Local Businesses Blog in Texas

Category: Garage Door Page 2 of 39

Aluminum vs. Steel: Comparing Two Popular Garage Door Materials – Rancho Park Garage & Overhead Doors

In the realm of homeownership, the garage door stands as an influential canvas that blends functionality with aesthetics. As I pondered the prospect of replacing my garage door, the choice between aluminum and steel surfaced as a pivotal decision.

This article embarks on a personal journey, comparing these two popular garage door materials—aluminum and steel—to unravel their unique attributes, strengths, and considerations as stated in Garage Door Repair.

The Gateway to Home: Understanding the Significance of Garage Doors

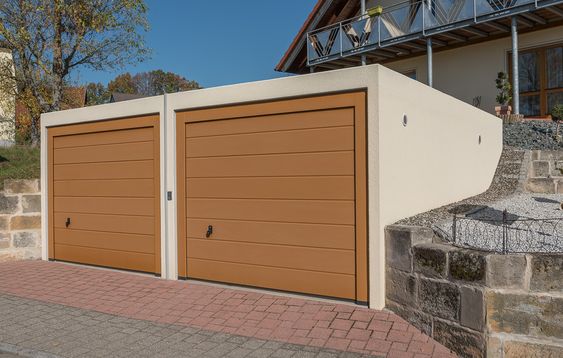
Before delving into the aluminum versus steel dilemma, it’s crucial to recognize the multifaceted role that garage doors play in the overall composition of a home. Beyond their utilitarian function of providing access to the garage, garage doors significantly contribute to curb appeal, insulation, and security. As a reflection of personal style and the first impression guests have of a home, the garage door merits careful consideration.

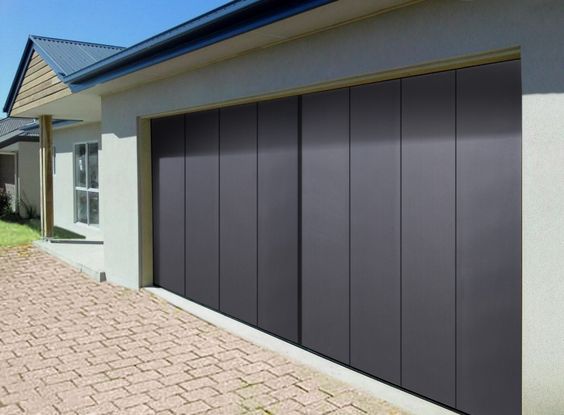
The Allure of Aluminum: A Lightweight Elegance

Aesthetic Appeal: The Modern Touch

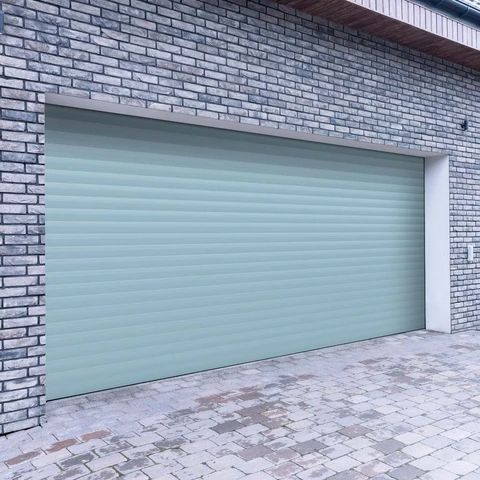
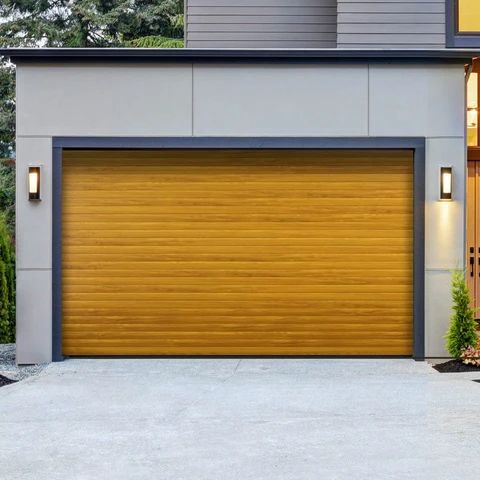
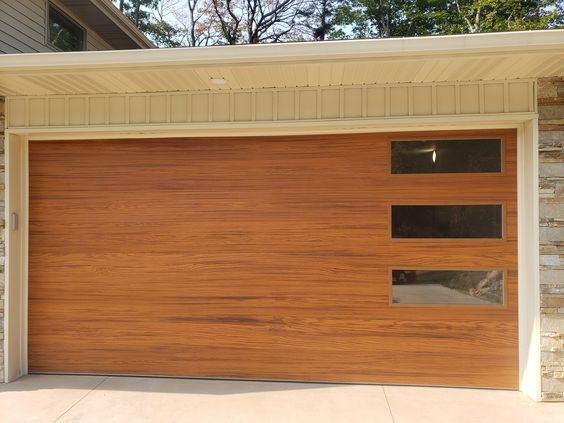
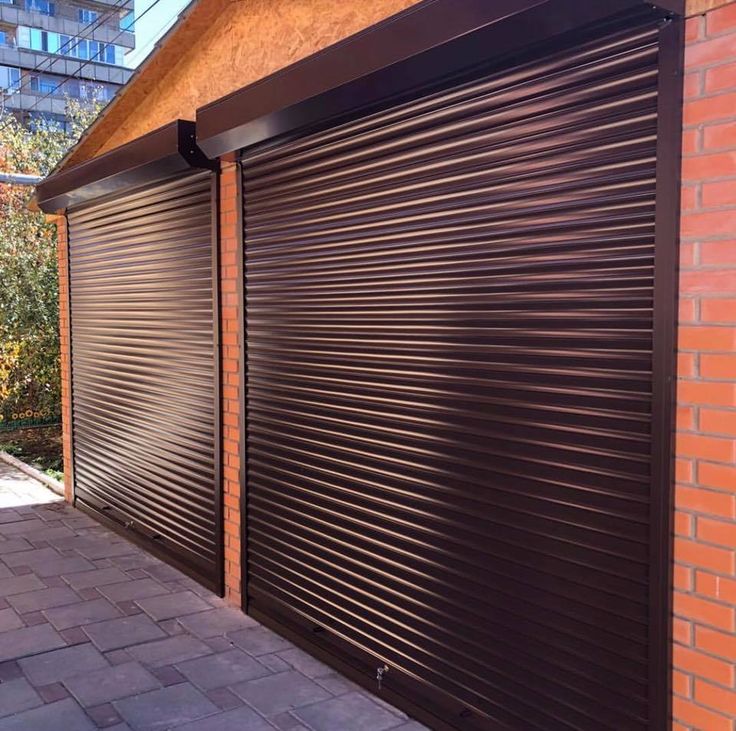
Aluminum garage doors exude a sleek and modern aesthetic that complements contemporary architectural styles. The material’s innate ability to resist corrosion and maintain a polished appearance over time adds to its allure. As someone drawn to modern design sensibilities, the prospect of an aluminum garage door immediately captured my attention.

Lightweight Advantage: Ease of Operation

One of the standout features of aluminum garage doors is their lightweight nature. This characteristic translates to a smoother and more energy-efficient operation, placing less strain on the garage door opener. The lightweight design also reduces the risk of premature wear on components, contributing to a longer lifespan for both the door and the opener.

Customization Opportunities: A Palette of Possibilities

Aluminum garage doors offer extensive customization options. The material can be powder-coated in a spectrum of colors, allowing homeowners to tailor the door’s appearance to their unique preferences. Additionally, aluminum doors can be designed with various panel styles and window configurations, offering a level of design flexibility that aligns with diverse architectural tastes.

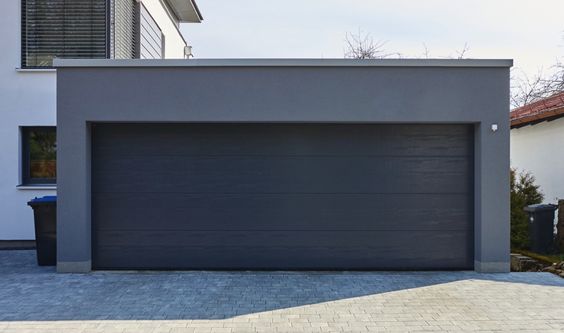
The Resilience of Steel: Unyielding Strength and Durability

Robust Construction: A Fortress for Home Security

Steel garage doors are renowned for their robust construction, making them a formidable choice for those prioritizing security. The inherent strength of steel provides a sturdy barrier against potential intruders, offering an additional layer of protection for the home and its contents. The sense of security that a steel garage door instills is a compelling aspect of its appeal.

Enduring Durability: Weathering the Elements

Steel garage doors are built to withstand the test of time and weather. The material’s resistance to rust and corrosion makes it particularly suitable for regions with harsh climates or high humidity. This durability ensures that the garage door maintains its structural integrity and aesthetic appeal even in the face of challenging environmental conditions.

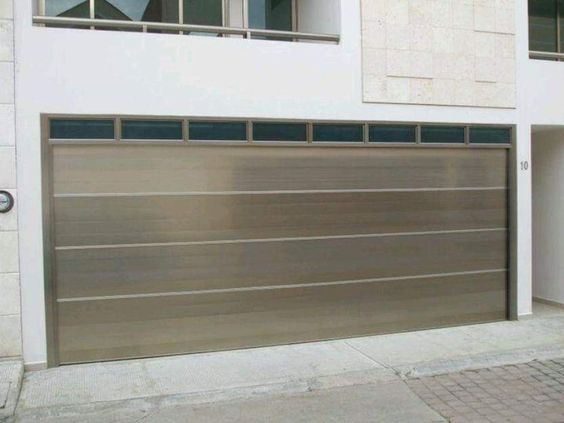
Insulation Options: Energy Efficiency

For homeowners seeking enhanced energy efficiency, steel garage doors have the option of insulation. Insulated steel doors provide better temperature regulation within the garage space, contributing to energy savings and potentially lowering heating and cooling costs. This aspect became particularly significant for me as I considered the year-round comfort of my garage space.

Comparative Considerations: Weighing the Pros and Cons

Cost Considerations: Balancing Budgets

As I navigated the decision-making process, cost emerged as a pivotal factor. While aluminum garage doors tend to be more affordable upfront due to the lower cost of the material, steel doors offer a compelling long-term investment. The durability and longevity of steel doors often result in fewer maintenance and repair expenses over time, offsetting the initial price difference.

Maintenance Requirements: The Dance of Care

Both aluminum and steel garage doors boast relatively low maintenance requirements, making them attractive options for busy homeowners. Aluminum doors, resistant to corrosion, demand minimal upkeep to maintain their aesthetic appeal. On the other hand, steel doors, while robust against the elements, may benefit from occasional touch-ups to prevent the development of rust.

Environmental Considerations: A Sustainable Footprint

As someone attuned to environmental consciousness, the sustainability of the chosen material held weight in my decision. Aluminum, known for its recyclability, aligns with eco-friendly practices. The ability to recycle aluminum doors at the end of their lifespan contributes to a more sustainable lifecycle. Steel, while recyclable, requires a more energy-intensive recycling process, which adds an extra layer of consideration.

Navigating Personal Preferences: A Personalized Decision

Ultimately, the choice between aluminum and steel garage doors hinges on personal preferences, lifestyle considerations, and the specific requirements of the home. As I stood at this crossroads, the aesthetic appeal of aluminum and its alignment with my modern design preferences tugged at my sensibilities. The lightweight functionality and customization options further solidified its allure.

Yet, the fortress-like strength of steel, its enduring durability, and the added security it promised were compelling factors that drew me into contemplation. The balance between upfront costs and long-term investment, coupled with the environmental footprint, added layers of complexity to the decision-making process.

Conclusion: The Portal to Personal Expression

In the grand narrative of homeownership, the garage door emerges as a portal to personal expression—a canvas where functionality and aesthetics converge. The aluminum versus steel dilemma is a nuanced exploration, a journey of weighing strengths against preferences and aligning practical considerations with personal tastes.

As I move forward in this decision-making process, I find solace in the realization that both materials offer unique advantages. The aluminum door beckons with its lightweight elegance and modern charm, while the steel door stands as an unyielding guardian, embodying strength and durability.

In the end, according to Garage Door Repair, the choice between aluminum and steel is not merely a selection of materials; it’s a declaration of personal style, a testament to the unique tapestry of each homeowner’s journey. As the garage door awaits its transformation into a reflection of my aspirations, the decision becomes not just about materials but about the story it tells—a story that unfolds with every rise and fall of the door, a narrative of strength, elegance, and the art of coming home.

Rancho Park Garage & Overhead Doors

2522 Aiken Ave, Los Angeles, CA 90064, United States

213-214-2651

Fixing Garage Door Hinge Problems: Ensuring Proper Movement – Affordable Garage Door Repairs of Indianapolis, LLC

The symphony of a smoothly operating garage door had always been a backdrop to the daily rhythm of my home. However, when that harmony was disrupted by creaks, groans, and a noticeable hitch in movement, I knew it was time to turn my attention to the unsung heroes of the system—the hinges.

By following Garage Door Repair, I share the insights gained and lessons learned during my journey in fixing garage door hinge problems, emphasizing the importance of ensuring proper movement for this essential home feature.

Introduction: The Role of Hinges in Garage Door Functionality

The garage door, often taken for granted, relies on a complex interplay of components to achieve its seamless operation. At the heart of this system are the hinges—small yet indispensable connectors that facilitate the fluid movement of the door. Little did I know that when these humble hinges encounter problems, they can disrupt the entire symphony, leading to squeaks, jerks, and a general sense of instability.

Understanding the Functionality of Garage Door Hinges:

1. Pivot Points for Smooth Movement:

  • Insights:
    • Reflect on the fundamental role of hinges as pivot points along the garage door’s path.
    • Discuss how hinges allow sections of the door to bend and flex, ensuring smooth movement during the opening and closing process.
  • Practical Tips:
    • Share personal observations of the hinges in action and the realization that they play a pivotal role in the door’s overall functionality.
    • Discuss the importance of regular inspection to catch early signs of hinge problems.

2. Types of Hinges:

  • Explore the different types of hinges used in garage doors, such as bottom, middle, and top hinges.
  • Discuss the specific functions of each hinge type and their contribution to the stability and movement of the door.

Signs of Garage Door Hinge Problems: A Call for Attention

1. Squeaking or Grinding Noises:

  • Insights:
    • Discuss the unexpected noises, such as squeaking or grinding sounds, as indicators of hinge issues.
    • Explore the potential reasons behind the sudden and audible signs of trouble.
  • Practical Tips:
    • Share personal experiences of recognizing unusual noises and the immediate concern they raised.
    • Discuss the importance of investigating the source of the noise to pinpoint hinge problems.

2. Jerky or Unstable Movements:

  • Insights:
    • Reflect on the impact of hinge problems on the overall stability and smoothness of the garage door’s movements.
    • Discuss the noticeable jerks, hesitations, or instability in the door’s ascent or descent.
  • Practical Tips:
    • Share observations of the garage door’s movements and the realization that something was amiss.
    • Discuss the potential risks of operating a door with hinge problems and the urgency of addressing the issue.

3. Gaps or Misalignment at Hinge Joints:

  • Insights:
    • Explore the visual signs of hinge problems, such as gaps or misalignment at the joints.
    • Discuss the potential causes, including wear and tear, rust, or damaged hinge components.
  • Practical Tips:
    • Share personal observations of inspecting the hinges and noticing visible signs of deterioration.
    • Discuss the importance of regular visual inspections to catch early indications of hinge issues.

4. Difficulty in Door Closure:

  • Insights:
    • Discuss how hinge problems can manifest in difficulties when attempting to close the garage door.
    • Explore the potential resistance, sticking points, or jamming that may occur.
  • Practical Tips:
    • Share personal experiences of attempting to close the door and the challenges encountered.
    • Discuss the impact on daily convenience and the potential safety concerns associated with difficulty in door closure.

Swift Action: The Importance of Timely Hinge Repair

1. Preventing Further Damage:

  • Insights:
    • Explore the domino effect of hinge problems on other components of the garage door system.
    • Discuss the potential for more extensive and costly damage if hinge issues are left unaddressed.
  • Practical Tips:
    • Share the realization that timely hinge repair is not just about fixing a current problem but preventing cascading issues.
    • Discuss the peace of mind derived from knowing that swift action can mitigate further damage.

2. Ensuring Proper Door Functionality:

  • Insights:
    • Emphasize the importance of proper garage door functionality for daily convenience and safety.
    • Discuss the risks associated with continued operation of a door with hinge problems.
  • Practical Tips:
    • Share the urgency felt upon realizing the safety risks associated with hinge problems.
    • Discuss the decision-making process of prioritizing safety and seeking professional assistance promptly.

3. DIY vs. Professional Assistance:

  • Insights:
    • Reflect on the considerations for DIY hinge repair.
    • Discuss the potential challenges and risks associated with attempting a DIY approach.
  • Practical Tips:
    • Share personal insights into the decision to seek professional assistance for hinge repair.
    • Discuss the benefits of expertise, safety, and efficiency that professional technicians bring to the repair process.

The Repair Journey: Restoring Fluidity to the Door’s Movement

1. Seeking Professional Assistance:

  • Narrate the process of reaching out to professional garage door technicians.
  • Discuss the importance of choosing reputable and experienced professionals for the repair job.

2. Assessment and Diagnosis:

  • Share the thorough assessment conducted by the technicians to diagnose the specific issues with the garage door hinges.
  • Discuss the communication and transparency in understanding the scope of the problem and the proposed repair solution.

3. Hinge Repair Process:

  • Explore the step-by-step process of repairing garage door hinges.
  • Discuss the replacement of worn-out or damaged hinge components, addressing rust or misalignment issues.

4. Testing and Assurance:

  • Share the post-repair testing phase to ensure the hinges and the entire system function optimally.
  • Discuss the assurance provided by professional technicians and the newfound confidence in the door’s smooth operation.

Conclusion: A Return to Seamless Movement

Overall, according to Garage Door Repair and as I stand before my garage door, now restored to its seamless movement, the journey of fixing hinge problems becomes a testament to the importance of vigilance and swift action. The unexpected disruptions in the daily movements were not just inconveniences but calls for attention to the intricate choreography of garage door hinges. In the landscape of 2023, where homes are not just structures but reflections of functionality and precision, the garage door hinges stand as humble facilitators—components that, when well-maintained, ensure a return to seamless movement and the reliable performance of that daily act.

Affordable Garage Door Repairs of Indianapolis, LLC

Indianapolis, IN

317-372-5337

Repairing Garage Door Auto-Reverse Issues: Ensuring Safety Features Work – Highland Garage Doors & Gate

As a homeowner, the safety of my family and property is paramount, and the garage door stands as a crucial guardian in this realm. The automatic reverse feature, a seemingly small yet integral component of garage door functionality, ensures that the door reacts swiftly to obstacles, preventing accidents and damage. However, when this safety feature falters, it becomes a matter of immediate concern.

I embark on a journey of understanding and troubleshooting, unraveling the complexities of repairing garage door auto-reverse issues to ensure that this vital safety mechanism operates seamlessly according to Garage Door Repair.

The Essence of Auto-Reverse: A Guardian in Action

Before delving into the nuances of repairing auto-reverse issues, it’s essential to comprehend the significance of this safety feature. The auto-reverse mechanism is designed to detect obstructions in the path of the closing garage door and automatically reverse its direction to prevent accidents and damage. This crucial feature relies on sensors and precise calibration to function effectively.

Common Causes of Auto-Reverse Malfunctions: Unraveling the Culprits

When the auto-reverse feature fails to function as intended, several factors may be at play. Understanding the common causes of auto-reverse malfunctions is the first step in navigating the troubleshooting process:

  1. Sensor Misalignment: The photoelectric sensors, typically mounted on each side of the garage door near the floor, may become misaligned over time, disrupting the beam that triggers the auto-reverse.
  2. Dirty or Blocked Sensors: Accumulated dirt, debris, or even spiderwebs on the sensor lenses can interfere with the proper functioning of the auto-reverse feature.
  3. Sensor Wiring Issues: Damaged or frayed wiring connecting the sensors to the garage door opener unit can impede the communication necessary for the auto-reverse mechanism to operate.
  4. Lack of Power to Sensors: If the sensors are not receiving power, whether due to electrical issues or a power outage, the auto-reverse feature may be rendered ineffective.
  5. Misaligned Garage Door Tracks: If the garage door tracks are misaligned or obstructed, it can hinder the smooth movement of the door and affect the auto-reverse function.
  6. Faulty Auto-Reverse Settings: Issues within the garage door opener unit, such as malfunctioning auto-reverse settings or a faulty logic board, can contribute to auto-reverse failures.

Safety First: Preparing for Troubleshooting

Before embarking on the troubleshooting journey, prioritizing safety is paramount. The garage door is a powerful and heavy component, and any attempts to address auto-reverse issues should be approached with caution. Here are essential safety precautions to take:

  1. Disconnect the Power: If the garage door is equipped with an automatic opener, disconnecting the power source ensures that the door won’t unexpectedly activate during troubleshooting.
  2. Secure the Door: Prop the garage door open using a sturdy object or enlist the help of a second person to hold it in place. This prevents unexpected movements while working on the auto-reverse mechanisms.
  3. Wear Protective Gear: Safety goggles and gloves shield against potential injuries from sharp edges or debris.

Troubleshooting Auto-Reverse Issues: A Step-by-Step Guide

With safety measures in place and an understanding of potential causes, the troubleshooting process unfolds systematically. The following step-by-step guide is designed to address common auto-reverse issues and restore the functionality of this vital safety feature:

1. Check Sensor Alignment:

  • Inspect the photoelectric sensors on each side of the garage door to ensure they are aligned. A misalignment can disrupt the beam and prevent proper auto-reverse function.
  • Adjust the sensors, ensuring that they are facing each other and the indicator lights on both sensors are illuminated.

2. Clean the Sensors:

  • Clean the sensor lenses thoroughly to remove any dirt, dust, or debris that may be obstructing the beam.
  • Use a soft, dry cloth or a gentle cleaning solution to wipe the sensor lenses.

3. Inspect Sensor Wiring:

  • Examine the wiring connecting the sensors to the garage door opener unit for any signs of damage or fraying.
  • Replace any damaged wiring and secure connections to ensure proper communication.

4. Verify Power Supply:

  • Check if the sensors are receiving power by inspecting the indicator lights on each sensor. If the lights are not illuminated, there may be an issue with the power supply.
  • Ensure that the sensors are connected to a power source and that there are no electrical issues affecting the garage door opener unit.

5. Test Garage Door Tracks:

  • Inspect the garage door tracks for misalignments or obstructions. Misaligned or obstructed tracks can impede the smooth movement of the door and affect the auto-reverse function.
  • Use a level to ensure that the tracks are properly aligned and make adjustments if necessary.

6. Check Auto-Reverse Settings:

  • Access the settings on the garage door opener unit related to the auto-reverse feature. Consult the user manual for instructions on adjusting these settings.
  • Ensure that the auto-reverse settings are calibrated to the recommended sensitivity levels.

7. Inspect Logic Board:

  • Examine the logic board within the garage door opener unit for any signs of damage or malfunction. The logic board plays a crucial role in processing signals from the sensors and triggering the auto-reverse feature.
  • If the logic board is damaged, consider consulting a professional technician for repairs or replacement.

8. Perform a Test Cycle:

  • Once adjustments and inspections are complete, perform a test cycle to check the functionality of the auto-reverse feature.
  • Place an object, such as a block of wood, in the path of the closing garage door and initiate the closing process.
  • Observe if the garage door stops and reverses upon encountering the obstruction.

9. Conduct Regular Maintenance:

  • Implement a regular maintenance schedule for the garage door, including cleaning sensors, lubricating moving parts, and inspecting wiring.
  • Address any issues promptly to prevent the recurrence of auto-reverse malfunctions.

Common Issues and Troubleshooting Tips: Navigating the Path to Resolution

During the troubleshooting process, certain issues may persist, requiring additional attention. Here are some common scenarios and troubleshooting tips:

  • Sensors Still Not Aligned: If the sensors remain misaligned despite adjustments, check for physical obstacles or structural issues that may be preventing proper alignment.
  • Auto-Reverse Feature Is Too Sensitive: If the garage door reverses even when there is no obstruction, consider adjusting the sensitivity settings on the garage door opener unit. Refer to the user manual for guidance.
  • Inconsistent Auto-Reversal: If the auto-reverse feature is inconsistent in its response, inspect the garage door tracks for irregularities, such as dents or bends. Smooth out any imperfections that may be affecting the door’s movement.
  • Persistent Issues: If auto-reverse issues persist or if there are signs of wear, such as fraying cables or damaged components, it’s advisable to consult a professional technician for a thorough inspection and necessary repairs.

Final Checks and Observations: Ensuring Reliable Safety Features

After successfully troubleshooting and repairing auto-reverse issues, conducting final checks and observations ensures that the entire system operates reliably. Perform the following steps:

  1. Operate the Door Manually: Open and close the garage door manually to assess its smoothness and alignment. Ensure that it moves along the tracks without hesitation or resistance.
  2. Test Automatic Opener: Reconnect the power to the automatic opener and test its functionality. Observe the door’s movement, listening for any unusual sounds or vibrations.
  3. Check Balance: A well-balanced garage door should stay in place when opened halfway. If the door tends to move upward or downward, it may indicate an imbalance that requires professional attention.
  4. Inspect for Persistent Issues: If any issues persist or if there are signs of wear, such as fraying cables or damaged components, it’s advisable to consult a professional technician for a thorough inspection and necessary repairs.

Conclusion: Nurturing a Safe Haven

As I stand before my garage door, confident in the seamless operation of the auto-reverse feature, a sense of assurance washes over me. Repairing garage door auto-reverse issues is not just a technical task; it’s a commitment to the safety and well-being of my family and property.

In the realm of homeownership and as per Garage Door Repair, the garage door serves as a gateway, offering convenience and security. By unraveling the complexities of auto-reverse mechanisms and navigating the troubleshooting process with care and precision, I’ve not only restored a crucial safety feature but also nurtured a haven where safety and functionality coexist harmoniously.

Highland Garage Doors & Gate

28355 Base Line St, Highland, CA 92346, United States

909-315-4678

Garage Door Track Alignment Problems – Hesperia Overhead & Garage Doors

As a homeowner, the daily rhythm of life often unfolds with the smooth orchestration of functional systems within the house. However, there are moments when this harmonious symphony is disrupted, and for me, one such disruption came in the form of garage door track alignment problems.

By following Garage Door Repair, I’ll share my personal experience, unraveling the intricacies of garage door track misalignment, the challenges it posed, and the steps taken to restore seamless operation to this crucial entry point of my home.

1. The Prelude: Signs of Garage Door Strain

The first indication that something was amiss with my garage door manifested in subtle but increasingly noticeable ways. The door, which once glided effortlessly along its tracks, began emitting ominous creaks and groans. Uneven movements and hesitations during both opening and closing cycles were the early whispers of an impending issue. Ignoring these signs, I soon found myself facing a more pronounced problem: the garage door tracks were misaligned.

2. Decoding Garage Door Track Misalignment: A Closer Look

Understanding the anatomy of a garage door is crucial to comprehend the gravity of track misalignment. The door operates on a system of tracks – vertical and horizontal channels that guide the door’s movement. Misalignment occurs when these tracks fall out of their proper position, disrupting the smooth trajectory of the door. Common signs of garage door track misalignment include:

  • Uneven Gaps: When inspecting the door from the sides, uneven gaps between the door and the frame may become apparent. These irregular gaps are indicative of a track misalignment issue.
  • Noisy Operation: A smoothly functioning garage door should operate with minimal noise. Excessive creaking, grinding, or popping sounds during operation may signal that the tracks are not aligned correctly.
  • Visible Gaps in Tracks: Physically inspecting the tracks may reveal visible gaps or misalignments. Misaligned tracks may appear skewed or not parallel to each other.
  • Jerky Movements: Instead of the usual smooth gliding motion, a misaligned garage door may exhibit jerky or shaky movements during opening and closing. This uneven motion can lead to further damage if not addressed promptly.

3. Causes of Garage Door Track Misalignment: Unveiling the Culprits

My quest to address the garage door track misalignment led me to investigate the underlying causes. Several factors can contribute to this issue, and identifying the culprits is key to implementing effective solutions. Here are some common causes:

  • Loose or Worn Rollers: Rollers are essential components that allow the garage door to move along the tracks. If these rollers become loose or show signs of wear and tear, they can disrupt the alignment of the tracks.
  • Track Obstructions: Accumulation of debris, dirt, or foreign objects in the tracks can impede the smooth movement of the door, leading to misalignment. Regular cleaning and maintenance are crucial in preventing this issue.
  • Bracket Issues: The brackets that secure the tracks to the wall or ceiling can become loose over time. This looseness compromises the stability of the tracks, resulting in misalignment.
  • Impact or Damage: Accidental impacts, whether from a vehicle or other sources, can cause the tracks to shift out of alignment. Inspecting the tracks for visible signs of damage is essential in such cases.
  • Improper Installation: In some instances, garage door track misalignment may be attributed to improper installation. If the tracks were not installed correctly from the outset, issues may arise over time.

4. The Discovery: Unveiling the Track Alignment Woes

My initial attempts at troubleshooting the garage door issues involved a keen inspection of the tracks. What I discovered was a subtle but noticeable misalignment in the tracks. The vertical tracks on either side of the door were not perfectly parallel, and the rollers seemed to struggle along certain sections.

5. DIY Troubleshooting: A Glimmer of Hope

With a determination to address the problem head-on, I delved into the realm of DIY troubleshooting. Here are some steps I took to alleviate the garage door track misalignment:

  • Visual Inspection: Carefully examining the tracks for any visible signs of misalignment or damage served as the first step. I noted areas where the gaps were uneven and observed the points where the rollers seemed to encounter resistance.
  • Tightening Loose Components: The brackets securing the tracks to the walls and ceiling were tightened to ensure a secure fit. Loose brackets can contribute significantly to track misalignment, so ensuring their stability is crucial.
  • Cleaning the Tracks: Accumulated dirt, debris, or even rust can hinder the smooth movement of rollers along the tracks. I meticulously cleaned the tracks, removing any obstructions that could contribute to misalignment.
  • Aligning the Tracks: Using a level, I attempted to realign the vertical tracks to ensure they were parallel. This involved gently tapping the tracks into the correct position to achieve a uniform gap along the entire length.
  • Examining Rollers: The rollers themselves were inspected for wear and tear. If any rollers showed signs of damage or were not rolling smoothly, I replaced them with new ones to facilitate smoother movement.

6. The Reality Check: When DIY Falls Short

While my initial DIY efforts provided temporary relief, the reality check soon arrived. The misalignment issues persisted, and the garage door continued to exhibit uneven movements. It became evident that a more comprehensive approach was required to address the root causes of the problem.

7. Seeking Professional Expertise: A Decision Reinforced by Necessity

Acknowledging the limitations of my DIY troubleshooting, I decided to seek the expertise of professionals. Garage door track misalignment, if not addressed correctly, can lead to more severe issues, including damage to the door itself. Here’s how professional intervention reinforced the journey:

  • Comprehensive Inspection: Professional technicians conducted a thorough inspection of the entire garage door system. This involved assessing the condition of rollers, tracks, brackets, and other components contributing to the misalignment.
  • Precision Realignment: Utilizing specialized tools and equipment, the professionals precisely realigned the tracks to ensure they were parallel and had uniform gaps. This level of precision is challenging to achieve with DIY methods.
  • Replacement of Worn Components: Any worn or damaged components, such as rollers or brackets beyond repair, were replaced with high-quality, durable replacements. This not only addressed the immediate issue but also contributed to the long-term reliability of the garage door.
  • Lubrication and Maintenance: Proper lubrication of moving parts is essential for smooth operation. The professionals applied the appropriate lubricants to ensure that the rollers and other components moved effortlessly along the tracks. Additionally, they provided maintenance recommendations to prevent future issues.

8. Lessons Learned: The Importance of Timely Intervention

Through this journey with garage door track alignment problems, I gleaned valuable lessons that extend beyond mere troubleshooting. Here are some insights gained from the experience:

  • Timely Addressing of Issues: Ignoring early signs of garage door problems can exacerbate the situation. Timely intervention, whether through DIY troubleshooting or professional assistance, is crucial to prevent further damage and ensure the longevity of the door.
  • The Complexity of Track Alignment: Garage door track alignment is a nuanced and precision-dependent task. While some DIY troubleshooting is possible, the complexities involved often necessitate professional expertise to achieve optimal results.
  • Regular Maintenance as a Preventive Measure: Regular inspection and maintenance of the garage door system are essential preventive measures. This includes cleaning tracks, tightening components, and addressing any issues promptly to prevent them from escalating.
  • Professional Guidance for Lasting Solutions: When faced with persistent issues, seeking professional guidance is not a sign of defeat but a strategic decision for lasting solutions. Professional technicians bring a depth of knowledge and specialized tools that are instrumental in resolving complex problems.

9. The Aftermath: A Restored Symphony of Operation

As the garage door track alignment issues were expertly addressed by professionals, the transformation in its operation was palpable. The once-jerky and hesitant movements were replaced with a seamless glide. The creaks and groans were replaced by a quiet efficiency that resonated with the restored functionality of this crucial entry point to my home.

10. Moving Forward: A Proactive Stance on Garage Door Maintenance

The journey through garage door track misalignment underscored the importance of a proactive stance on maintenance. Moving forward, I’ve embraced a routine of regular inspections, cleaning, and minor adjustments to ensure that the garage door operates smoothly. The experience has instilled in me a deeper appreciation for the intricate mechanisms that contribute to the seamless functioning of this daily necessity.

Conclusion: A Symphony Restored

In the grand orchestration of daily life, the garage door plays a significant role, and when its operation is disrupted, it can create discord in the symphony of home functionality. My journey with garage door track alignment problems was not just a quest for a quick fix but a realization of the intricacies involved and the need for a harmonious blend of DIY troubleshooting and professional expertise.

As a homeowner, according to Garage Door Repair, understanding the signs, causes, and solutions to garage door track misalignment is empowering. It enables a proactive approach to maintenance, ensuring that this vital entry point remains not just functional but a seamless contributor to the daily rhythm of home life. The lessons learned extend beyond the confines of garage doors, fostering a mindset of attentive care for the systems that make a house a home.

Hesperia Overhead & Garage Doors

18361 Bear Valley Rd # 4, Hesperia, CA 92345, United States

760-990-1054

Garage Door Opener Capacitor Symptoms: Signs of Wear – Braintree Garage & Overhead Doors

As a homeowner, my journey into the realm of DIY home maintenance led me to a pivotal component of my garage door opener—the capacitor. Often overlooked until signs of wear emerge, the capacitor plays a crucial role in the smooth operation of the garage door opener.

By following Garage Door Repair, join me on this exploration as we decipher the symptoms that indicate a capacitor in distress and unravel the importance of timely attention to ensure the continued functionality of this essential device.

Chapter 1: Unraveling the Mystery of the Capacitor

Before diving into the symptoms, it’s essential to understand the capacitor’s function. Acting as a temporary energy storage device, the capacitor in a garage door opener provides the initial burst of power required to start the motor. Over time, wear and tear can affect its performance, leading to noticeable symptoms that warrant investigation.

Chapter 2: The Telltale Signs of a Struggling Capacitor

A. Delayed Response

One of the initial signs that caught my attention was a delayed response from the garage door opener. Instead of the prompt and smooth operation I was accustomed to, there was a noticeable lag between pressing the opener button and the initiation of movement. This delay is often a red flag indicating capacitor wear.

B. Unusual Motor Sounds

As I continued to observe, I noticed a change in the auditory landscape of my garage. The once familiar hum of the garage door opener’s motor took on a different tone. Unusual buzzing, clicking, or humming sounds during operation are common symptoms of capacitor issues. These sounds signal a struggle for power and should not be dismissed.

C. Intermittent Operation

Capacitor wear can manifest in intermittent operation. My garage door opener, once a reliable companion, started exhibiting unpredictable behavior. It would work seamlessly on some occasions and act erratically on others. This inconsistency is a clear indication that the capacitor is struggling to maintain a consistent flow of power.

D. Failure to Open or Close

The most concerning symptom for any homeowner is the outright failure of the garage door opener to perform its primary function. If you find yourself repeatedly pressing the button with no response or if the door only moves a fraction of the way, the capacitor may be on the verge of failure.

Chapter 3: Why Timely Attention Matters

Understanding the symptoms is only half the battle; recognizing the importance of timely attention is equally crucial. Ignoring capacitor issues can lead to a cascade of problems, including overloading the motor and causing further damage to the entire garage door opener system. Addressing capacitor symptoms promptly not only saves on potential repair costs but also ensures the longevity of the entire system.

Chapter 4: DIY Capacitor Inspection

Armed with the knowledge of symptoms, I decided to take matters into my own hands and perform a DIY inspection. Safety precautions, including disconnecting the power to the garage door opener, were my first priority. A visual inspection of the capacitor revealed bulging, leaking, or other signs of physical damage—a clear indication that a replacement was in order.

Chapter 5: The Replacement Process

After identifying the capacitor as the culprit, I embarked on the replacement process. Sourcing a compatible replacement capacitor was essential, and the market offers various options suited to different garage door opener models. The replacement itself involved careful removal of the old capacitor and secure installation of the new one, ensuring proper electrical connections.

Chapter 6: Professional Assistance When Needed

While I took the DIY route for capacitor replacement, it’s important to acknowledge that some homeowners might feel more comfortable seeking professional assistance. Capacitor replacement involves dealing with electrical components, and if uncertainties arise, consulting a certified technician is a wise decision. Safety should always be the top priority in any home maintenance endeavor.

Chapter 7: Capacitor Maintenance for Longevity

My journey into understanding garage door opener capacitor symptoms emphasized the importance of proactive maintenance. Regular checks, especially if you notice any of the symptoms mentioned, can significantly extend the capacitor’s lifespan. Lubricating moving parts, keeping the opener clean, and addressing any issues promptly contribute to the overall health of the garage door opener system.

Conclusion: Empowered Homeownership

In conclusion, decoding garage door opener capacitor symptoms has been a transformative experience in my journey as a homeowner. Recognizing the signs of wear, understanding the importance of timely attention, and embracing a DIY approach when possible have empowered me to take control of my home’s maintenance.

As a homeowner, according to Garage Door Repair, staying attuned to the nuances of essential components like the garage door opener capacitor adds a layer of responsibility and empowerment. It’s a reminder that with knowledge and a willingness to engage in DIY endeavors, we can not only address issues promptly but also contribute to the longevity and efficiency of our home systems. So, if you notice the subtle signs of a struggling capacitor, don your DIY hat, embark on an inspection, and ensure the smooth operation of your garage door opener—an endeavor that transforms you from a homeowner to a proactive custodian of your home’s essential systems.

Braintree Garage & Overhead Doors

0 Campanelli Dr, Braintree, MA 02184, United States

781-678-4910

Can I Replace Just One Panel of My Damaged Garage Door? – Dedham Garage & Overhead Doors

As a conscientious homeowner who recently faced the predicament of a damaged garage door, I embarked on a journey to explore the feasibility and intricacies of replacing just one panel.

By following Garage Door Repair, I share my insights, experiences, and a step-by-step guide for those grappling with the question: Can I replace just one panel of my damaged garage door?

Chapter 1: Assessing the Damage

The first step in considering a single-panel replacement is a thorough assessment of the damage. Whether it’s a dent, a scratch, or more severe damage, evaluating the extent and location of the impairment is crucial. If the damage is limited to a single panel and doesn’t compromise the overall structural integrity of the door, the prospect of a targeted replacement becomes a viable option.

Chapter 2: Identifying the Garage Door Model

Successfully replacing a single panel hinges on identifying the specific make and model of the garage door. Manufacturers often produce doors with unique panel designs and dimensions. I delved into the garage door’s documentation, which typically includes information on the model and specifications. In instances where the documentation is unavailable, I sought identifying marks or labels on the door itself.

Chapter 3: Contacting the Manufacturer or Supplier

Armed with the knowledge of the garage door model, I reached out to the manufacturer or the supplier from whom the door was purchased. Manufacturers usually produce replacement panels for their doors, ensuring a seamless match in terms of design and specifications. I provided them with details about the damaged panel, and they guided me through the process of ordering a compatible replacement.

Chapter 4: Exploring Aftermarket Panels

In cases where contacting the original manufacturer is challenging or cost-prohibitive, exploring aftermarket panels becomes an alternative. Numerous companies specialize in producing replacement panels that cater to a wide range of garage door models. I researched reputable aftermarket suppliers, ensuring that the replacement panels they offered were compatible with my specific garage door model.

Chapter 5: Measuring and Documenting

Precision is paramount when replacing a single panel, and accurate measurements are the linchpin of success. I meticulously measured the dimensions of the damaged panel, paying attention to its width, height, and thickness. These measurements served as the basis for selecting or customizing a replacement panel that would seamlessly integrate with the existing door.

Chapter 6: Considering Aesthetic Harmony

Beyond technical compatibility, maintaining aesthetic harmony is a crucial consideration. Garage doors often feature distinctive panel designs and patterns. I scrutinized the replacement options, ensuring that the chosen panel not only matched the dimensions but also preserved the overall aesthetic appeal of the door. This attention to detail was instrumental in achieving a cohesive and visually pleasing result.

Chapter 7: Removing the Damaged Panel

Before undertaking the replacement process, I disengaged the garage door opener and carefully removed the damaged panel. This step involved loosening the fasteners securing the panel to the frame and cautiously detaching it. If the door is composed of multiple sections, I ensured that adjacent panels were adequately supported to prevent any unintended movement or damage.

Chapter 8: Installing the Replacement Panel

With the damaged panel removed, I proceeded to install the replacement panel. Aligning the new panel with the existing ones, I secured it in place using the appropriate fasteners. Ensuring a snug fit and uniform alignment was crucial to maintaining the structural integrity and aesthetic cohesion of the garage door.

Chapter 9: Finishing Touches and Paint Matching

To achieve a seamless integration, I paid attention to finishing touches. This involved checking for any gaps or misalignments and making necessary adjustments. If the replacement panel required painting, I meticulously matched the color to the existing panels, ensuring a cohesive and polished appearance. Proper paint matching played a pivotal role in disguising the replacement and preserving the uniformity of the door.

Chapter 10: Testing the Door Operation

Before declaring the replacement a success, I conducted thorough tests to ensure the door operated smoothly and without any issues. I engaged the garage door opener and manually operated the door, observing its movement and functionality. Any unusual sounds, misalignments, or resistance prompted further adjustments until the door operated seamlessly.

Chapter 11: Seeking Professional Assistance

While the process of replacing a single panel is achievable through careful planning and execution, there are instances where professional assistance may be prudent. Structural damage, intricate designs, or specific garage door mechanisms may require the expertise of a qualified technician. Seeking professional guidance ensures a comprehensive assessment and appropriate solutions tailored to the unique characteristics of the door.

Conclusion: Breathing New Life into an Old Door

In conclusion, based from Garage Door Repair, replacing just one panel of a damaged garage door is a viable solution under certain conditions. A systematic approach, including assessing the damage, identifying the model, contacting the manufacturer or exploring aftermarket options, measuring accurately, considering aesthetic harmony, and executing a meticulous installation process, can breathe new life into an otherwise compromised door. My experience in replacing a single panel not only salvaged the functionality of the garage door but also highlighted the importance of precision, compatibility, and attention to detail in achieving a successful outcome. As I look at my rejuvenated garage door, I’m confident that this targeted replacement has prolonged the life of the door and maintained the overall appeal of my home.

Dedham Garage & Overhead Doors

3 Allied Dr #303, Dedham, MA 02026, United States

781-650-7642

Garage Door Opener Chain vs. Belt Drive – Riverside Garage & Overhead Doors

As a homeowner standing at the crossroads of upgrading my garage door opener, the dilemma of choosing between a chain drive and a belt drive system loomed large. This article chronicles my exploration into the intricacies of these two options, delving into the nuances that ultimately guided my decision.

Join me on this journey as we unravel the chain vs. belt drive debate, seeking the ideal heartbeat for the heart of our homes according to Garage Door Repair.

Chapter 1: The Symphony of Garage Door Openers

Before delving into the specifics of chain and belt drives, it’s crucial to understand the central role they play in the symphony of garage door openers. These systems act as the heartbeat, translating the electrical impulses into the mechanical movements that effortlessly lift and lower the garage door.

Chapter 2: The Roar of the Chain Drive

The chain drive, a stalwart in the realm of garage door openers, resonates with a distinct audible presence. This system employs a sturdy metal chain, reminiscent of a bicycle chain, to drive the trolley that raises and lowers the garage door. The characteristic noise, often likened to a reassuring mechanical hum, signals the powerful performance of the chain drive.

Chapter 3: Strength and Durability of the Chain Drive

In my exploration, the chain drive emerged as the epitome of strength and durability. The metal chain, robust and resilient, can withstand the rigors of daily use and varying weather conditions. For homeowners seeking a workhorse capable of handling heavy garage doors with ease, the chain drive proves to be a reliable choice.

Chapter 4: The Whispers of the Belt Drive

Contrasting the robust clamor of the chain drive, the belt drive system operates with a hushed elegance. Utilizing a reinforced rubber or fiberglass belt in lieu of a metal chain, this system silently glides the garage door open. The near-silent operation is a defining feature, making the belt drive a preferred choice for those seeking a quieter garage door opener.

Chapter 5: Noise Levels: A Decisive Factor

The issue of noise levels became a pivotal consideration in my decision-making process. While the chain drive’s audible presence signifies strength, it may not be ideal for homes where noise is a concern. The belt drive’s near-silent operation, on the other hand, adds a layer of sophistication, making it an excellent choice for attached garages or homes where minimizing noise is paramount.

Chapter 6: Smooth and Silent Operation of the Belt Drive

The appeal of the belt drive lies in its smooth and silent operation. The absence of the characteristic hum associated with chain drives transforms the garage door opener into a discreet companion. This feature is particularly advantageous for homes with bedrooms or living spaces adjacent to or above the garage.

Chapter 7: The Tug of War: Speed and Power

As I weighed the pros and cons, the issue of speed and power emerged as a significant factor. Chain drives, with their robust construction, excel in lifting heavy garage doors at a commendable speed. Belt drives, while generally slower in comparison, offer a smoother and more controlled operation. The choice between the two hinges on the homeowner’s priorities – speed or serenity.

Chapter 8: Maintenance: A Crucial Consideration

Maintenance considerations became a decisive factor in my decision-making process. Chain drives, though rugged, require regular lubrication to mitigate noise and ensure smooth operation. Belt drives, with fewer moving parts and reduced friction, generally demand less maintenance. For homeowners seeking a low-maintenance option, the belt drive presents a compelling case.

Chapter 9: Budgetary Considerations

Budgetary constraints played a role in my final decision. Chain drives, known for their affordability, are a cost-effective option for homeowners prioritizing economic efficiency. Belt drives, while offering a premium experience, often come with a higher price tag. Balancing performance with budgetary considerations became an essential aspect of my deliberation.

Chapter 10: Making the Decision: Chain or Belt Drive?

In the end, my decision between a chain drive and a belt drive hinged on a careful consideration of priorities. If the garage door’s raw power, durability, and an audible reminder of functionality took precedence, the chain drive emerged as the ideal choice. On the other hand, if a serene, nearly silent operation, reduced maintenance, and a smoother glide were paramount, the belt drive beckoned.

Conclusion: The Heartbeat Tailored to Your Home

Overall, based from Garage Door Repair, choosing between a chain and a belt drive ultimately boils down to personal preferences, priorities, and the unique characteristics of your home. As I stand in front of my upgraded garage door opener, the heartbeat of my home, I am reminded that the decision between a chain and a belt drive is not just about functionality but about tailoring the heartbeat to the symphony of your living space. Whether it’s the robust roar of the chain or the elegant whispers of the belt, the choice becomes an integral part of your home’s daily rhythm.

Riverside Garage & Overhead Doors

3410 Torrey St, Riverside, CA 92503, United States

951-494-6436

Chamberlain vs. LiftMaster Garage Door Openers – Ontario Garage & Overhead Doors

As a homeowner seeking to enhance the security and convenience of my abode, the question of choosing the right garage door opener loomed large. In my quest, I found myself torn between two reputable brands – Chamberlain and LiftMaster.

This article details my personal journey and the insights gained while comparing Chamberlain vs. LiftMaster garage door openers based from Garage Door Repair.

The Quest for the Ideal Garage Door Opener: Setting the Stage

The realization that my aging garage door opener needed an upgrade sparked my exploration into the world of advanced, feature-rich options. Both Chamberlain and LiftMaster, owned by the same parent company, offered a plethora of choices, each promising to elevate the functionality of my garage door. The journey began with a thorough examination of the strengths and nuances of each brand.

Chamberlain: The Promise of Innovation

Chamberlain, a renowned name in the home automation industry, stood out for its commitment to innovation and user-friendly features. The brand boasted a diverse range of garage door openers catering to various preferences and budgets. The key factors that drew me to Chamberlain were:

1. MyQ Technology:

Chamberlain’s MyQ technology emerged as a standout feature. This smart technology allows for seamless integration with home automation systems, enabling me to control my garage door remotely through a smartphone app.

2. Battery Backup:

The inclusion of a battery backup system was an appealing feature. It promised uninterrupted operation during power outages, providing an added layer of convenience and security.

3. Quiet Operation:

Chamberlain garage door openers were renowned for their quiet operation, a feature that resonated with me as I sought a solution that wouldn’t disturb the peace and quiet of my neighborhood.

4. Security Features:

Advanced security features, including rolling code technology and PosiLock, promised heightened protection against unauthorized access, adding an extra layer of reassurance.

LiftMaster: The Epitome of Reliability

As a sibling brand under the umbrella of The Chamberlain Group, LiftMaster shared the commitment to quality and reliability. LiftMaster garage door openers were positioned as robust, high-performance options with a focus on durability and security. The key factors that intrigued me about LiftMaster were:

1. Heavy-Duty Performance:

LiftMaster prided itself on delivering heavy-duty performance, suitable for residential and commercial applications alike. The promise of a reliable and long-lasting solution appealed to my desire for durability.

2. Security+ 2.0 Technology:

LiftMaster’s Security+ 2.0 technology, designed to thwart hacking attempts, offered an additional layer of security. The assurance that my garage door opener would stay one step ahead of potential threats was a compelling factor.

3. Professional-Grade Options:

LiftMaster’s lineup included professional-grade models, emphasizing robust construction and powerful performance. The availability of models designed for heavy daily use showcased the brand’s commitment to reliability.

4. Enhanced Remote Controls:

LiftMaster’s remote controls came equipped with advanced features, including the ability to control multiple garage doors and even operate gates. This appealed to my desire for a comprehensive and streamlined control system.

Comparative Analysis: Chamberlain vs. LiftMaster

1. Price Range:

Chamberlain’s diverse product range allowed for a broader spectrum of prices, catering to various budget considerations. LiftMaster, positioned as a premium brand, tended to have a higher price range, reflecting its emphasis on durability and advanced features.

2. Technology Integration:

Both Chamberlain and LiftMaster excelled in integrating smart technology. The MyQ technology from Chamberlain and the Security+ 2.0 technology from LiftMaster showcased their commitment to staying at the forefront of innovation.

3. Power and Performance:

LiftMaster, with its emphasis on heavy-duty performance, stood out in scenarios where the garage door was subjected to frequent use. Chamberlain, while offering reliable performance, may be more suitable for standard residential applications.

4. Noise Levels:

Chamberlain’s reputation for quiet operation was evident in many of its models, making it an excellent choice for homeowners seeking a discreet solution. LiftMaster, while not as explicitly marketed for its noise reduction, offered a range of options with relatively quiet operation.

5. Additional Features:

Chamberlain’s battery backup and LiftMaster’s professional-grade options were notable additional features that differentiated the brands. The choice between the two would depend on specific needs, such as the importance of a battery backup during power outages.

My Decision-Making Process: Balancing Needs and Preferences

As I navigated through the details of Chamberlain vs. LiftMaster, the decision-making process became a delicate balance between my specific needs and personal preferences. The following considerations guided my final decision:

1. Budget Constraints:

Being mindful of my budget played a crucial role. Chamberlain’s diverse range allowed me to find a model that met my requirements without stretching my budget excessively.

2. Focus on Smart Technology:

The MyQ technology from Chamberlain aligned seamlessly with my desire for smart home integration. The ability to control and monitor my garage door remotely added a layer of convenience that I found particularly appealing.

3. Heavy-Duty Requirements:

While LiftMaster’s heavy-duty performance was commendable, my residential needs didn’t warrant the level of durability it offered. Chamberlain, with its reliable operation and innovative features, proved to be a more suitable fit for my scenario.

4. Noise Sensitivity:

Given the proximity of my garage to neighboring homes, the quiet operation of Chamberlain garage door openers emerged as a decisive factor. The promise of smooth and discreet functionality without disturbing the peace of the neighborhood was a significant selling point.

5. Future-Proofing with Smart Features:

The prospect of future-proofing my garage door opener with advanced smart features influenced my decision. Chamberlain’s MyQ technology ensured that my garage door could easily adapt to evolving smart home trends.

Conclusion: Elevating Home Security and Convenience

In the end, the choice between Chamberlain and LiftMaster was a deeply personal one, shaped by the unique demands of my living situation and my vision for an upgraded garage door system. The comparative analysis served as a valuable guide, allowing me to weigh the strengths and specialties of each brand against my specific needs.

Overall, according to Garage Door Repair, choosing between Chamberlain and LiftMaster ultimately became a decision not just about garage door openers but about enhancing the security, convenience, and overall experience of my home. The journey illuminated the importance of aligning brand features with individual requirements, ensuring that the selected garage door opener would seamlessly integrate into my lifestyle while providing reliable, long-lasting performance.

Ontario Garage & Overhead Doors

1353 E 7th St, Ontario, CA 91764, United States

909-442-4206

Spring Repair vs. Replacement: Which Does Your Garage Door Need? – Denzel Garage Door Repair

As a vigilant homeowner who cherishes the seamless functionality of my garage door, the sudden disruption caused by a malfunctioning spring was a call to action. Springs play a pivotal role in the balletic performance of a garage door, counterbalancing its weight and ensuring effortless opening and closing.

By following Garage Door Repair, I share insights and experiences, unraveling the complexities of garage door spring issues and deciphering the crucial decision between repair and replacement.

The Spring Symphony: Understanding the Role of Garage Door Springs

Before diving into the nuances of repair and replacement, it’s imperative to grasp the indispensable role that springs play in the operation of a garage door:

1. Torsion Springs:

Located above the door, torsion springs twist and unwind to generate the energy needed to lift the door.

2. Extension Springs:

Positioned on either side of the door, extension springs stretch and contract to provide the necessary counterbalance for smooth movement.

The Warning Signs: Identifying Spring Issues

Recognizing the early indicators of spring issues can be the key to addressing them promptly. Keep an eye out for these warning signs:

1. Unusual Sounds:

Creaking, snapping, or popping noises during door operation may signify spring problems.

2. Imbalance:

An imbalanced door, where one side appears to sag or rise faster than the other, is a red flag.

3. Slow or Jerky Movement:

A garage door that moves sluggishly or exhibits jerky motions may be struggling with spring issues.

4. Gaps or Gaps in Cables:

Visible gaps in the cables or loose cables can indicate a problem with the springs.

5. Physical Damage:

Inspect the springs for visible damage, such as cracks, rust, or a distorted shape.

The Dilemma Unveiled: Repair or Replace?

1. Spring Repair: Addressing the Wounds

Spring repair involves addressing specific issues with the existing springs, restoring them to a functional state. Consider repair in the following scenarios:

a. Minor Wear and Tear:

If the springs exhibit minor wear and tear without significant damage, such as small cracks or surface rust, repair may be a viable option.

b. Limited Age:

Younger springs that haven’t reached the end of their typical lifespan may be candidates for repair, especially if the issues are minor.

c. Balanced Wear:

If both springs show similar levels of wear and no imbalances, repairing both simultaneously might extend their collective lifespan.

2. Spring Replacement: Embracing a Fresh Start

Spring replacement involves installing new springs, providing a clean slate for reliable garage door operation. Opt for replacement in the following circumstances:

a. Extensive Damage:

If the springs exhibit significant damage, such as cracks, distortion, or severe rust, replacement becomes imperative.

b. Uneven Wear:

When one spring is significantly more worn than the other, replacing both ensures balanced performance and longevity.

c. Aging Springs:

Springs approaching or surpassing their typical lifespan are more prone to failure. Replacement becomes a proactive measure to avoid unexpected breakdowns.

d. Safety Concerns:

If a spring has snapped or shows signs of imminent failure, replacement is crucial for safety reasons.

Navigating the Repair Terrain: The Process Unveiled

1. Inspection:

A professional technician begins by inspecting the springs, assessing the extent of damage, wear, or imbalances.

2. Minor Repairs:

If the issues are minor, such as surface rust or small cracks, the technician may perform repairs, including cleaning, lubricating, or reinforcing the springs.

3. Balancing Act:

In cases where one spring is more worn than the other, the technician might balance the tension between the two to ensure even wear.

4. Safety Checks:

A thorough safety check is conducted to ensure the repaired springs meet industry standards and pose no hazards.

5. Testing:

The garage door is tested for smooth operation, and adjustments are made as necessary to achieve optimal performance.

Embarking on the Renewal Journey: The Anatomy of Spring Replacement

1. Assessment:

A comprehensive assessment of the existing springs is conducted, considering factors such as age, wear, and overall condition.

2. Removal:

The worn or damaged springs are carefully removed, ensuring safety precautions are followed to prevent accidents.

3. Spring Selection:

New springs are selected based on the specific requirements of the garage door, taking into account factors like weight and size.

4. Installation:

The new springs are installed, with meticulous attention to achieving the correct tension and balance for smooth door operation.

5. Safety Features:

Modern safety features, such as containment cables, may be added during replacement to enhance safety and prevent injury in case of spring failure.

6. Testing:

The garage door undergoes rigorous testing to ensure the newly installed springs operate seamlessly, with adjustments made as needed.

Making the Decision: A Personal Reflection

Having faced the crossroads of spring repair and replacement myself, the decision-making process was a journey of weighing various factors. Here are insights drawn from my personal experience:

1. Age Matters:

Consider the age of the springs. If they are relatively young and the issues are minor, repair might be a cost-effective option. However, aging springs nearing the end of their lifespan may benefit more from replacement.

2. Symmetry and Balance:

Ensure that both springs are treated equally. If one spring is significantly more worn or damaged than the other, opting for replacement for both maintains balance and harmony in the garage door’s operation.

3. Safety as a Priority:

Prioritize safety. If a spring has snapped or shows signs of imminent failure, replacement is the safest route. Safety features like containment cables, commonly added during replacement, contribute to a secure garage door system.

4. Long-Term Investment:

Consider the long-term investment. While repair may seem like a cost-effective solution in the short term, replacing worn or aging springs ensures a more extended period of reliable performance, reducing the likelihood of future breakdowns.

5. Professional Consultation:

Seek the expertise of a professional technician. A thorough inspection by a qualified technician provides an accurate assessment of the springs’ condition, guiding the decision-making process.

Conclusion: Restoring the Rhythm of Your Garage Door

In the intricate dance of garage door springs, the choice between repair and replacement is a pivotal decision that impacts not just the immediate functionality but the long-term reliability of your garage door. As a homeowner attuned to the subtleties of this choreography, my journey through spring issues has been a lesson in proactive maintenance and thoughtful decision-making.

As stated in Garage Door Repair, whether opting for the meticulous repairs that breathe new life into existing springs or embracing the renewal that comes with replacement, the ultimate goal is to restore the rhythm of your garage door. In this delicate balance between repair and replacement, the heartbeat of your home’s functionality finds its cadence, ensuring a seamless and secure entry and exit—an assurance that every homeowner can appreciate.

Denzel Garage Door Repair

2380 Camino Vida Roble, Carlsbad, CA 92011, United States

760-970-8179

Garage Door Lubrication: Essential Maintenance for 2023 – Atlas Door Company

As a homeowner, the rhythmic hum of a smoothly operating garage door has always been a comforting soundtrack to my daily routine. However, that harmony was recently interrupted by an unwelcome screech and groan, signaling that my garage door needed attention. This prompted me to embark on a journey of discovery into the world of garage door lubrication – an essential maintenance practice for 2023 that not only ensures a silent and efficient operation but also prolongs the life of this vital home component.

I’ll share my experiences, insights gained, and the importance of making garage door lubrication a regular part of home care as per Garage Door Repair.

Introduction: The Unexpected Squeak

The symphony of my home was disrupted one morning when I pressed the button to open my garage door. Instead of the familiar smooth ascent, I was met with an unpleasant screech, as if the door itself was protesting its movement. Determined to address the issue promptly, I began my exploration into the world of garage door lubrication.

Understanding the Importance of Lubrication:

1. The Role of Lubrication:

  • Briefly explain the critical role lubrication plays in the smooth operation of a garage door.
  • Emphasize that regular lubrication prevents friction, reduces wear and tear, and minimizes noise.

2. Components Requiring Lubrication:

  • Introduce the various components of a garage door system that benefit from lubrication, including hinges, rollers, springs, and tracks.
  • Emphasize that each part plays a crucial role in ensuring the door’s seamless operation.

Signs Your Garage Door Needs Lubrication:

1. Unusual Noises:

  • Reflect on the audible signs, such as squeaking or grinding sounds, that indicate the need for lubrication.
  • Share personal experiences of noticing these noises and their impact on daily life.

2. Jerky Movements:

  • Discuss the impact of friction on the smooth movement of the garage door.
  • Share insights into how jerky movements can lead to increased strain on the motor and other components.

3. Visible Wear and Tear:

  • Acknowledge that visual inspection is crucial in identifying signs of wear and tear.
  • Share personal anecdotes of discovering rust or visible damage on components that could have been prevented with timely lubrication.

DIY Garage Door Lubrication: A Hands-On Approach

1. Selecting the Right Lubricant:

  • Explore different types of lubricants suitable for garage doors, such as silicone-based sprays or specialty garage door lubricants.
  • Emphasize the importance of choosing a lubricant that is specifically designed for garage door components.

2. Cleaning Before Lubricating:

  • Stress the significance of cleaning components before applying lubricant.
  • Share experiences of removing built-up dirt and debris to ensure the lubricant can penetrate effectively.

3. Lubricating Hinges and Rollers:

  • Walk through the process of lubricating hinges and rollers, emphasizing the need for thorough coverage.
  • Share personal insights into the impact of lubrication on eliminating squeaks and improving door movement.

4. Addressing Springs and Tracks:

  • Discuss the often-overlooked components, such as springs and tracks, that also require lubrication.
  • Share tips on safely lubricating these parts to ensure optimal performance.

Challenges Encountered During DIY Lubrication:

1. Over-lubrication Issues:

  • Acknowledge the common mistake of applying too much lubricant.
  • Share experiences of dealing with excess lubrication and its potential impact on the garage door system.

2. Choosing the Wrong Lubricant:

  • Reflect on the trial and error process of finding the most suitable lubricant.
  • Share personal insights into the benefits of using specialized garage door lubricants.

3. Safety Considerations:

  • Emphasize the importance of safety precautions, such as disconnecting the garage door opener and ensuring stability on ladders.
  • Share personal anecdotes of ensuring a safe environment during the lubrication process.

Professional Garage Door Lubrication: When to Seek Expert Help

Recognizing the limits of my DIY expertise, I decided to explore the option of professional garage door lubrication. Seeking expert help became not only a pragmatic decision but also an investment in the longevity and optimal functioning of my garage door.

1. Thorough Inspection:

  • Discuss the advantages of professional inspections, including the ability to identify hidden issues.
  • Share insights gained from the professionals’ thorough examination of hinges, rollers, and other garage door components.

2. Precision Lubrication:

  • Explore the specialized lubrication techniques employed by professionals.
  • Discuss the benefits of their precision in applying lubricants to critical areas.

3. Adjustments and Alignments:

  • Reflect on the expertise professionals bring to aligning and adjusting hinges and rollers.
  • Share personal experiences of witnessing the subtle yet impactful adjustments made by the professionals.

4. Recommendations for Future Maintenance:

  • Discuss the value of receiving personalized recommendations for ongoing maintenance.
  • Emphasize the educational aspect of professional services, empowering homeowners to better care for their garage doors.

Conclusion: Silencing the Symphony

As I stand in my garage now, the once-disruptive screech replaced by a serene hum, I reflect on the journey of maintaining my garage door through lubrication in 2023. The combination of hands-on DIY efforts and the precision touch of professionals has elevated the performance and longevity of these critical components.

Overall, based from Garage Door Repair, garage door lubrication is not merely a task on the checklist; it is an investment in the quiet efficiency of our daily lives. Whether opting for a hands-on approach or seeking professional help, the importance of regular lubrication cannot be overstated. It’s not just about silencing the creaks; it’s about ensuring that the symphony of our homes continues to play smoothly, welcoming us with its familiar tune every day.

Atlas Door Company

6817 Sundance Cir W, Joshua, TX 76058, United States

817-295-3660

Page 2 of 39

Powered by WordPress & Theme by Anders Norén