Local Businesses Blog in Texas

Tag: garage door repair Page 1 of 60

How Much To Replace A Garage Door Torsion Spring – Ryder Garage Doors

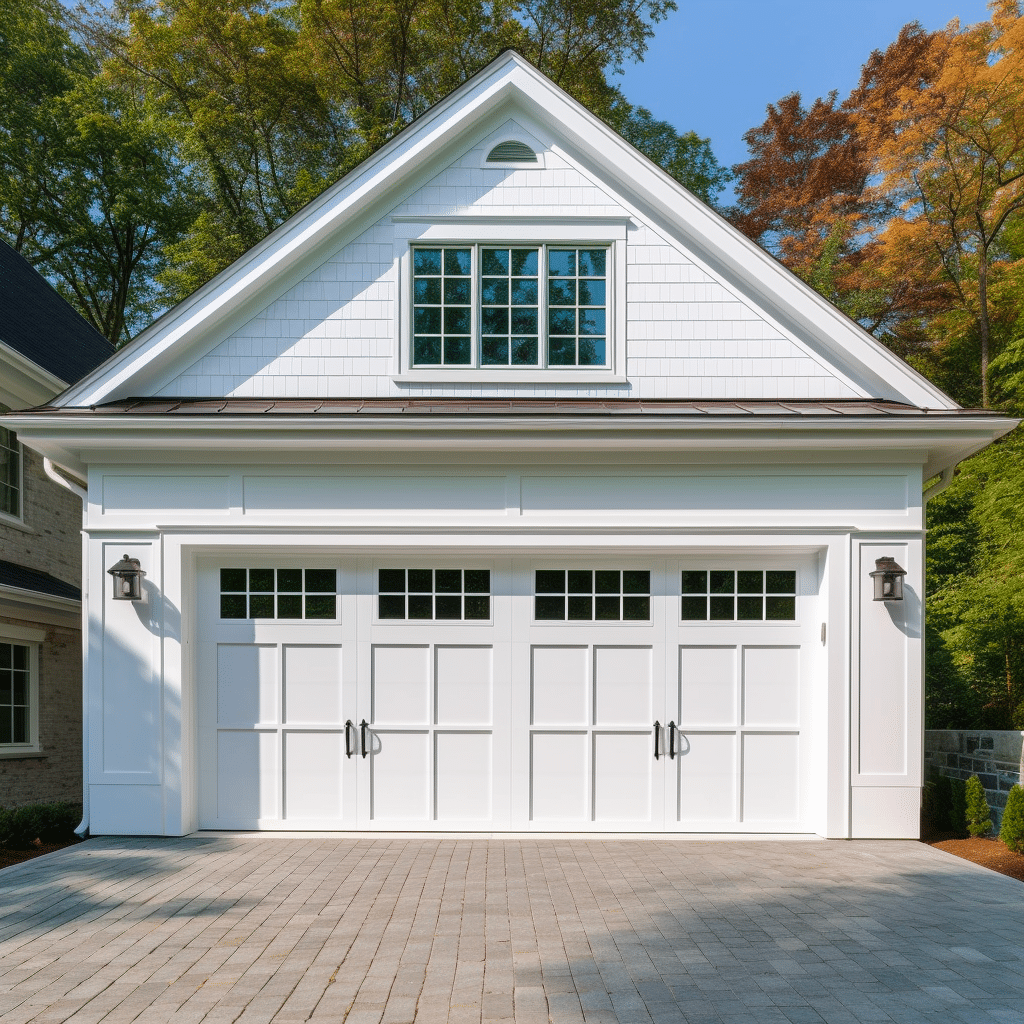
Garage Door Repair Vancouver WA plays a crucial role in the operation of your garage door, helping to counterbalance the weight of the door and facilitate smooth opening and closing.

When a torsion spring breaks or becomes worn out, it can lead to significant issues with the functionality and safety of your garage door system. In this guide, we’ll explore everything you need to know about the cost of replacing a garage door torsion spring, including factors that affect the cost, types of springs available, and tips for selecting the right replacement.

Factors Affecting the Cost

Several factors can influence the cost of replacing a garage door torsion spring, including:

  1. Type of Spring: Garage doors typically use two types of torsion springs: standard torsion springs and high-cycle torsion springs. Standard torsion springs are designed for typical residential use and have a lifespan of around 10,000 cycles, while high-cycle torsion springs are more durable and can last up to 100,000 cycles. High-cycle torsion springs are generally more expensive but offer greater longevity and reliability.
  2. Size and Weight of the Door: The size and weight of your garage door will determine the size and strength of the torsion springs required. Larger and heavier doors require stronger springs, which may be more expensive to replace.
  3. Number of Springs: Some garage doors use a single torsion spring, while others use multiple springs for added support and balance. The number of springs required for your door will impact the overall cost of replacement.
  4. Quality of Springs: The quality of the torsion springs used for replacement will affect the cost. Higher-quality springs made from durable materials may have a higher upfront cost but can offer better performance and longevity, potentially saving you money in the long run.
  5. Labor Costs: In addition to the cost of the springs themselves, you’ll also need to factor in labor costs for professional replacement. Hiring a professional garage door technician ensures that the replacement is done correctly and safely, reducing the risk of accidents or injuries.

Cost Range of Replacing Garage Door Torsion Spring

The cost of replacing a garage door torsion spring can vary depending on the factors mentioned above. Here’s a breakdown of the cost range based on different scenarios:

  1. Standard Torsion Spring Replacement:
    • Single Spring Replacement: $150 to $300
    • Dual Spring Replacement: $250 to $500
  2. High-Cycle Torsion Spring Replacement:
    • Single Spring Replacement: $250 to $500
    • Dual Spring Replacement: $400 to $800
  3. Additional Costs and Considerations:
    • Labor Costs: Professional replacement typically costs between $100 and $200 per spring, depending on the complexity of the job and the technician’s experience.
    • Emergency Service: If your garage door torsion spring breaks unexpectedly, you may need to pay extra for emergency service or after-hours replacement.
    • Additional Parts: Depending on the condition of your garage door system, you may need to replace other parts such as cables, pulleys, or rollers during the replacement process. These additional parts can add to the overall cost but are essential for ensuring the proper functioning of the door.

DIY vs. Professional Replacement

While some homeowners may attempt to replace a garage door torsion spring themselves to save money, this is not recommended unless you have experience and expertise in garage door repair. Torsion springs are under high tension and can be dangerous to work with, posing a risk of serious injury or property damage if mishandled. Hiring a professional garage door technician ensures that the replacement is done safely and correctly, reducing the risk of accidents and ensuring the longevity of your garage door system.

Conclusion:

In conclusion, the cost of replacing a garage door torsion spring depends on factors such as the type of spring, size and weight of the door, number of springs, quality of springs, and labor costs. By understanding these factors and working with a reputable garage door technician, you can ensure that your garage door torsion spring is replaced correctly and safely, restoring the functionality and reliability of your garage door system.

Ryder Garage Doors

PO Box 5474 Vancouver, WA 98668

1-360-843-7981

How Much Does A Garage Door Spring Cost To Replace – A 24 Hour Door Service

Garage Door Repair Madison MS are essential components of the garage door system, responsible for counterbalancing the weight of the door and facilitating smooth opening and closing movements.

Over time, garage door springs may wear out or break due to factors such as frequent use, temperature fluctuations, and metal fatigue, necessitating replacement to ensure safe and efficient operation of the garage door.

Types of Garage Door Springs

There are two main types of garage door springs:

  1. Torsion Springs: Torsion springs are mounted horizontally above the garage door opening and are attached to a metal shaft. When the door is closed, torsion springs are under tension, storing energy that is released to lift the door when it is opened.
  2. Extension Springs: Extension springs are mounted vertically on either side of the garage door tracks and stretch and contract to facilitate door movement. Extension springs are typically found on older garage door systems and are less common in newer installations.

Factors Affecting the Cost of Garage Door Spring Replacement

Several factors influence the cost of replacing garage door springs, including:

  1. Type of Spring: Torsion springs are generally more expensive to replace than extension springs due to their complexity and higher load-bearing capacity.
  2. Size and Weight of the Door: Larger and heavier garage doors require stronger springs to support their weight, which can affect the cost of replacement.
  3. Number of Springs: Some garage door systems use multiple springs to counterbalance the door’s weight. The cost of replacement will depend on the number of springs that need to be replaced.
  4. Quality and Material: The quality and material of the springs can also affect their cost. High-quality, durable springs made of corrosion-resistant materials may be more expensive upfront but can offer better performance and longevity.

Cost Range of Garage Door Spring Replacement

The cost of replacing garage door springs varies depending on the aforementioned factors and can range from $150 to $400 or more. Here’s a breakdown of the cost range based on different considerations:

  1. Torsion Springs:
    • Single Torsion Spring: $150 to $250
    • Double Torsion Springs: $250 to $400
  2. Extension Springs:
    • Pair of Extension Springs: $150 to $250
    • Single Extension Spring: $75 to $150

Additional Costs and Considerations

In addition to the cost of the springs themselves, there may be additional costs and considerations to factor in:

  • Professional Installation: Garage door spring replacement can be dangerous and should be handled by trained professionals. Professional installation ensures proper installation and minimizes the risk of accidents or injuries.
  • Labor Costs: Labor costs for garage door spring replacement vary depending on factors such as labor rates, the complexity of the job, and any additional services required.
  • Additional Parts and Components: In some cases, additional parts and components such as cables, pulleys, and brackets may need to be replaced along with the springs. These additional parts can add to the overall cost of the replacement.
  • Warranty: Consider the warranty offered by the manufacturer or installer for the springs and labor. A warranty can provide peace of mind and protection against defects or malfunctions.

Conclusion:

In conclusion, the cost of replacing garage door springs varies depending on factors such as the type of spring, size and weight of the door, number of springs, quality and material, and additional costs and considerations. By carefully considering these factors and seeking professional assistance, you can ensure safe and efficient replacement of your garage door springs.

A 24 Hour Door Service

417 Post Oak Cove, Madison, MS 39110, United States

1-601-664-8935

How To Activate A Chamberlain Garage Door Remote – DoorJam Garage

Garage Door Repair Wake Forest NC allows you to conveniently open and close your garage door with ease.

Whether you’re setting up a new remote or reactivating an existing one, this step-by-step guide will walk you through the process to ensure smooth operation of your garage door opener.

1. Check Compatibility

Before activating your Chamberlain garage door remote, ensure that it is compatible with your garage door opener model. Chamberlain remotes are designed to work with a wide range of Chamberlain, LiftMaster, and Craftsman garage door openers, but it’s essential to confirm compatibility to avoid compatibility issues.

2. Install Batteries

If your Chamberlain garage door remote requires batteries, install them according to the instructions provided in the user manual. Ensure that the batteries are inserted correctly, with the positive and negative terminals aligned properly.

3. Locate the “Learn” Button

Most Chamberlain garage door openers feature a “Learn” button that is used to activate remotes. This button is typically located on the motor unit of the opener near the antenna wire. It may be labeled as “Learn,” “Smart,” or “Program.” Consult your opener’s user manual or look for the button near the antenna wire.

4. Press the “Learn” Button

Once you’ve located the “Learn” button, press it firmly and release it. You’ll notice that the indicator light on the motor unit will begin to blink or change color, indicating that the opener is in programming mode and ready to learn the code from your remote.

5. Activate the Remote

Next, follow these steps to activate your Chamberlain garage door remote:

  • Press and hold the button on the remote that you want to activate. Hold the button down until you see the indicator light on the remote flash or hear a beep. This indicates that the remote’s code has been transmitted to the garage door opener.
  • Some Chamberlain remotes may require you to enter a specific code sequence or follow additional instructions. Refer to your remote’s user manual for detailed activation instructions.

6. Test the Remote

After activating the remote, it’s essential to test it to ensure that it’s working correctly. Stand inside your garage and press the button on the remote. If the activation was successful, your garage door should open or close smoothly in response to the remote’s command.

7. Repeat for Additional Remotes (If Necessary)

If you have multiple Chamberlain garage door remotes that you want to activate, simply repeat the process outlined above for each remote. Press the “Learn” button on the opener, then activate each remote individually, and test each one to ensure that they’re all functioning correctly.

8. Secure Your Remote

Once you’ve activated your Chamberlain garage door remote, be sure to keep it in a safe and secure location, such as your car’s glove compartment or a designated spot inside your home. Avoid leaving the remote in plain sight, where it could be easily stolen or accessed by unauthorized individuals.

Conclusion:

Activating your Chamberlain garage door remote is a straightforward process that allows you to enjoy convenient access to your garage. By following the steps outlined in this guide and consulting your opener’s user manual for specific instructions, you can quickly activate your remote and ensure smooth operation of your garage door opener. If you encounter any difficulties during the activation process, don’t hesitate to reach out to Chamberlain’s customer support or consult a professional for assistance.

DoorJam Garage

3418 Quarry Rd, Wake Forest, NC 27587, United States

1-919-906-6623

How To Wire A Garage Door Opener – New Braunfels Garage Door Repair

Garage Door Repair New Braunfels TX is a crucial step in the installation process, ensuring that the opener unit communicates properly with the motor, sensors, and other components of the garage door system. While the specific wiring instructions may vary depending on the model and brand of your garage door opener, the basic principles remain consistent across most installations. In this comprehensive guide, we’ll walk you through the step-by-step process of wiring a garage door opener, providing detailed instructions and safety tips along the way.

1. Gather the Necessary Tools and Materials

Before you begin, gather all the tools and materials you’ll need for wiring the garage door opener:

  • Garage door opener unit.
  • Mounting hardware and brackets.
  • Electrical wiring (typically provided with the opener unit).
  • Wire nuts.
  • Screwdriver.
  • Drill and drill bits.
  • Wire strippers.
  • Electrical tape.
  • Safety glasses.

2. Prepare the Garage Door Opener Unit

Before wiring the opener, ensure that the unit is securely mounted to the ceiling or wall of the garage according to the manufacturer’s instructions. Use the provided mounting brackets and hardware to attach the opener unit, making sure it is level and securely fastened.

3. Identify the Terminal Connections

Most garage door opener units have terminal connections labeled for easy identification. Common terminal connections include:

  • Power terminals (for connecting to the electrical supply).
  • Motor terminals (for connecting to the garage door motor).
  • Sensor terminals (for connecting safety sensors).
  • Wall control terminals (for connecting the wall-mounted control panel).

Refer to the wiring diagram and installation manual provided with your garage door opener to locate and identify the terminal connections on the unit.

4. Connect the Power Supply

Begin by connecting the power supply to the garage door opener unit. Locate the power terminals on the opener and strip the ends of the electrical wiring to expose the copper conductors. Connect the black (hot) wire to the terminal labeled “L” or “Power In” and the white (neutral) wire to the terminal labeled “N” or “Neutral.”

Note: If your garage door opener requires a separate ground connection, connect the green or bare copper wire to the grounding terminal on the unit.

5. Connect the Motor Wires

Next, connect the wires from the garage door opener motor to the appropriate terminals on the unit. Strip the ends of the motor wires and connect them to the motor terminals on the opener. Typically, these terminals are labeled “Motor” or “Motor Out” and may be color-coded for easy identification.

6. Connect the Safety Sensors

If your garage door opener is equipped with safety sensors, connect the sensor wires to the designated terminals on the opener unit. Most sensors have two wires: one for the sending unit and one for the receiving unit. Connect the wires from each sensor to the corresponding terminals on the opener, ensuring that the polarity is correct.

Note: Position the safety sensors on each side of the garage door opening, facing each other, and align them according to the manufacturer’s instructions.

7. Connect the Wall Control

If your garage door opener includes a wall-mounted control panel, connect the wires from the control panel to the designated terminals on the opener unit. Typically, these terminals are labeled “Wall Control” or “Push Button.” Strip the ends of the control panel wires and connect them to the appropriate terminals, ensuring proper polarity.

8. Secure and Insulate the Wiring

After connecting all the wires, secure them to the opener unit using wire nuts or other suitable connectors. Ensure that all connections are tight and secure to prevent loosening or electrical hazards. Use electrical tape to insulate and protect the exposed wires and terminals.

9. Test the Garage Door Opener

Once the wiring is complete, test the garage door opener to ensure proper operation. Activate the opener using the wall control or remote transmitter and observe the movement of the garage door. Verify that the opener responds correctly to commands and that the safety sensors are functioning as intended.

10. Finalize Installation and Safety Checks

After testing the opener, finalize the installation by securing any loose wires and closing the opener unit’s cover or housing. Conduct a final safety check to ensure that all components are properly installed and functioning correctly. Verify that the garage door moves smoothly and without any obstructions.

By following these step-by-step instructions and safety precautions, you can wire your garage door opener confidently and enjoy the convenience and security of automated garage door operation.

New Braunfels Garage Door Repair

 3702 I 35 Frontage Rd Unit 112, New Braunfels, TX 78132, United States

1-830-387-9855

Can I Program My Car Garage Door Opener Without Remote – Garage Door Solutionz

Garage Door Repair Anniston AL have simplified the process of accessing our homes, offering convenience and security with the click of a button.

However, what if you find yourself without a remote control for your car’s garage door opener? Is it possible to program your car’s built-in garage door opener without a remote? In this comprehensive guide, we’ll delve into the feasibility of programming your car’s garage door opener without a remote and explore alternative methods to help you gain access to your garage.

Understanding Car Garage Door Opener Systems

Modern vehicles often come equipped with built-in garage door opener systems, such as HomeLink or Car2U, designed to streamline the process of opening and closing garage doors. These systems allow drivers to program their vehicles to communicate with compatible garage door openers, eliminating the need for a separate remote control.

Programming with a Remote Control

The conventional approach to programming a car’s garage door opener involves using a remote control that accompanies the garage door opener system. By synchronizing the remote control with the garage door opener, you can program your vehicle to interact with the opener. However, if you lack a remote control, you may wonder if there are alternative avenues for programming your car’s garage door opener.

Alternative Methods

While programming your car’s garage door opener without a remote control may present challenges, several alternative methods can be explored:

1. Utilizing the Garage Door Opener Buttons

Some garage door openers feature programming buttons located on the motor unit. By pressing these buttons in a specific sequence, you may activate the opener’s “learn” mode, enabling you to program your vehicle’s built-in opener without a remote control. Nevertheless, this method’s efficacy may vary based on your garage door opener’s make and model, so consulting your owner’s manual for precise instructions is advisable.

2. Engaging the Wall Control Panel

Another option is to employ the wall control panel situated inside your garage. Analogous to the programming buttons on the motor unit, the wall control panel might incorporate a programming button that, when pressed, triggers the opener’s “learn” mode. Subsequently, you can follow your vehicle manufacturer’s instructions to program your car’s garage door opener.

3. Seeking Assistance from Customer Support

If you encounter difficulties programming your car’s garage door opener using the aforementioned methods, reaching out to the manufacturer’s customer support can be beneficial. They may offer guidance or alternative solutions for programming your vehicle’s built-in opener without a remote control, ensuring successful setup and operation.

Conclusion:

While programming your car’s garage door opener without a remote control may pose initial challenges, it’s entirely feasible with the utilization of alternative methods. By exploring options like utilizing the garage door opener buttons, engaging the wall control panel, or seeking assistance from customer support, you can successfully program your vehicle to communicate with your garage door opener. Nevertheless, it’s imperative to consult your vehicle’s owner’s manual and adhere to the manufacturer’s instructions for precise guidance on programming your car’s garage door opener without a remote.

Garage Door Solutionz

1016 Sandrock Rd. Anniston, AL 36207

1-256-954-0264

How Do I Program A Genie Intellicode Garage Door Opener – Team Taylor Garage Doors of Lee’s Summit

Garage Door Repair Lee’s Summit MO are renowned for their advanced security features and ease of use. Programming your Genie Intellicode garage door opener is a straightforward process that can be completed in just a few simple steps.

In this comprehensive guide, we’ll walk you through the process of programming your Genie Intellicode garage door opener, ensuring smooth operation and enhanced security for your home.

: Gather Your Equipment Before you begin programming your Genie Intellicode garage door opener, make sure you have all the necessary equipment at hand. You’ll need your Genie Intellicode garage door opener, the owner’s manual for your opener model, and a ladder if necessary.

: Identify Your Garage Door Opener Model The programming process for Genie Intellicode garage door openers may vary depending on the model of your opener. Refer to the owner’s manual or locate the model number on the motor unit of your opener to ensure you have the correct instructions.

: Access the Programming Button on the Opener Locate the “Learn” or “Program” button on the motor unit of your Genie Intellicode garage door opener. This button is typically located near the antenna wire and may be labeled as “Learn,” “Program,” or something similar. Pressing this button will put the opener into programming mode, allowing it to receive signals from the remote.

: Clear Existing Remote Codes (if necessary) If you are programming a new remote or reprogramming an existing one, it’s a good idea to clear any existing codes from the opener to prevent interference. To do this, press and hold the “Learn” or “Program” button on the opener until the indicator light turns off. This indicates that the existing codes have been cleared, and the opener is ready to receive new programming.

: Program the Remote Now it’s time to program the Genie Intellicode garage door opener remote to the opener. The exact steps may vary depending on the model of your opener, but the general process is as follows:

  1. Press and release the “Learn” or “Program” button on the garage door opener. The indicator light will illuminate, indicating that the opener is in programming mode.
  2. Within 30 seconds, press and hold the button on the remote that you wish to program. Hold the button until the indicator light on the opener flashes or blinks, indicating that the programming was successful.
  3. Release the button on the remote. The indicator light on the opener should stop flashing, indicating that the remote has been successfully programmed.

: Test the Remote Once the remote has been programmed, it’s essential to test it to ensure that it’s working correctly. Stand within range of the opener and press the button on the remote. The garage door should open or close smoothly in response to the remote signal. If the door doesn’t respond, double-check the programming steps and try again.

: Repeat for Additional Remotes (if necessary) If you have multiple Genie Intellicode garage door remotes that you want to program to the opener, simply repeat the programming process for each remote. Each remote can be programmed separately using the same procedure outlined above.

: Secure the Remote and Opener Once all remotes have been programmed and tested successfully, securely mount the remote(s) in your vehicle or keep them in a safe location. Additionally, ensure that the garage door opener is securely mounted and properly maintained to ensure continued smooth operation.

Conclusion:

Programming your Genie Intellicode garage door opener is a simple process that can be completed in just a few steps. By following the instructions provided in this guide and referring to the owner’s manual for your specific opener model, you can easily set up or reprogram your remote for seamless operation of your garage door. With your remote programmed and ready to go, you can enjoy the convenience and security of accessing your garage with ease.

Team Taylor Garage Doors of Lee’s Summit

1012 NE Jib Ct STE D, Lee’s Summit, MO 64064, United States

1-816-239-2959

How To Attach Christmas Lights Around Garage Door – Anna’s Best Garage & Overhead Doors

Decorating your Garage Door Repair Anna TX is a fantastic way to spread holiday cheer and enhance the festive atmosphere of your home.

Whether you prefer a simple and elegant display or a dazzling light show, there are several creative ways to attach Christmas lights around your garage door. In this comprehensive guide, we’ll walk you through the step-by-step process of attaching Christmas lights to your garage door, ensuring a festive and visually stunning display that will delight your family and neighbors.

Choosing the Right Lights

Before you begin decorating your garage door with Christmas lights, it’s essential to choose the right type of lights for your display. Consider factors such as color, style, and whether you prefer traditional incandescent lights or energy-efficient LED lights. Additionally, make sure to measure the length of your garage door and calculate how many strands of lights you’ll need to cover the entire area.

Tools and Materials Needed

Gather the following tools and materials before you start decorating your garage door with Christmas lights:

  • Christmas lights
  • Extension cords
  • Outdoor-rated electrical tape
  • Clips or hooks for hanging lights
  • Ladder
  • Timer (optional)
  • Outdoor-rated power outlet (if not already available)

Having these tools and materials on hand will make the decorating process easier and more efficient.

Step-by-Step Decoration Guide

Follow these step-by-step instructions to attach Christmas lights around your garage door effectively:

1. Plan Your Design

Before you start hanging lights, take some time to plan your design. Consider whether you want to outline the perimeter of the garage door, create patterns or shapes, or cover the entire surface with lights. Sketch out your design on paper or visualize it in your mind to ensure you achieve the desired look.

2. Test the Lights

Before hanging the lights, test them to make sure they’re working correctly. Plug them in and check for any burnt-out bulbs or malfunctioning sections. Replace any faulty lights before proceeding with the decoration.

3. Attach Hooks or Clips

Using outdoor-rated clips or hooks, attach them to the trim or siding around your garage door. Place the hooks or clips evenly spaced apart to provide support for the strands of lights. Make sure the hooks or clips are securely attached and can hold the weight of the lights.

4. Hang the Lights

Starting at one corner of the garage door, begin hanging the lights along the hooks or clips you’ve installed. Work your way around the perimeter of the door, following your planned design. Keep the lights taut and evenly spaced for a neat and professional appearance.

5. Secure the Lights

Use outdoor-rated electrical tape to secure any loose sections of lights or extension cords to prevent them from drooping or tangling. Make sure the tape is weather-resistant and won’t damage the surface of your garage door or trim.

6. Create Patterns or Shapes

If you’re feeling creative, consider creating patterns or shapes with the lights on your garage door. You can outline the edges of the door, create a festive wreath or bow design, or spell out holiday greetings or symbols using the lights.

7. Adjust and Test

Step back periodically to assess your progress and make any necessary adjustments to the placement of the lights. Once you’re satisfied with the arrangement, plug in the lights and test them to ensure they’re evenly spaced and provide the desired illumination.

8. Consider Safety

When decorating your garage door with Christmas lights, always prioritize safety. Use a sturdy ladder to reach high areas, and have a spotter to assist you if needed. Avoid overloading electrical outlets and use outdoor-rated extension cords and timers to minimize fire hazards.

9. Add Finishing Touches

Once the lights are in place, step back and admire your handiwork! Consider adding additional decorations such as bows, ribbons, or garlands to complement the lights and enhance the festive look of your garage door.

10. Enjoy Your Festive Display

With your Christmas lights securely attached to your garage door, sit back, relax, and enjoy the warm glow of your festive display. Your beautifully decorated garage door will spread holiday cheer to all who pass by and create lasting memories for you and your loved ones.

Conclusion:

Decorating your garage door with Christmas lights is a fun and festive way to celebrate the holiday season and spread joy to your neighborhood. By following the step-by-step guide outlined above and using your creativity and imagination, you can create a stunning display that will delight friends, family, and passersby alike. So gather your lights, grab your tools, and let the decorating begin!

Anna’s Best Garage & Overhead Doors

1009 Mathew Dr, Anna, TX 75049, United States

1-469-224-1335

How Much Horsepower Does My Garage Door Opener Need – First Call Garage Doors

Determining the appropriate Garage Door Repair Richmond TX is essential to ensure smooth and efficient operation.

In this comprehensive guide, we’ll explore the factors influencing horsepower requirements, different horsepower options available, considerations for selecting the right horsepower, and tips for optimizing your garage door opener’s performance.

Understanding Horsepower

Horsepower (HP) is a measure of the motor’s strength and ability to lift and lower the garage door effectively. Choosing the right horsepower ensures that your opener can handle the weight and size of your door without strain or malfunction.

Factors Influencing Horsepower Requirements

Several factors influence the amount of horsepower needed for a garage door opener:

1. Door Weight and Size:

  • Heavier and larger doors require more horsepower to operate smoothly. Wooden or solid steel doors typically weigh more than aluminum or fiberglass doors and may require higher horsepower.

2. Door Material:

  • The material of the garage door affects its weight and resistance, impacting horsepower requirements.

3. Usage Frequency:

  • The frequency of door operation, such as daily use or occasional use, influences horsepower needs. Higher horsepower is advisable for doors used frequently to prevent motor strain and prolong the opener’s lifespan.

4. Opener Mechanism:

  • The type of opener mechanism, such as chain drive, belt drive, or screw drive, may have different horsepower requirements based on their design and efficiency.

Different Horsepower Options Available

Garage door openers typically come in three main horsepower options:

1. 1/3 HP:

  • Suitable for lightweight single-car garage doors made of aluminum or fiberglass.
  • Ideal for occasional use or smaller doors with minimal weight.

2. 1/2 HP:

  • Versatile option suitable for standard single or double-car garage doors.
  • Provides sufficient power for most residential applications, including moderate use.

3. 3/4 HP or Higher:

  • Recommended for heavier or larger doors, such as wooden or solid steel doors.
  • Ideal for frequent use or commercial applications where durability and strength are essential.

Considerations for Choosing the Appropriate Horsepower

When selecting the horsepower for your garage door opener, consider the following factors:

1. Door Size and Weight:

  • Determine the weight and size of your garage door to assess the horsepower needed for smooth operation.

2. Usage Patterns:

  • Evaluate how often the garage door will be used and whether it requires constant lifting and lowering throughout the day.

3. Climate and Environment:

  • Consider environmental factors such as extreme temperatures or high humidity, which may affect the opener’s performance and horsepower requirements.

4. Future Upgrades:

  • Anticipate any future upgrades or changes to your garage door, such as insulation or additional panels, which may increase its weight and affect horsepower needs.

Tips for Optimizing Performance

To ensure optimal performance and longevity of your garage door opener, consider the following tips:

1. Professional Installation:

  • Have your garage door opener installed by a professional to ensure proper setup and calibration for optimal performance.

2. Regular Maintenance:

  • Perform routine maintenance tasks, such as lubricating moving parts and checking for loose hardware, to keep your opener running smoothly.

3. Upgrade as Needed:

  • If you notice signs of strain or difficulty in lifting the door, consider upgrading to a higher horsepower opener to prevent motor damage and ensure safe operation.

4. Consult with Experts:

  • Seek advice from garage door professionals or technicians to determine the most suitable horsepower for your specific door and usage requirements.

Conclusion:

Choosing the appropriate horsepower for your garage door opener is crucial for efficient and reliable operation. By considering factors such as door size, weight, usage patterns, and environmental conditions, you can select the right horsepower to meet your needs and ensure smooth functionality of your garage door opener for years to come.

First Call Garage Doors

20527 Farm to Market 1093 Unit B205, Richmond, TX 77407, United States

1-713-248-2684

How To Install A Service Door In A Garage – Southern Home Creations Garage Doors & Openers

Garage Door Repair Suwanee GA is a practical and functional addition that provides convenient access to the garage without having to open the main garage door.

Whether you’re converting part of your garage into a workshop, storage area, or home office, installing a service door allows for easy entry and exit while maintaining security and privacy. In this comprehensive guide, we’ll walk you through the steps to install a service door in your garage safely and effectively.

Understanding Service Doors

Before starting the installation process, it’s essential to understand the different types of service doors available and their various features.

Types of Service Doors

Service doors come in various styles and materials, including steel, fiberglass, and wood. They can have different configurations, such as single or double doors, and may feature windows or decorative panels.

Pre-Installation Considerations

Before installing a service door in your garage, there are several factors to consider to ensure a successful installation process.

Planning and Preparation

  • Determine the location for the service door, considering factors such as convenience, accessibility, and existing structural elements.
  • Measure the opening for the door accurately to ensure that the door fits properly and aligns with the surrounding walls.

Choosing the Right Door

  • Select a service door that complements the style and design of your garage, as well as your personal preferences and budget.
  • Consider factors such as durability, insulation, security features, and maintenance requirements when choosing the door material and configuration.

Gathering Tools and Materials

  • Gather all necessary tools and materials for the installation, including a drill, screwdriver, level, measuring tape, shims, screws, and safety equipment.

Step-by-Step Installation Guide

Follow these step-by-step instructions to install a service door in your garage safely and efficiently.

1. Prepare the Opening

  • Remove any existing trim, framing, or obstacles from the opening where the service door will be installed.
  • Clean the opening thoroughly to remove dirt, debris, and any obstructions that may interfere with the installation process.

2. Install the Door Frame

  • Position the door frame in the opening, ensuring that it is level, plumb, and square.
  • Secure the door frame to the surrounding walls using shims and screws, making sure it is securely anchored and properly aligned.

3. Hang the Door

  • Place the door into the frame, ensuring that it fits snugly and operates smoothly.
  • Install the hinges on the door and attach them to the door frame using screws, following the manufacturer’s instructions.

4. Adjust and Secure

  • Adjust the position of the door as needed to ensure that it opens and closes properly without sticking or binding.
  • Secure the door in place by installing additional screws or fasteners through the hinges and into the door frame.

5. Install Hardware and Accessories

  • Install any hardware and accessories, such as doorknobs, locks, hinges, and weather-stripping, according to the manufacturer’s instructions.
  • Test the operation of the door and ensure that all hardware functions properly.

6. Finish and Seal

  • Apply caulk or sealant around the perimeter of the door frame to prevent drafts, moisture, and pests from entering the garage.
  • Install trim or molding around the door frame to provide a finished appearance and conceal any gaps or imperfections.

Safety Precautions

  • Wear safety glasses and gloves when handling tools and materials to protect against injury.
  • Use caution when working on ladders or scaffolding to prevent falls or accidents.
  • Follow all safety guidelines and instructions provided by the manufacturer throughout the installation process.

Conclusion:

By following these step-by-step instructions and taking necessary safety precautions, you can successfully install a service door in your garage and enjoy the convenience and functionality it provides. If you encounter any difficulties during the installation process, consult the manufacturer’s instructions or seek professional assistance to ensure a safe and efficient installation.

Southern Home Creations Garage Doors & Openers

4110 Tench Rd Suite D, Suwanee, GA 30024, United States

1-770-831-0301

Can You Program A Garage Door Remote From Another Remote – Camco Commercial Door Company

This process, often referred to as “remote cloning” or “remote syncing,” enables you to synchronize multiple remotes to control the same Garage Door Repair Knoxville TN.

While the specific steps and compatibility requirements may vary based on the make and model of the garage door opener and the remote controls involved, the general procedure typically involves activating programming mode on the garage door opener and then transmitting the programming signal from the existing remote to the new remote. Let’s delve into the process in more detail:

1. Check Compatibility: Before attempting to program a garage door remote from another remote, verify that both remotes are compatible with the garage door opener and designed to work together. Check the manufacturer’s instructions or specifications to confirm compatibility between the remotes and the opener.

2. Determine Programming Method: Garage door openers offer various methods for programming additional remotes, such as using a “learn” button on the opener motor unit, entering a specific code sequence, or cloning the signal from an existing remote. Determine the programming method supported by your garage door opener and refer to the manufacturer’s instructions for detailed steps.

3. Access Programming Mode: To program the garage door remote from another remote, you’ll typically need to access programming mode on the garage door opener. This often involves pressing and releasing the “learn” button on the motor unit to initiate the programming process.

4. Activate Cloning Mode on Existing Remote: If your garage door opener supports cloning or copying signals from an existing remote, activate cloning mode on the existing remote by following the instructions provided by the manufacturer. This usually entails pressing specific buttons or a combination of buttons to enable cloning mode.

5. Transmit Signal to New Remote: Once cloning mode is activated on the existing remote, position the new remote close to the existing remote and press the appropriate buttons on both remotes simultaneously. The existing remote will transmit its programming signal to the new remote, copying its code and programming it to operate the garage door opener.

6. Verify Programming: After transmitting the programming signal, verify that the new remote has been successfully programmed by testing its functionality. Press the programmed button on the new remote to open or close the garage door and ensure that the door responds as expected.

7. Repeat if Necessary: If you have multiple remotes that you want to program to the same garage door opener, repeat the cloning process for each additional remote. Ensure that each remote is successfully programmed before proceeding to the next one.

8. Secure Programming Mode: Once all desired remotes have been programmed, secure programming mode on the garage door opener to prevent unauthorized access or accidental reprogramming. This may involve pressing the “learn” button again or following specific instructions provided by the manufacturer.

9. Troubleshooting: If you encounter any issues or difficulties during the programming process, refer to the manufacturer’s instructions for troubleshooting tips and guidance. Common issues may include signal interference, improper button sequences, or low battery power in the remotes.

10. Conclusion:

In conclusion, programming a garage door remote from another remote is a convenient method for synchronizing multiple remotes to control the same garage door opener. By following the appropriate programming method and ensuring compatibility between the remotes and the opener, you can successfully program additional remotes to your garage door opener system. Enjoy the convenience and flexibility of controlling your garage door from multiple remotes with ease.

Camco Commercial Door Company

1-865-776-9455

Page 1 of 60

Powered by WordPress & Theme by Anders Norén