Local Businesses Blog in Texas

Tag: heating repair

How To Address Uneven Heating Or Cold Spots In A Home – Jenny Beauty Supply Super Center


Heating Repair Service Dallas TX  Uneven heating can result from various factors, including inadequate insulation, ductwork issues, thermostat problems, or blocked vents.

Here’s a comprehensive guide on how to address and resolve uneven heating or cold spots in your home:

1. Identify the Problem Areas:

  • Walk through your home and identify areas where temperature variations are noticeable. Pay attention to rooms that feel colder or warmer than others, as well as areas near windows, exterior walls, or poorly insulated spaces.

2. Check Air Vents and Registers:

  • Ensure that all supply and return vents are open and unobstructed. Blocked vents can restrict airflow and lead to uneven heating. Remove any furniture, drapes, or other obstructions blocking the vents and ensure they are not covered by rugs or curtains.

3. Balance Airflow:

  • Adjust the airflow to balance temperature distribution throughout your home. Closing partially open vents in warmer rooms and opening vents in cooler areas can help redistribute airflow and alleviate temperature discrepancies.

4. Clean Air Ducts and Registers:

  • Dirty or clogged air ducts and registers can restrict airflow and lead to uneven heating. Use a vacuum cleaner with a brush attachment to remove dust, debris, and pet hair from air ducts and registers. Consider hiring a professional duct cleaning service for thorough cleaning if needed.

5. Inspect and Seal Ductwork:

  • Inspect the ductwork for leaks, gaps, or disconnected sections that could allow conditioned air to escape or unconditioned air to enter. Seal any leaks or gaps using foil tape or mastic sealant to improve duct efficiency and prevent heat loss.

6. Upgrade Insulation:

  • Inadequate insulation in walls, floors, and ceilings can contribute to temperature variations and cold spots. Upgrade insulation in poorly insulated areas, especially in attics, crawl spaces, and exterior walls, to improve thermal efficiency and reduce heat transfer.

7. Address Window Drafts:

  • Drafty windows can allow cold air to infiltrate your home and create cold spots near windows. Seal gaps and cracks around windows with weatherstripping or caulking to prevent drafts and improve energy efficiency. Consider installing insulated window treatments such as curtains or cellular shades for additional insulation.

8. Optimize Thermostat Settings:

  • Adjust your thermostat settings to optimize comfort and energy efficiency. Consider using a programmable or smart thermostat to create customized heating schedules based on your daily routine. Program lower temperatures at night or when away from home to save energy without sacrificing comfort.

9. Install Zoned Heating Systems:

  • Zoned heating systems allow you to control the temperature in different areas or zones of your home independently. Install dampers in ductwork to regulate airflow to individual zones and adjust temperatures according to occupants’ preferences.

10. Consider Supplemental Heating Solutions:

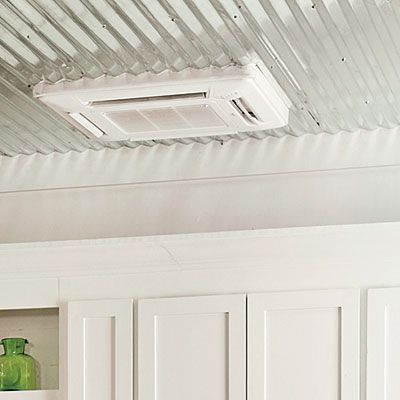
  • In areas with persistent cold spots, consider using supplemental heating solutions such as space heaters, radiant floor heating, or ductless mini-split systems to provide additional warmth and improve comfort without overworking your primary heating system.

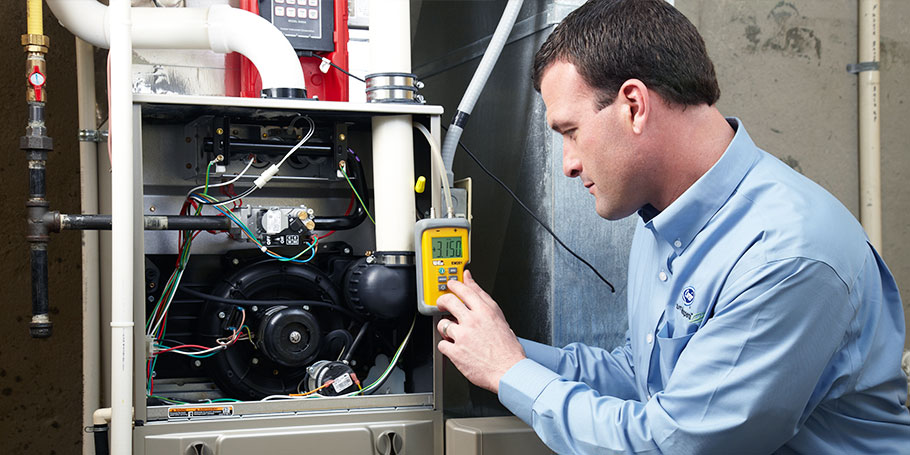
11. Conduct Regular Maintenance:

  • Schedule regular maintenance for your heating system to ensure optimal performance and efficiency. Replace air filters regularly, inspect and clean components, and schedule professional tune-ups to identify and address potential issues before they escalate.

12. Consult a Professional:

  • If you’re unable to resolve uneven heating issues on your own or if the problem persists despite your efforts, consult a qualified HVAC technician for a comprehensive evaluation of your heating system. A professional technician can diagnose underlying issues, recommend appropriate solutions, and ensure your home’s heating system operates efficiently and effectively.

Conclusion:

  • Heating Repair Service Dallas TX  By following the steps outlined above and consulting with a professional HVAC technician when needed, you can achieve consistent and comfortable heating throughout your home while optimizing energy efficiency.

Jenny Beauty Supply Super Center

4343 Gannon Ln #100, Dallas, TX 75237, United States

1-972-283-9000

https://maps.app.goo.gl/DVvHkpZhjENGoZK37

How to Replace Air Conditioning Unit – Bedford AC & Heat

When it comes to replacing an air conditioning unit, I’ve had some firsthand experience with the process. While I’m not a professional HVAC technician, I can share some general insights based on my own experiences. Please note that every installation is unique, and it’s crucial to consult the manufacturer’s instructions and seek professional assistance if needed.

Here’s a step-by-step guide based on my personal knowledge and by following steps from Air Conditioning Repair Bedford TX:

  1. Evaluate Your Needs: The first step is to assess your cooling requirements and determine the appropriate size and type of air conditioning unit for your space. Factors such as the size of the area, cooling capacity required, energy efficiency ratings, and compatibility with your existing HVAC system should be considered. It’s always wise to consult with an HVAC professional to ensure you choose the right unit for your specific needs.
  2. Gather Tools and Equipment: Before starting the replacement process, gather all the necessary tools and equipment. Typical tools may include screwdrivers, wrenches, a level, duct tape, insulation, electrical tape, and a refrigerant recovery unit (if applicable). Having these tools readily available will make the installation process smoother.
  3. Turn off Power: Safety is paramount, so before beginning any work, ensure that the power to the existing air conditioning unit is turned off. Locate the electrical disconnect switch or shut off the circuit breaker that controls the unit. This step helps prevent electrical accidents during the replacement process.
  4. Remove the Old Unit: Disconnecting the old unit from the electrical and refrigerant lines is the next step. Take caution and carefully disconnect any wiring, making sure to label them for future reference. Remove any mounting brackets or screws that secure the unit in place. With care, slide out the old unit, ensuring not to damage any surrounding components. If necessary, enlist the help of another person to safely remove the unit.
  5. Prepare the Mounting Area: Take a close look at the area where the new unit will be installed. Make sure it is structurally sound and capable of supporting the weight of the new unit. Clean the area thoroughly, removing any debris or obstacles that may hinder the installation process. Preparing the mounting area properly is essential for a stable and secure installation.
  6. Install the New Unit: Follow the manufacturer’s instructions carefully for installing the new air conditioning unit. Begin by attaching any mounting brackets or supports securely to the structure. Then, with caution, lift and position the unit onto the mounting area, ensuring it is level using a level tool. Connect the electrical wiring, making sure to follow the proper connections and using electrical tape to secure them. Next, connect the refrigerant lines using the appropriate fittings and insulation.
  7. Make Necessary Adjustments: Once the new unit is installed, it’s important to make any necessary adjustments to ensure proper airflow and distribution of conditioned air. Adjust any airflow dampers or registers as needed. Take the time to double-check that all electrical and refrigerant connections are secure and properly sealed.
  8. Test the Unit: With the installation complete, it’s time to test the new air conditioning unit. Restore power to the unit by turning it on and check its operation. Ensure that it cools effectively and that all functions, such as temperature control and fan speed, work properly. Listen for any unusual noises or vibrations and observe the unit for any signs of leaks or issues.
  9. Professional Inspection and Maintenance: While you may have successfully installed the new unit, it’s still advisable to have a professional HVAC technician inspect the installation. They can verify the proper installation and perform any necessary maintenance tasks, such as checking refrigerant levels, cleaning coils, and ensuring optimal system performance.

Overall, as stated in Air Conditioning Repair Bedford TX, while I’ve shared my personal insights on replacing an air conditioning unit, it’s crucial to note that each installation can vary, and professional expertise is highly recommended. HVAC systems are complex, and a professional technician has the necessary knowledge and experience to handle the installation safely and efficiently.

Bedford AC & Heat

3901 Airport Fwy #322, Bedford, TX 76021, United States

817-623-5210

Powered by WordPress & Theme by Anders Norén