Local Businesses Blog in Texas

Category: Window Cleaning Service

What Is The Best Way To Clean Windows In A High-Rise Building – DFW Window Cleaning Colleyville

Colleyville Window Cleaning Service unique challenges due to the height and accessibility issues.

However, with careful planning, the right equipment, and safety measures, you can achieve sparkling, clear windows even in the highest reaches of a skyscraper. In this comprehensive guide, we’ll explore the best ways to clean windows in a high-rise building, ensuring both efficiency and safety.

1. Safety First: Before delving into the cleaning process, prioritize safety. High-rise window cleaning involves working at heights, and safety should be the top priority. Ensure compliance with local safety regulations, and if needed, hire professional window cleaning services with expertise in high-rise buildings.

2. Assess the Building Structure: Before starting the cleaning process, thoroughly assess the structure of the high-rise building. Take note of any architectural features, setbacks, or obstacles that may affect the window cleaning process. This information will help you plan the most efficient approach.

3. Obtain Necessary Permits: Depending on the location and building regulations, you may need permits or approvals to conduct high-rise window cleaning. Check with local authorities to ensure compliance with safety and environmental standards.

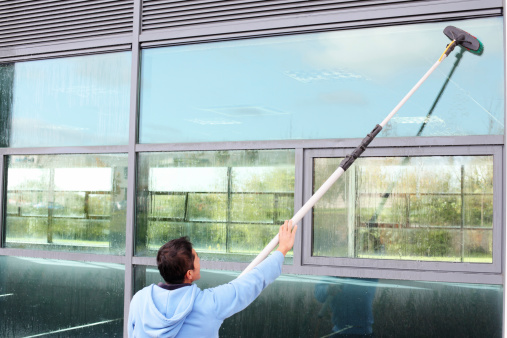
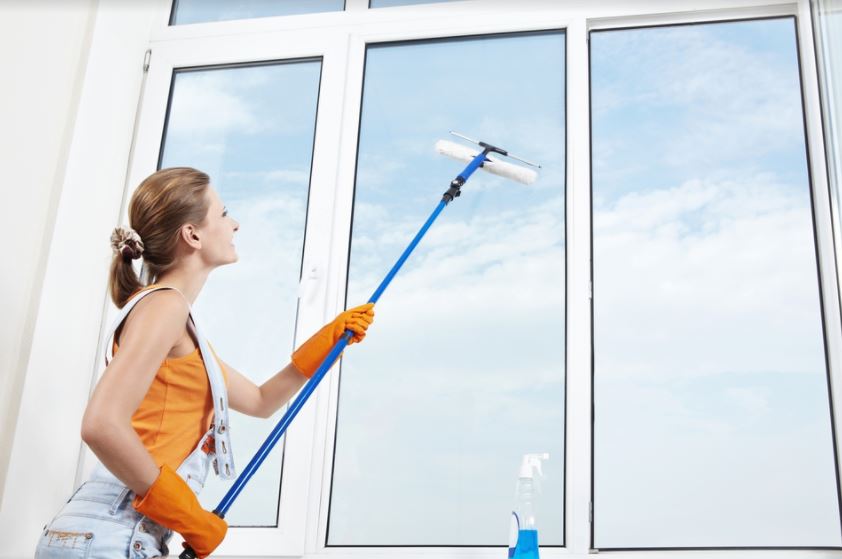
4. Choose the Right Equipment: Invest in high-quality and industry-approved window cleaning equipment suitable for high-rise buildings. This may include telescopic poles, water-fed brushes, safety harnesses, and a reliable suspension system if working from a platform or bosun’s chair.

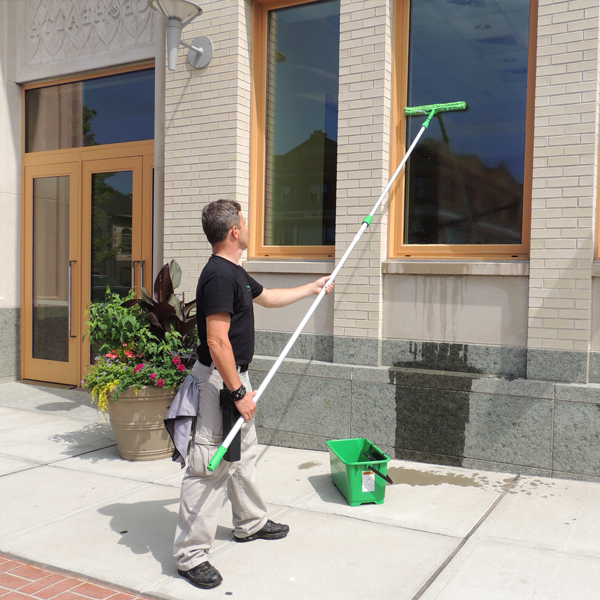
5. Water-Fed Pole System: Consider using a water-fed pole system, which allows for cleaning windows at heights without the need for ladders or scaffolding. These poles are equipped with brushes and water jets, providing a thorough clean while ensuring the safety of the operator.

6. Rope Access Technique: Rope access is a commonly used technique for high-rise window cleaning. Certified technicians use industrial ropes and harnesses to access and clean windows from the exterior of the building. This method is efficient and widely used in skyscraper maintenance.

7. Boom Lifts or Cherry Pickers: In some cases, especially for windows that are difficult to reach, boom lifts or cherry pickers may be employed. These hydraulic platforms provide a stable and elevated work platform for window cleaners to access high windows.

8. Exterior Building Maintenance Units (BMUs): Some high-rise buildings are equipped with exterior Building Maintenance Units (BMUs) or window-washing gondolas. These motorized systems allow window cleaners to move horizontally and vertically along the building facade, reaching windows at various heights.

9. Coordinate with Building Management: Work closely with building management to coordinate window cleaning schedules. They can provide valuable information about building access points, safety protocols, and any specific requirements for window cleaning.

10. Weather Considerations: Be mindful of weather conditions when scheduling high-rise window cleaning. Strong winds, rain, or extreme temperatures can impact the safety and effectiveness of the cleaning process. Plan for optimal weather conditions to ensure a successful operation.

11. Use Professional Cleaning Solutions: Choose professional-grade window cleaning solutions suitable for high-rise buildings. These solutions are formulated to provide effective cleaning without leaving streaks or residue on the windows.

12. Implement a Water Purification System: If using a water-fed pole system, consider implementing a water purification system. Purified water reduces the likelihood of streaks or water spots on the windows, leaving a pristine finish.

13. Focus on Safety Training: If you have an in-house window cleaning team, prioritize safety training. Ensure that all team members are well-trained in using safety equipment, harnesses, and following proper procedures for high-rise window cleaning.

14. Plan for Regular Maintenance: Establish a regular window cleaning schedule to prevent the buildup of dirt and grime on high-rise windows. Regular maintenance ensures that windows remain clean and clear, enhancing the building’s aesthetics.

15. Consider Environmental Impact: Choose cleaning solutions that have minimal environmental impact. Some high-rise buildings may have specific requirements for environmentally friendly cleaning products.

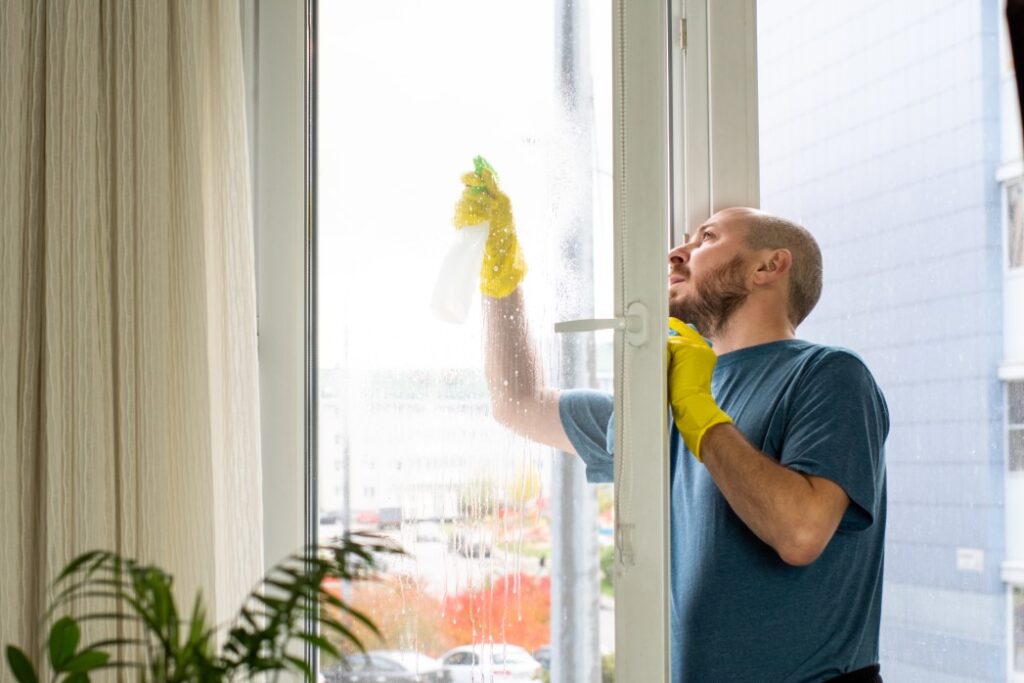
16. Interior Window Cleaning: While the focus is often on exterior windows, don’t neglect interior window cleaning. Work with building management to coordinate access to interior spaces for thorough cleaning.

17. Use Microfiber Cloths for Detailing: For a finishing touch, use microfiber cloths for detailing. These cloths are effective in removing any remaining streaks or water spots, leaving the windows crystal clear.

18. Post-Cleaning Inspection: After completing the window cleaning process, conduct a thorough inspection to ensure that all windows are clean and free of streaks or spots. Address any areas that may need additional attention.

19. Document and Report Issues: Document any issues or concerns observed during the cleaning process and report them to building management. This collaborative approach helps address maintenance issues promptly.

20. Professional Window Cleaning Services: For complex high-rise window cleaning tasks, consider hiring professional window cleaning services with experience in working on tall buildings. They have the expertise, equipment, and safety measures in place for efficient and safe window cleaning.

21. Evaluate New Technologies: Stay informed about new technologies in high-rise window cleaning. Advancements in robotics and drone technology are being explored for window cleaning applications in some high-rise buildings.

22. Consult Experts for Unusual Architectural Features: If the high-rise building has unusual architectural features or challenging design elements, consult with experts in high-rise window cleaning. They can provide insights and solutions tailored to the building’s specific requirements.

23. Celebrate Success: Once the high-rise window cleaning is successfully completed, take a moment to celebrate the success. Enjoy the improved aesthetics and clarity that clean windows bring to the building.

In conclusion, Colleyville Window Cleaning Service requires a strategic and safety-focused approach. By employing the right equipment, techniques, and safety measures, you can achieve impeccable windows that enhance the overall appearance of the skyscraper. Whether using water-fed poles, rope access, or other methods, prioritizing safety and efficiency is key to a successful high-rise window cleaning operation.

DFW Window Cleaning Colleyville

1808 Maplewood Trail, Colleyville, TX 76034, United States

1-817-813-8010

How Do I Clean Windows Without A Professional Streak-Free Finish – Plano Window Cleaning & Glass Repair

Plano Window Cleaning Service without hiring a professional is a task that can be accomplished with the right tools, techniques, and a bit of patience.

In this comprehensive guide, we’ll explore step-by-step instructions and valuable tips to help you clean your windows like a pro and enjoy clear, spotless glass.

1. Gather Your Cleaning Supplies: Before you start, gather all the necessary cleaning supplies. You will need a squeegee, a bucket, a scrubber or sponge, distilled white vinegar, dish soap, and microfiber cloths or lint-free paper towels. Having these items on hand will make the cleaning process more efficient.

2. Choose the Right Day: Timing is crucial when it comes to window cleaning. Select a day with overcast or cloudy weather. Cleaning windows in direct sunlight can cause the cleaning solution to dry too quickly, leading to streaks and water spots. Overcast days provide an ideal environment for achieving a streak-free finish.

3. Remove Dust and Debris: Before applying any cleaning solution, use a dry brush or duster to remove dust, cobwebs, and loose debris from the window frames and sills. This pre-cleaning step prevents dirt from spreading around during the cleaning process.

4. Create a Cleaning Solution: Mix a solution using equal parts distilled white vinegar and water. If your windows have accumulated grease or grime, add a few drops of dish soap to the mix. This solution will effectively break down dirt and leave your windows sparkling.

5. Dip and Scrub: Dip a scrubber or sponge into the cleaning solution and generously scrub the entire window surface. Pay extra attention to areas with built-up grime or spots. Ensure that every inch of the window is covered, including corners and edges.

6. Master the Squeegee Technique: The squeegee is a key tool for achieving a streak-free finish. Wet the squeegee blade and start at the top of the window. Pull it down in a straight, vertical motion, wiping the blade with a clean, dry cloth after each pass. Overlapping each stroke slightly prevents streaks from forming.

7. Wipe Edges and Sills: After squeegeeing, use a damp cloth to wipe down the edges and sills of the window. This step is crucial to remove any remaining cleaning solution and ensures a thorough clean. Pay attention to details to achieve a polished look.

8. Microfiber Magic: For the final touch, use a microfiber cloth or lint-free paper towels to polish the glass. Microfiber is excellent for absorbing moisture without leaving lint behind, providing a crystal-clear finish to your windows.

9. Check for Streaks: Step back and inspect the window for any lingering streaks or spots. If you notice imperfections, reapply the cleaning solution and repeat the squeegee and wiping steps until the glass is flawless. A thorough spot check guarantees a pristine result.

10. Tackle Both Sides: If your windows have multiple panes, don’t forget to repeat the entire cleaning process on the other side. Cleaning both sides ensures a consistent, crystal-clear appearance throughout your windows.

11. Prevent Future Streaks: To prevent future streaks, consider adding a water repellent treatment to your windows. These treatments create a protective barrier that makes it harder for streaks and water spots to form.

12. Regular Maintenance: Make window cleaning a regular part of your home maintenance routine. Consistent cleaning prevents the buildup of dirt and grime, making each subsequent cleaning session more efficient and effective.

Additional Tips for a Professional Finish:

  • Use Distilled Water: If you’re dealing with hard water, using distilled water in your cleaning solution can help prevent mineral deposits on your windows, contributing to a streak-free finish.
  • Work in Sections: Rather than attempting to clean the entire window at once, work in manageable sections. This ensures that the cleaning solution doesn’t dry before you have a chance to squeegee, minimizing the risk of streaks.
  • Change Your Cloth or Paper Towel: If you notice your cloth or paper towel getting too damp or dirty during the process, switch to a fresh one. A clean, dry wiping material is essential for achieving a streak-free finish.
  • Be Mindful of Window Frames: While focusing on the glass is crucial, don’t neglect the window frames. Wipe down the frames with a damp cloth to ensure a thorough and polished look.
  • Adjust Your Technique: Depending on the size and shape of your windows, you might need to adjust your cleaning technique. Experiment with the angle and pressure applied during the squeegeeing process to find what works best for your specific windows.

Conclusion:

Achieving a streak-free, professional finish when Plano Window Cleaning Service is entirely within reach with the right tools and techniques. By following these step-by-step instructions and incorporating the additional tips provided, you can transform your window cleaning routine into a satisfying and effective process, leaving you with clear, sparkling glass that enhances the overall appearance of your home.

Plano Window Cleaning & Glass Repair

1201 Legacy Dr #2114, Plano, TX 75023, United States

1-972-544-1373

How Do I Clean Windows With Multiple Panes – NRH Window Cleaning & Glass Repair

Window Cleaning Service North Richland Hills TX add a touch of sophistication to any home, but they also present a unique challenge when it comes to cleaning.

The intricate design and numerous surfaces can make the process seem daunting, but fear not—this comprehensive guide will walk you through the best practices for achieving spotless, streak-free windows with multiple panes.

Why Cleaning Multiple Panes Requires Special Attention

Cleaning windows with multiple panes is different from tackling a single large pane. Here’s why it requires special attention:

Intricate Design:

Multiple-pane windows often feature intricate designs with dividers or muntins. Cleaning each section requires precision to ensure no spot is left untouched.

Access Challenges:

Reaching every part of the window can be challenging, especially for windows on higher floors. The design may limit access to certain areas, requiring specific tools and techniques.

Potential for Streaks:

With more surfaces to clean, the likelihood of streaks increases. Careful cleaning methods and the right tools are crucial to achieving a streak-free finish.

Dust and Grime Accumulation:

The dividers and crevices in multiple-pane windows can trap dust and grime, making thorough cleaning essential to maintain the window’s clarity and appearance.

Step-by-Step Guide: Cleaning Windows with Multiple Panes

Gather Your Supplies

Before you begin, assemble the necessary supplies:

  • Soft-bristle brush or vacuum cleaner with an attachment
  • Microfiber cloths or sponges
  • Mild detergent or specialized window cleaner
  • Warm water
  • Squeegee
  • Cotton swabs for detailed cleaning
  • Optional: Extendable cleaning pole for higher windows

Remove Loose Debris

Start by removing loose dirt and debris from the window. Use a soft-bristle brush or a vacuum cleaner with a brush attachment to gently sweep away dust, cobwebs, and other particles. Pay special attention to the dividers and corners.

Wet the Surface

Dampen a microfiber cloth or sponge with a mixture of warm water and a mild detergent or specialized window cleaner. Gently wipe down each pane, ensuring you cover the entire surface, including the dividers. This initial step helps break down dirt and grime.

Squeegee Technique

To achieve a streak-free finish, use a squeegee to remove the cleaning solution. Start at the top of the window and pull the squeegee down in a straight, overlapping motion. Wipe the squeegee blade with a clean cloth after each pass. Repeat this process for each pane.

Cotton Swabs for Detailing

For the areas between dividers or any spots the squeegee can’t reach, use cotton swabs. Dip the cotton swab in the cleaning solution and carefully clean these hard-to-reach areas. This meticulous detailing ensures a thorough cleaning.

Repeat on Both Sides

If your multiple-pane windows are accessible from both sides, repeat the process on the other side. This ensures a comprehensive clean and allows you to address any streaks or spots that may have been missed.

Check for Streaks

After cleaning, inspect each pane for streaks or residues. If you notice any, use a dry microfiber cloth to buff the surface gently. This final touch ensures a crystal-clear finish.

Tips for Cleaning Efficiency and Effectiveness

Work on Overcast Days:

Cleaning windows with multiple panes is more effective on overcast days. Direct sunlight can cause cleaning solutions to dry too quickly, leading to streaks.

Use the Right Tools:

Invest in high-quality tools like a good squeegee and microfiber cloths. Quality tools make the cleaning process smoother and contribute to better results.

Establish a Routine:

Regular cleaning helps prevent the buildup of dirt and grime. Establish a cleaning routine that suits your schedule and the specific needs of your windows.

Consider Professional Cleaning:

For hard-to-reach or extremely high windows, consider hiring professionals. They have the expertise and tools to clean windows with multiple panes safely and effectively.

Inspect for Damage:

During the cleaning process, inspect the window frames and dividers for any signs of damage. Addressing issues promptly can prevent further deterioration.

Protect Surrounding Areas:

When applying cleaning solutions, protect surrounding areas, such as walls or furnishings, to avoid potential damage. Use drop cloths or towels as needed.

Conclusion:

Window Cleaning Service North Richland Hills TX may require a bit more effort, but the results are well worth it. With the right tools, techniques, and a commitment to regular maintenance, you can enjoy spotless, streak-free windows that enhance the beauty of your home.

NRH Window Cleaning & Glass Repair

7510 Davis Blvd # B, North Richland Hills, TX 76182, United States

1-817-601-6082

Is It Possible To Clean Windows Without Chemicals – Southlake Window Cleaning & Glass Repair

Window Cleaning Service Southlake TX is not only possible but also a popular and eco-friendly approach to maintaining clear and streak-free glass.

Many natural ingredients and simple DIY solutions can effectively remove dirt, grime, and smudges from your windows without the use of harsh chemicals. Let’s explore various methods and ingredients for chemical-free window cleaning.

1. Vinegar and Water Solution: One of the most well-known and effective chemical-free window cleaning solutions is a mixture of white vinegar and water. Mix equal parts vinegar and water in a spray bottle. The acidity of vinegar helps break down dirt and grime, leaving your windows sparkling clean. The smell of vinegar dissipates as it dries.

2. Lemon Juice and Water: For a refreshing alternative, combine lemon juice with water in a spray bottle. Lemon juice not only provides natural acidity for effective cleaning but also leaves a pleasant citrus scent. This solution is particularly useful for removing stains and adding a natural shine to your windows.

3. Baking Soda Paste: Create a baking soda paste by mixing baking soda with a small amount of water. This paste works well for removing stubborn stains or spots on your windows. Apply the paste to the affected areas, scrub gently, and then wipe clean with a damp cloth.

4. Club Soda: Club soda is another chemical-free option for cleaning windows. The carbonation in club soda helps lift dirt and grime from the glass surface. Simply pour club soda into a spray bottle and mist it onto the windows. Wipe with a clean cloth or squeegee for streak-free results.

5. Cornstarch and Water Mixture: Mix cornstarch with water to create a thick, paste-like consistency. Apply the cornstarch mixture to your windows and let it sit for a few minutes. Wipe clean with a damp cloth for a chemical-free shine. This method is effective for removing greasy residues.

6. Microfiber Cloth and Water: Microfiber cloths are excellent for cleaning windows without the need for additional cleaning solutions. Dampen a microfiber cloth with water and use it to wipe away dirt, fingerprints, and smudges. Microfiber’s texture traps and lifts dirt, leaving your windows streak-free.

7. Black Tea Solution: Brew a strong cup of black tea and let it cool. Transfer the tea to a spray bottle and use it as a natural window cleaner. The tannic acid in black tea helps break down dirt and grime. Wipe the windows with a clean cloth or squeegee for a shiny finish.

8. Water and Dish Soap Mixture: Create a simple solution using water and a small amount of mild dish soap. Mix the ingredients in a spray bottle and use it to clean your windows. This method is gentle yet effective for regular window maintenance.

9. Newspaper for Buffing: After cleaning your windows with one of the chemical-free solutions, use crumpled newspaper to buff the glass to a streak-free shine. The texture of newspaper helps polish the glass surface without leaving lint behind.

10. Distilled Water for Spotless Cleaning: Consider using distilled water in your cleaning routine. Regular tap water can contain minerals that leave streaks or spots on the glass. Distilled water, free from impurities, ensures spotless and chemical-free cleaning.

11. Essential Oils for Fragrance: If you prefer a pleasant fragrance while cleaning your windows, add a few drops of your favorite essential oil, such as lavender or peppermint, to your water-based cleaning solution. Essential oils provide a natural and refreshing scent.

12. Ice Cube for Sticker Residue: For windows with sticker residue or stubborn adhesives, rub an ice cube over the affected area to harden the residue. Gently scrape it off with a plastic scraper or the edge of a credit card. Follow up with one of the chemical-free cleaning solutions.

13. Use a Squeegee: To ensure streak-free windows, use a high-quality squeegee. Wet the glass with your chosen chemical-free solution and pull the squeegee down in a straight, vertical motion. Wipe the blade with a clean, dry cloth after each pass.

14. Avoid Direct Sunlight: When cleaning windows without chemicals, choose a time when the sun is not directly shining on the glass. Cleaning under direct sunlight can cause the cleaning solution to dry too quickly, leading to streaks.

15. Regular Maintenance Matters: The key to successfully cleaning windows without chemicals is regular maintenance. By incorporating these chemical-free methods into your routine, you can keep your windows consistently clean and free from harsh cleaning agents.

16. Environmentally Friendly Options: Opting for chemical-free window cleaning aligns with environmentally friendly practices. It reduces the use of harmful chemicals that can impact the environment, making it a sustainable and eco-conscious choice.

17. Budget-Friendly Approach: Cleaning windows without chemicals is not only environmentally friendly but also budget-friendly. Many of the ingredients used in DIY solutions are readily available in most households, making this approach accessible to everyone.

In conclusion, Window Cleaning Service Southlake TX is not only possible but also practical and beneficial for both your home and the environment. By utilizing natural ingredients and simple DIY solutions, you can achieve streak-free, sparkling windows without compromising on cleanliness. Experiment with different methods to find the one that works best for your preferences and enjoy the results of chemical-free window cleaning.

Southlake Window Cleaning & Glass Repair

1052 Summerplace Ln, Southlake, TX 76092, United States

1-817-839-4773

DIY Window Cleaning: Common Mistakes to Avoid – DFW Window Cleaning Coppell

As a proud DIY enthusiast, I’ve always relished the satisfaction of completing household tasks on my own. Window cleaning seemed like a straightforward endeavor – until I encountered a few setbacks and realized that there’s more to it than meets the eye.

I’ll share my journey and shed light on common mistakes to avoid when embarking on the DIY window cleaning adventure as stated in DFW Window Cleaning Coppell TX.

The Allure of DIY Window Cleaning

There’s a certain appeal to tackling window cleaning as a DIY project. It feels like an achievement to restore clarity to your windows and let natural light flood into your home. Plus, it can save you money on professional services. However, beneath the seemingly simple task lies a series of potential pitfalls that can turn your DIY window cleaning project into a frustrating ordeal.

The Window Cleaning Revelation

My journey into DIY window cleaning began when I noticed that my windows had lost their luster. The accumulation of dust, smudges, and streaks had become an eyesore. Armed with enthusiasm and a basic understanding of the process, I set out to reclaim my crystal-clear view of the world outside.

The Common Mistakes

As I embarked on my DIY window cleaning journey, I learned some valuable lessons the hard way. Here are common mistakes that many DIY window cleaners make, and how to avoid them:

1. Neglecting Window Preparation

Mistake: One of the most common mistakes is failing to prepare the windows properly. Neglecting to remove dust, debris, and cobwebs from the window frames and sills before cleaning can lead to streaks and a less-than-perfect finish.

Solution: Begin by using a soft brush or duster to remove any loose dirt, dust, or cobwebs from the window frames, sills, and surrounding areas. This ensures that your cleaning efforts are not hindered by debris.

2. Using the Wrong Cleaning Solution

Mistake: Using the wrong cleaning solution can result in streaks, residue, or damage to your windows. Some DIY window cleaners opt for generic household cleaners that may not be suitable for glass surfaces.

Solution: Choose a cleaning solution specifically designed for windows or create your own using a mixture of water and a small amount of dish soap or white vinegar. Avoid cleaners with harsh chemicals, as they can damage the glass and frames.

3. Overusing Cleaning Solution

Mistake: Applying too much cleaning solution can lead to excess moisture, making it challenging to achieve a streak-free finish. This mistake is often made by those who believe that more cleaning solution equals better results.

Solution: Use a spray bottle to apply a moderate amount of cleaning solution to the glass. You want the surface to be damp but not saturated. This ensures that you have enough moisture to clean effectively without excessive residue.

4. Ignoring the Weather

Mistake: Window cleaning on a sunny, hot day can lead to rapid evaporation of the cleaning solution, resulting in streaks and a hasty cleaning process. Conversely, cleaning windows in freezing temperatures can cause the cleaning solution to freeze on the glass.

Solution: Choose a cloudy or overcast day for window cleaning to prevent the cleaning solution from drying too quickly. If you must clean on a sunny day, work in small sections and wipe the glass promptly to avoid streaks.

5. Using the Wrong Tools

Mistake: Not using the right tools for the job can make window cleaning a frustrating experience. Some DIY window cleaners rely solely on paper towels, which can leave lint and streaks.

Solution: Invest in quality window cleaning tools, including a squeegee and microfiber cloths. A squeegee helps remove cleaning solution effectively, while microfiber cloths are lint-free and ideal for achieving a streak-free finish.

6. Inadequate Drying and Polishing

Mistake: Rushing through the drying and polishing process can leave windows looking streaky and incomplete. Some DIY cleaners neglect to wipe the edges, frames, and sills, leaving moisture behind.

Solution: After using a squeegee, take the time to wipe the edges, frames, and sills with a clean, dry microfiber cloth. This ensures that no moisture or cleaning solution is left behind, resulting in a flawless finish.

7. Skipping the Final Inspection

Mistake: Many DIY window cleaners skip the final inspection and assume their windows are spotless. However, upon closer examination, they may find streaks, spots, or missed areas.

Solution: Always perform a final inspection of your windows. Stand back and examine them from different angles to ensure there are no streaks or spots. Touch up any imperfections with a clean, dry cloth.

The DIY Window Cleaning Routine

Through trial and error, I’ve refined my DIY window cleaning routine to avoid common mistakes and achieve pristine results. Here’s a step-by-step guide to help you navigate your own window cleaning adventure:

Step 1: Gather Your Supplies

Before you begin, ensure you have all the necessary supplies on hand:

  • A bucket
  • Window cleaning solution (commercial or homemade)
  • A spray bottle
  • A squeegee
  • Microfiber cloths or paper towels
  • A soft brush or duster
  • Rubber gloves (optional)

Step 2: Window Preparation

Start by removing dust, debris, and cobwebs from the window frames, sills, and surrounding areas using a soft brush or duster.

Step 3: Apply Cleaning Solution

Prepare your cleaning solution by mixing water with a small amount of dish soap or white vinegar. Fill a spray bottle with the solution and lightly spray the entire window surface.

Step 4: Scrub and Clean

Using a microfiber cloth or sponge, gently scrub the glass in a circular motion. Pay special attention to areas with stubborn spots or build-up.

Step 5: Squeegee It Clean

After scrubbing, use a squeegee to remove the cleaning solution from the glass. Start at the top and pull the squeegee downward in a straight line, wiping the blade clean after each pass. Repeat this process, slightly overlapping each stroke, until the entire window is clean.

Step 6: Wipe Edges and Sills

Use a clean, dry microfiber cloth to wipe down the window edges, frames, and sills. Ensure that no moisture or cleaning solution is left behind.

Step 7: Final Inspection

Stand back and inspect the windows from different angles to check for any streaks, spots, or missed areas. Touch up any imperfections with a clean, dry cloth.

The Satisfaction of DIY Window Cleaning

Based from DFW Window Cleaning Coppell TX, while DIY window cleaning can present its challenges, it also offers a sense of accomplishment and a deep connection to your living space. By avoiding common mistakes and following a well-planned routine, you can achieve the satisfaction of sparkling, streak-free windows that enhance the beauty and comfort of your home.

As I continue my DIY window cleaning journey, I appreciate the lessons learned along the way. Each clean window is a testament to the effort and attention to detail invested in maintaining my living space. So, embrace the adventure, learn from your mistakes, and revel in the clarity and satisfaction that come with DIY window cleaning.

DFW Window Cleaning Coppell

842 Dalmalley Ln, Coppell, TX 75019, United States

469-809-1532

Window Cleaning Safety Equipment: Harnesses and Ladders – DFW Window Cleaning Mckinney

As I gaze out of my office window, marveling at the breathtaking cityscape below, I can’t help but think about the individuals who brave heights to ensure that the glass through which I see this view remains pristine. Window cleaning, often taken for granted, is a profession that demands not only skill and precision but also unwavering dedication to safety.

In this article in reference to DFW Window Cleaning Mckinney, I’ll share my deep appreciation for the role of window cleaning safety equipment, specifically harnesses and ladders, in keeping these brave individuals safe as they scale dizzying heights to provide us with crystal-clear views.

The High-Risk Profession of Window Cleaning

Window cleaning is a high-risk profession that involves working at considerable heights. Whether it’s cleaning windows in skyscrapers, commercial buildings, or residential homes, window cleaners face numerous hazards, including:

  • Falls: The risk of falling from elevated surfaces is a constant concern, especially when cleaning windows on tall buildings.
  • Injury from Equipment: Window cleaning tools, such as squeegees and buckets, can become hazardous objects if dropped from a height.
  • Exposure to Weather: Window cleaners are exposed to the elements, including strong winds, rain, and extreme temperatures.
  • Chemical Exposure: Cleaning solutions used in window cleaning can be caustic and pose health risks if not handled properly.

Given these inherent dangers, the use of safety equipment is not just advisable but essential.

1. Window Cleaning Harnesses: A Lifeline at Heights

Harnesses are the backbone of window cleaning safety equipment. They serve as a lifeline, anchoring window cleaners to the building’s structure and preventing them from falling in the event of a slip or equipment failure.

Types of Window Cleaning Harnesses:

  • Full-Body Harness: This type of harness covers the entire body, distributing the force of a fall evenly and reducing the risk of injury.
  • Chest Harness: Chest harnesses are often used in conjunction with full-body harnesses, providing additional support and stability.
  • Sit Harness: Sit harnesses are designed to be more comfortable for extended periods of suspension. They allow window cleaners to sit and work comfortably while secured to the harness.

Key Features of Window Cleaning Harnesses:

  • Durable Materials: Window cleaning harnesses are constructed from robust materials, such as nylon or polyester webbing, to withstand the rigors of the job.
  • Adjustability: Harnesses are adjustable to ensure a secure and comfortable fit for each individual. Proper fit is essential for safety.
  • Attachment Points: They are equipped with attachment points or D-rings to connect safety lines and lifelines.

2. Safety Ladders: Ascending to New Heights

Ladders are another critical component of window cleaning safety equipment, especially for windows that are not accessible from the ground or require close-up work. However, not just any ladder will do. Safety ladders designed specifically for window cleaning ensure stability and security when working at heights.

Types of Safety Ladders for Window Cleaning:

  • Extension Ladders: These ladders can be extended to reach various heights, making them versatile for different window cleaning tasks.
  • Step Ladders: Step ladders are self-supporting and are often used for shorter tasks where the window cleaner needs to access a specific height.
  • Telescoping Ladders: These compact ladders can be easily transported and adjusted to different heights. They are ideal for mobile window cleaning units.

Key Features of Safety Ladders:

  • Anti-Slip Rungs: Ladder rungs are designed to be slip-resistant, ensuring that window cleaners can maintain secure footing, even when their shoes are wet from cleaning.
  • Stability Braces: Many safety ladders come with stability braces, which provide additional support and prevent wobbling.
  • Load Capacity: The ladder’s load capacity should be sufficient to support the weight of the window cleaner and their equipment.

The Symbiosis of Harnesses and Ladders

One of the most crucial aspects of window cleaning safety is understanding how harnesses and ladders work together seamlessly to protect window cleaners at great heights. The process begins with securing the harness to a reliable anchor point on the building’s structure. This anchor point serves as the primary attachment for the window cleaner’s lifeline.

As the window cleaner ascends the ladder, the harness remains securely fastened, allowing for movement and flexibility. In the event of a fall or loss of balance, the harness distributes the force of the fall, preventing severe injury.

Additional Safety Measures:

  • Safety Lines: Window cleaners may also use safety lines or lifelines, which are attached to the harness and secured independently to another anchor point. These lines provide an additional layer of safety, allowing for a controlled descent in case of an emergency.
  • Training: Proper training in the use of harnesses and ladders is paramount. Window cleaners must be well-versed in safety procedures, equipment operation, and emergency protocols.
  • Regular Inspection: Safety equipment, including harnesses and ladders, should undergo regular inspection and maintenance to ensure they remain in good working condition.

The Value of Professional Window Cleaners

While it’s crucial to understand the role of safety equipment like harnesses and ladders in window cleaning, it’s equally essential to appreciate the expertise and dedication of professional window cleaners. These individuals undergo rigorous training and adhere to strict safety protocols to ensure that every job is completed safely and efficiently.

Professional window cleaners are not only skilled in the use of safety equipment but also in assessing the specific requirements of each job. They consider factors such as building height, window accessibility, and environmental conditions to determine the best approach for a safe and thorough cleaning.

The Consequences of Neglecting Safety Equipment

Neglecting safety equipment in window cleaning can lead to disastrous consequences. Falls from heights can result in serious injuries or even fatalities. The risks extend beyond the well-being of window cleaners; accidents can also pose liabilities for property owners and building management.

Additionally, failure to use safety equipment can compromise the quality of window cleaning. Window cleaners who feel unsafe or unsupported may rush through their work, leading to streaks, missed spots, or inadequate cleaning.

Conclusion: A Higher Perspective on Safety

By following DFW Window Cleaning Mckinney and as I continue to enjoy the unobstructed view from my office window, I am reminded of the dedicated professionals who make it possible. Their commitment to safety, coupled with the proper use of window cleaning safety equipment like harnesses and ladders, ensures that they can carry out their work at dizzying heights while safeguarding their well-being.

So, the next time you witness a window cleaner scaling the heights of a skyscraper or maintaining the clarity of your office view, take a moment to appreciate the harmony of safety equipment and expertise that allows them to rise to the occasion, both figuratively and literally.

DFW Window Cleaning Mckinney

10701 Smithville Pl, McKinney, TX 75071, United States

972-433-579

The Best Window Cleaning Techniques for Streak-Free Results – DFW Window Cleaning Colleyville

As a homeowner who values the clarity and cleanliness of my windows, I’ve spent years perfecting my window cleaning techniques. Streak-free windows not only offer an unobstructed view of the world outside but also enhance the overall appearance of my home. Through trial and error, I’ve discovered the best practices and techniques to achieve those crystal-clear results.

In this article, I’ll share my experiences and insights into the best window cleaning techniques for streak-free windows based from DFW Window Cleaning Colleyville.

The Quest for Streak-Free Windows

Before delving into the techniques, it’s essential to understand why streaks often appear during window cleaning. Streaks typically occur due to the presence of residual cleaning solutions or improper cleaning methods. Achieving streak-free windows requires a combination of the right tools, cleaning solutions, and methods. Let’s explore the techniques that have proven effective in my pursuit of streak-free perfection.

1. Gather the Right Tools and Materials

To embark on your journey toward streak-free windows, you’ll need to gather the following tools and materials:

  • A bucket for mixing and holding your cleaning solution.
  • A squeegee with a rubber blade.
  • A scrubber or window cleaning cloth.
  • A cleaning solution (commercial or homemade).
  • A few lint-free microfiber cloths or paper towels.
  • A ladder or step stool (if necessary).
  • A drop cloth to protect the surrounding area from drips.

Ensure that all your tools and materials are clean and free of debris before you start. Dirty tools can introduce dirt or streaks onto your windows.

2. Prepare Your Cleaning Solution

Whether you prefer a commercial window cleaning solution or a homemade one, ensure it’s suitable for your windows and the specific cleaning needs. Here’s a simple homemade solution that I’ve found effective:

  • Mix equal parts water and white vinegar in a bucket.
  • Add a few drops of dish soap.
  • Stir the solution gently to combine.

This homemade solution is cost-effective, eco-friendly, and highly efficient in removing dirt and grime. If you opt for a commercial cleaner, choose one that is formulated for streak-free results.

3. Remove Loose Debris

Before applying any cleaning solution, it’s crucial to remove loose debris, dust, or cobwebs from the window surface. Use a soft brush, microfiber cloth, or a duster to gently sweep away any loose particles. This step prevents debris from getting mixed with the cleaning solution, which can lead to streaks.

4. Apply the Cleaning Solution

Dip your scrubber or cleaning cloth into the cleaning solution, ensuring it is well-saturated but not dripping. Apply the solution evenly to the window, working from top to bottom. Take care not to oversaturate the glass, as excessive moisture can lead to streaks.

5. Scrub Gently

Using the scrubber or cleaning cloth, gently scrub the entire window surface. Pay special attention to areas with stubborn stains, smudges, or built-up grime. It’s essential to agitate the dirt to loosen it from the glass.

6. Squeegee from Top to Bottom

Now comes the critical step for achieving streak-free windows: squeegeeing. Start at the top corner of the window and pull the squeegee down in a single, continuous motion. Wipe the blade of the squeegee with a clean, lint-free cloth after each pass. This removes any residual cleaning solution and prevents streaks from forming.

Pro Tip: To avoid streaks, it’s important to maintain consistent pressure on the squeegee throughout the entire pass. Begin with the squeegee at a slight angle and gradually straighten it as you move down the glass.

7. Wipe the Edges and Sills

After squeegeeing the glass, use a clean microfiber cloth or paper towel to wipe any remaining moisture from the window edges, sills, and frames. This step prevents water from running down and creating streaks.

8. Final Inspection

Once you’ve completed the squeegeeing and wiped down the edges, step back and inspect your work. Look at the window from different angles to ensure there are no streaks, smudges, or spots left behind. If you spot any imperfections, touch up the area with a clean, dry cloth or the squeegee.

Additional Tips for Streak-Free Windows

Achieving streak-free windows requires attention to detail and practice. Here are some additional tips to help you master the technique:

  1. Use a Quality Squeegee: Invest in a high-quality squeegee with a rubber blade that fits snugly in the frame. A good squeegee is essential for achieving streak-free results.
  2. Choose the Right Time: Avoid cleaning windows on a sunny, hot day. Direct sunlight can cause the cleaning solution to dry too quickly, leading to streaks. Opt for a cloudy day or work during the cooler hours.
  3. Keep Your Tools Clean: Clean your squeegee blade and scrubber or cleaning cloth regularly to prevent the buildup of dirt or residue. Dirty tools can transfer debris onto your windows.
  4. Work from Top to Bottom: Always start at the top of the window and work your way down. This prevents drips from running over areas you’ve already cleaned.
  5. Change Cleaning Cloths: Use clean, dry microfiber cloths or paper towels for wiping the squeegee blade and window edges. Using dirty or damp cloths can introduce streaks.
  6. Practice Makes Perfect: Window cleaning is a skill that improves with practice. Don’t be discouraged if your first attempts aren’t perfect. Over time, you’ll become more proficient at achieving streak-free results.

Conclusion: Crystal-Clear Views with Streak-Free Windows

Overall, according to DFW Window Cleaning Colleyville, in my quest for streak-free windows, I’ve discovered that the right tools, materials, and techniques make all the difference. By following the steps outlined in this article and practicing regularly, you can achieve the clarity and shine your windows deserve. Streak-free windows not only provide unobstructed views of the outside world but also contribute to the overall cleanliness and beauty of your home. So, roll up your sleeves, gather your window cleaning supplies, and enjoy the satisfaction of crystal-clear windows that enhance the charm of your living space.

DFW Window Cleaning Colleyville

1808 Maplewood Trail, Colleyville, TX 76034, United States

817-813-8010

Cleaning Windows for Individuals with Respiratory Conditions – Plano Window Cleaning & Glass Repair

As someone who lives with a respiratory condition, I’ve come to appreciate the profound impact that indoor air quality has on my well-being. Creating a space that supports clean and fresh air is essential for managing symptoms and enhancing my quality of life. In this article, I want to share the window cleaning strategies I’ve developed over time, specifically tailored to individuals like me who face respiratory challenges.

By adopting these techniques from Window Cleaning Plano TX, we can create an environment that promotes respiratory health and allows us to breathe more easily.

1. A Breath of Fresh Air

Living with a respiratory condition has taught me that the air we breathe has a direct effect on our comfort and health. Windows, acting as portals between indoor and outdoor air, play a crucial role in this equation. Keeping them clean and free from allergens and pollutants is a step toward ensuring that the air we inhale remains as pure as possible.

2. Timing is Everything

Planning my window cleaning routine around the times when my respiratory symptoms are less intense has been a game-changer. This way, I can tackle cleaning activities without worrying about triggering discomfort. I choose well-ventilated periods and keep windows open to reduce exposure to cleaning fumes.

3. Dusting as a Prelude

Before I dive into the cleaning process, I start by gently dusting the windowsills, frames, and surrounding areas. Using a slightly damp microfiber cloth or an electrostatic duster helps trap dust effectively and prevents it from becoming airborne and aggravating my respiratory symptoms.

4. Nature’s Cleaners: Non-Toxic Solutions

Traditional cleaning products often come with strong fumes that can be particularly challenging for individuals like us. Opting for non-toxic, eco-friendly cleaning solutions or creating my own with ingredients like white vinegar and water has been a gentle yet effective approach to cleaning.

5. Embracing Microfiber Magic

Microfiber cloths have become my cleaning superheroes. These specialized cloths capture particles without requiring harsh chemicals. I dampen a microfiber cloth with my chosen natural cleaning solution and gently wipe down the window surface, confident that I’m achieving a thorough clean without causing any respiratory distress.

6. Masking for Protection

Wearing a mask while cleaning has become a habit that adds an extra layer of protection for my respiratory system. A mask helps filter out particles and potential irritants, allowing me to clean with greater peace of mind.

7. The Gift of Fresh Air: Ventilation

Proper ventilation is my secret weapon against lingering cleaning fumes. I open windows and doors wide while I clean to ensure a steady flow of fresh air, helping to disperse any odors and maintain indoor air quality.

8. Saying No to Aerosols

Aerosol-based cleaning products are a no-go in my cleaning routine. These products can release tiny particles and droplets that worsen respiratory symptoms. Instead, I opt for spray bottles with non-toxic solutions, avoiding the risk of aggravating my condition.

9. Upholstery and Curtains: Tackling Hidden Allergens

Window treatments like curtains and blinds can harbor allergens and dust. Regularly vacuuming or dusting these items helps minimize the potential for airborne irritants. I also choose washable curtains that I can clean periodically to ensure a cleaner indoor environment.

10. Seeking Professional Expertise

If the task of window cleaning becomes too challenging due to my respiratory condition, I don’t hesitate to seek professional cleaning assistance. Professional cleaners are equipped to ensure a thorough clean without compromising indoor air quality.

Conclusion: Breathing in Wellness

In summary, as stated from Window Cleaning Plano TX, for individuals like me who navigate life with a respiratory condition, a clean living space isn’t just a luxury—it’s a necessity. By adopting these window cleaning strategies, I’ve transformed my home into a sanctuary that supports my respiratory health. Clearing away dust, allergens, and pollutants from my windows not only keeps my indoor air fresh but also provides a sense of relief and empowerment. Let’s embark on this journey of cleaner air, clearer windows, and better respiratory well-being, one deep breath at a time.

Plano Window Cleaning & Glass Repair

1201 Legacy Dr #2114, Plano, TX 75023, United States

972-544-1373

DIY Window Cleaning Tools You Can Make at Home – NRH Window Cleaning & Glass Repair

I’d be happy to share my personal experience and insights on creating DIY window cleaning tools at home. Making your own tools for window cleaning not only saves money but also adds a sense of accomplishment to the task.

Here’s how I’ve gone about creating and using these homemade tools according to North Richland Hills Window Cleaning:

1. DIY Window Cleaning Solution Creating my window cleaning solution was a game-changer for me. I used a simple recipe with distilled white vinegar and water. This mixture is not only effective but also safe for various surfaces. Adding a few drops of dish soap helps with stubborn dirt and grime.

2. Homemade Microfiber Cleaning Cloths One of the easiest DIY tools I’ve made is reusable microfiber cleaning cloths. I repurposed old clothing and towels to create these cloths. They are gentle on glass and leave fewer streaks compared to regular towels.

3. DIY Squeegee with Household Items For a makeshift squeegee, I used a piece of rigid plastic or cardboard and attached a rubber strip from an old glove using tape. It wasn’t as professional as a store-bought squeegee, but it got the job done and saved me money.

4. Homemade Window Scrubber I found that making a homemade window scrubber was straightforward and effective. I wrapped a sponge with an old piece of fabric and secured it in place. This tool helped me apply the cleaning solution evenly and loosen dirt before using the squeegee.

5. Extension Pole for High Windows Dealing with high windows was a challenge, but creating a DIY extension pole made a significant difference. I attached a squeegee or scrubber to the end of a broom handle using strong tape. It gave me the reach I needed without needing to use a ladder.

6. Natural Bristle Brush for Frames Cleaning window frames is often overlooked, but I found that a natural bristle brush made from an old paintbrush was effective in removing dirt and grime from frames.

7. Homemade Cleaning Solution Sprayer When I didn’t have a spray bottle on hand, I recycled an empty and cleaned spray bottle. I filled it with my homemade cleaning solution and used it to apply the solution evenly to the windows.

8. Eco-Friendly Rubber Wiper for Condensation To tackle condensation on windows, especially during colder months, I attached a small piece of rubber or silicone to a string or wire to create a makeshift wiper. It was an eco-friendly way to remove condensation without wasting paper towels.

9. Recycled Newspaper for Streak-Free Shine Using old newspapers to achieve a streak-free shine was a revelation. I crumpled up sheets of old newspapers and used them to wipe the glass after using the squeegee. The result was impressive, and it felt good to repurpose something that would have otherwise been discarded.

10. Storage and Organization To keep my DIY window cleaning tools organized, I repurposed an old bucket to create a storage caddy. This made it easy to carry my tools and solutions around as I moved from window to window.

Overall, as per North Richland Hills Window Cleaning, creating these DIY window cleaning tools has not only saved me money but also added a personal touch to my cleaning routine. It’s a satisfying feeling to use tools I’ve crafted myself and see the effective results on my windows. Just remember to prioritize safety and be mindful while using these homemade tools for cleaning.

NRH Window Cleaning & Glass Repair

7510 Davis Blvd # B, North Richland Hills, TX 76182, United States

817-601-6082

My Journey to Crystal-Clear Views: Cleaning Exterior Windows Safely – Southlake Window Cleaning & Glass Repair

As a homeowner who treasures the beauty of natural light and panoramic outdoor views, keeping my exterior windows sparkling clean has always been a priority. However, the idea of cleaning windows at elevated heights used to make me a bit apprehensive. Over time, I’ve learned the importance of safety precautions and the right tools to achieve a pristine finish without compromising my well-being. I

In this guide I got from Southlake Window Cleaning, I’m excited to share my personal insights into safely cleaning exterior windows, offering tips that have helped me maintain a clear view of the world outside while staying safe and confident.

Making Safety a Top Priority

Cleaning exterior windows isn’t just about achieving a picture-perfect finish; it’s also about ensuring my own safety throughout the process. Prioritizing safety has been my guiding principle, allowing me to tackle this task with peace of mind.

Essential Safety Precautions

  1. Weather Watch: I always pick a dry and calm day for window cleaning. Windy or rainy conditions can create hazards and compromise my stability.
  2. Secure Footing: Sturdy non-slip shoes or boots with excellent traction have become my go-to choice. They provide the stability I need on potentially wet or uneven surfaces.
  3. Ladder Care: If I’m using a ladder, I ensure it’s on level ground and stabilized to prevent wobbling. A ladder stabilizer or stand-off keeps the ladder at a safe distance from the window.
  4. Safety Gear: When dealing with significant heights, I seriously consider using a safety harness and rope system to prevent falls. I make sure to undergo proper training to use this equipment effectively.
  5. Teamwork Matters: Whenever possible, I enlist the help of a friend or family member. Having an extra pair of hands not only eases the workload but also adds an extra layer of safety.

Must-Have Tools for the Job

  1. Extension Pole: An extension pole with attachments such as a squeegee and scrubber is a game-changer for cleaning higher windows from the ground. An adjustable and durable pole is a worthy investment.
  2. Reliable Squeegee: A squeegee with a replaceable rubber blade is my go-to tool for achieving a streak-free finish, even on hard-to-reach windows.
  3. Bucket with Handle: A sturdy bucket with a convenient handle is essential for holding water and my preferred cleaning solution. Some buckets even come with built-in squeegee holders.
  4. Microfiber Cloths: These soft and lint-free cloths are my secret weapon for wiping and buffing windows to perfection without leaving unsightly streaks.
  5. Scraper: A scraper with a flat blade comes in handy for tackling stubborn debris or adhesive residues on the window surface. I use it cautiously to avoid scratching the glass.

My Step-by-Step Guide for Safe Exterior Window Cleaning

  1. Preparation is Key:
    • I gather all necessary tools and equipment before starting the cleaning process.
    • Clearing the area around the window of any obstacles ensures a safe and unobstructed workspace.
    • Placing a drop cloth or tarp underneath the window catches any dripping water or cleaning solution.
  2. Safety First:
    • I gear up in appropriate attire, including non-slip shoes and protective gloves.
    • If a ladder is involved, I double-check its stability and positioning.
  3. Preliminary Cleaning:
    • Before diving into the main cleaning process, I remove dust, cobwebs, and loose debris using a brush or duster.
  4. Mixing the Cleaning Solution:
    • A bucket filled with a well-prepared window cleaning solution is essential for effective cleaning.
  5. Getting Down to Business:
    • I dip the scrubber or sponge attachment on the extension pole into the cleaning solution.
    • Gently scrubbing the window from top to bottom ensures even coverage.
  6. Squeegee Mastery:
    • Employing the squeegee attachment on the extension pole, I start at the top corner of the window.
    • Pulling the squeegee down in a straight line and wiping the blade with a cloth after each pass ensures a clear result.
  7. Focusing on Details:
    • A microfiber cloth is my tool of choice for wiping any remaining water or cleaning solution around the edges and corners of the window.
  8. Addressing Stubborn Spots:
    • For particularly stubborn stains or debris, I turn to a scraper with a flat blade. I proceed with caution to prevent accidental scratches.
  9. The Finishing Touch:
    • Thoroughly inspecting the window for streaks or spots is crucial. If needed, I re-squeegee or gently wipe problem areas.
  10. Rinse and Dry:
    • I wrap up by rinsing the window with clean water using the scrubber attachment and squeegee.
    • A final wipe-down of the window edges and sill with a microfiber cloth ensures a dry and spotless finish.

After the Cleaning Session:

  • I ensure that all tools and equipment are properly cleaned and safely stored.
  • Disposing of any cleaning solution and waste responsibly is a part of my post-cleaning routine.

Conclusion: A Clear View, a Safe Approach

According to Southlake Window Cleaning, cleaning exterior windows no longer feels like a daunting task. Armed with safety measures, the right tools, and a systematic approach, I confidently achieve sparkling, streak-free windows without compromising my safety. Through the process of learning, practicing, and sharing these insights, I’ve come to appreciate that a clear view is attainable while prioritizing safety at every step. So, as you embark on your exterior window cleaning journey, remember that a combination of safety precautions and the right tools will help you achieve stunning windows that welcome natural light and enhance the overall appeal of your home.

Southlake Window Cleaning & Glass Repair

1052 Summerplace Ln, Southlake, TX 76092, United States

817-839-4773

Powered by WordPress & Theme by Anders Norén