Local Businesses Blog in Texas

Tag: garage door repair service

Can A Bedroom Have A Door To The Garage – BH Garage Doors and Gates


Whether a bedroom can have a  Garage Door Repair Rockwall TX to the garage depends on various factors, including building codes, safety regulations, and personal preferences.

Here’s a comprehensive exploration of the considerations involved in determining whether it’s appropriate to have a bedroom with a door leading directly to the garage:

1. Building Codes and Regulations:

Building codes and regulations dictate the requirements for residential construction and are enforced by local authorities to ensure the safety and well-being of occupants. These codes often have specific provisions regarding egress, fire safety, and ventilation, which may impact the installation of doors between bedrooms and garages.

  • Egress Requirements: Building codes typically mandate that bedrooms have at least two means of egress, typically in the form of windows or doors leading directly to the exterior of the home. This ensures that occupants have a safe and accessible route to exit the bedroom in the event of an emergency, such as a fire or other hazardous situation.
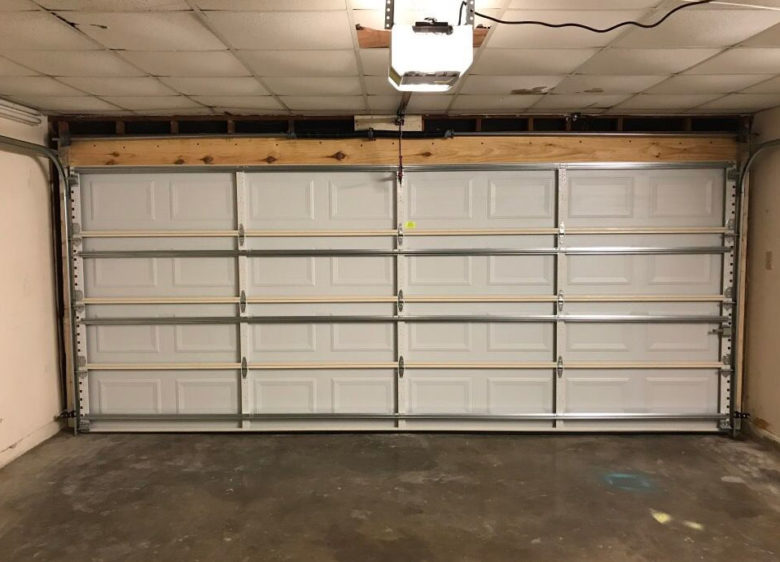
  • Fire Safety: Garages are considered high-risk areas for fires due to the presence of flammable materials such as gasoline, paint, and household chemicals. As a result, building codes often prohibit direct access from bedrooms to garages to minimize the risk of fire spreading to living spaces. Fire-rated doors and proper sealing may be required if such access is permitted.
  • Ventilation and Air Quality: Garages can contain pollutants, odors, and potentially harmful gases such as carbon monoxide from vehicle exhaust. Direct access from a bedroom to the garage may compromise indoor air quality and pose health risks to occupants, particularly if proper ventilation measures are not in place.

2. Safety Considerations:

  • Carbon Monoxide Exposure: Garages are common areas where carbon monoxide (CO) can accumulate, especially if vehicles are running or if there are gas-powered appliances present. A door connecting a bedroom to the garage could increase the risk of CO exposure to sleeping occupants, potentially leading to carbon monoxide poisoning.
  • Security Concerns: Bedrooms with direct access to the garage may pose security risks, as burglars could potentially gain entry to the home through the garage. Reinforced doors, secure locks, and alarm systems may help mitigate these concerns, but homeowners should carefully consider the security implications of such access points.

3. Personal Preferences:

  • Convenience: Some homeowners may appreciate the convenience of having direct access from a bedroom to the garage, especially if the garage serves as a primary entry and exit point for the home. This arrangement can make it easier to transport groceries, luggage, or other items between the car and the bedroom.
  • Privacy: On the other hand, others may prioritize privacy and security and prefer bedrooms to be physically separated from areas such as the garage, which may be frequented by household members, guests, or service providers.

 Garage Door Repair Rockwall TX Consulting with local building officials and professional contractors can provide valuable guidance on whether this configuration is appropriate and, if so, how to ensure compliance with applicable regulations and safety standards.

BH Garage Doors and Gates

4035 N Goliad St, Rockwall, TX 75087, United States

1-214-206-5231

https://maps.app.goo.gl/iYdGkyhiGAiUXN3G7

How To Paint A New Steel Garage Door – Martin Garage Door


Painting a new steel Garage Door Repair Castle Rock CO is a straightforward process that can enhance its appearance and protect it from the elements.

Follow these steps to paint your new steel garage door effectively:

  1. Gather Your Supplies: Before you begin, gather all the necessary supplies:
    • Exterior latex paint specifically formulated for metal surfaces
    • Primer suitable for use on metal
    • Paintbrushes or rollers
    • Painter’s tape
    • Drop cloths or plastic sheeting to protect surrounding areas
    • Sandpaper or sanding block (optional)
    • Tack cloth or damp cloth for cleaning
  2. Prepare the Surface: Start by preparing the surface of the steel garage door for painting. If the door is new, it may already have a factory-applied primer. However, if the surface is rough or has imperfections, you may want to lightly sand it with fine-grit sandpaper to smooth out any rough spots. Use a tack cloth or damp cloth to remove any dust or debris from the surface.
  3. Clean the Surface: Clean the surface of the garage door to remove any dirt, grease, or grime that may prevent the paint from adhering properly. Use a mild detergent or degreaser and water to wash the door thoroughly. Rinse with clean water and allow the surface to dry completely before proceeding.
  4. Protect Surrounding Areas: Use painter’s tape to mask off any areas of the garage door that you do not want to paint, such as windows, handles, or trim. Cover the surrounding areas with drop cloths or plastic sheeting to protect them from overspray or drips.
  5. Apply Primer: Apply a coat of primer to the steel garage door using a paintbrush or roller. Make sure to use a primer specifically designed for metal surfaces. Apply the primer evenly, covering the entire surface of the door. Allow the primer to dry completely according to the manufacturer’s instructions.
  6. Sand (Optional): If necessary, lightly sand the primed surface with fine-grit sandpaper or a sanding block to smooth out any rough areas or imperfections. Wipe away any dust with a tack cloth or damp cloth before proceeding.
  7. Apply Paint: Once the primer is dry and the surface is smooth, it’s time to apply the paint. Stir the paint thoroughly before use, and pour it into a paint tray if using a roller. Apply the paint evenly to the steel garage door using a paintbrush or roller, working in small sections to ensure even coverage. Be careful not to apply too thick a coat to avoid drips or runs.
  8. Allow to Dry: Allow the first coat of paint to dry completely according to the manufacturer’s instructions. Depending on the type of paint used and the environmental conditions, this may take several hours.
  9. Apply Additional Coats (If Needed): If necessary, apply additional coats of paint to achieve the desired color and coverage. Allow each coat to dry completely before applying the next one. Most paint manufacturers recommend applying at least two coats for optimal durability and coverage.
  10. Remove Masking Tape: Once the final coat of paint has dried completely, carefully remove the painter’s tape from the garage door, being careful not to disturb the paint. Dispose of the drop cloths or plastic sheeting used to protect surrounding areas.
  11. Inspect and Touch Up: After the paint has dried completely, inspect the garage door for any missed spots or uneven areas. Touch up any imperfections with additional paint as needed, using a small brush or roller.
  12. Allow to Cure: Allow the painted garage door to cure fully before using it or exposing it to harsh weather conditions. This typically takes several days to a week, depending on the type of paint used and the environmental conditions.

Garage Door Repair Castle Rock CO Following these steps will help you achieve a professional-looking finish and protect your new steel garage door for years to come.

Martin Garage Door

10411 S Parker Rd, Parker, CO 80134, United States

1-303-663-1310

How to Reset Wifi on Ryobi Garage Door Opener-Aztec Garage Door Repair Las Vegas NV

Resetting the Wi-Fi on your Ryobi Garage Door Repair opener is a straightforward process that can be completed in a few simple steps.

Follow the instructions below to reset the Wi-Fi on your Ryobi garage door opener:

Step 1: Prepare for the Reset Before resetting the Wi-Fi on your Ryobi garage door opener, make sure you have the necessary information, such as the Wi-Fi network name (SSID) and password. This information will be required during the setup process. Additionally, ensure that you have access to the garage door opener and a smartphone or computer with Wi-Fi connectivity.

Step 2: Locate the Learn Button The Learn Button is a small button on the back or side of your Ryobi garage door opener. It is typically labeled and can be found near the antenna or on the motor unit. The appearance and location of the Learn Button may vary depending on the model of your garage door opener.

Step 3: Press and Hold the Learn Button To initiate the Wi-Fi reset process, press and hold the Learn Button on your Ryobi garage door opener for approximately 6 seconds. You may need a small tool like a pen or paperclip to press the button effectively. Make sure to hold the button until you see the Wi-Fi indicator light on the garage door opener flash or change its pattern.

Step 4: Connect to the Opener’s Wi-Fi Network After pressing the Learn Button, the Wi-Fi indicator light on your Ryobi garage door opener should start blinking. This indicates that the opener has entered Wi-Fi setup mode. Take your smartphone or computer and go to the Wi-Fi settings menu. Look for available Wi-Fi networks and find the one named similar to your Ryobi garage door opener. It may have a default name like “RyobiOpener” or something similar.

Step 5: Connect to the Opener’s Wi-Fi Network Select the Wi-Fi network associated with your Ryobi garage door opener from the available networks on your smartphone or computer. If prompted, enter the password for the opener’s Wi-Fi network. The default password is usually located on the side or back of the garage door opener or provided in the instruction manual. After entering the password, wait for the connection to be established.

Step 6: Configure the Opener’s Wi-Fi Settings Once connected to the opener’s Wi-Fi network, open a web browser on your smartphone or computer and enter the IP address for the opener. The IP address is often printed on a sticker located on the opener itself. If you can’t find the IP address, refer to the instruction manual or contact Ryobi customer support for assistance.

Step 7: Follow the On-Screen Instructions After entering the IP address in your web browser, you should see the Ryobi garage door opener’s configuration page. Follow the on-screen instructions to configure the Wi-Fi settings. This typically involves selecting your home Wi-Fi network from the list of available networks, entering the network password, and applying the changes.

Step 8: Test the Connection Once you have completed the configuration process, your Ryobi garage door opener should attempt to connect to your home Wi-Fi network. You may need to wait a few moments for the connection to establish. To ensure a successful connection, check the Wi-Fi indicator light on the garage door opener. It should stop blinking and remain solid or display a different pattern.

Step 9: Verify the Connection To confirm that the Wi-Fi reset was successful, use your smartphone or computer to access the Ryobi garage door opener’s app or online portal. Log in to your account or create a new one if necessary. From there, you should be able to control and monitor your garage door opener remotely, as well as receive notifications and alerts.

Congratulations! You have successfully reset the Wi-Fi on your Ryobi garage door opener. Remember to update any connected devices, such as smartphones or tablets, with the new Wi-Fi credentials to ensure uninterrupted access to your Garage Door Repair opener remotely. If you encounter any difficulties during the process, refer to the instruction manual or contact Ryobi customer support for further assistance.

Aztec Garage Door Repair Las Vegas NV

2450 Losee Rd STE A, North Las Vegas, NV 89030

1-702-415-7904

How to Pair Garage Door Opener-Ohio Garage Door Repair

Pairing a Garage Door Repair opener with your device is a straightforward process that allows you to control the door remotely.

Follow the steps below to pair your garage door opener successfully.

  1. Determine compatibility: Check if your garage door opener is compatible with the device you want to pair it with. Most modern garage door openers use wireless technology such as Wi-Fi or Bluetooth for pairing. Ensure that your device supports the same wireless technology.
  2. Prepare your device: Make sure your device is ready for pairing. Ensure that it is turned on and has the necessary wireless features enabled. If required, download and install any companion apps or software provided by the garage door opener manufacturer.
  3. Find the pairing button: Locate the pairing button on your garage door opener. It is usually found on the motor unit, near the antenna wire. Refer to your garage door opener’s manual for specific instructions on finding the pairing button.
  4. Enable pairing mode: Press and hold the pairing button until the indicator light starts flashing. This puts your garage door opener into pairing mode, allowing it to be discovered by your device.
  5. Open device settings: On your device, navigate to the settings menu and open the wireless or Bluetooth settings. Look for the option to scan or search for nearby devices. Start the scanning process.
  6. Discover the garage door opener: While your device is scanning, it should detect the garage door opener in pairing mode. The name or model number of the garage door opener may appear on your device’s screen. Select it to initiate the pairing process.
  7. Enter the pairing code (if applicable): Some garage door openers require a pairing code or password to establish a secure connection. If prompted, enter the code provided in the garage door opener’s manual or on the device’s screen.
  8. Complete the pairing process: Once the pairing code is verified, your device and the garage door opener will establish a connection. This may take a few moments. When the pairing process is complete, you will receive a confirmation message on your device.
  9. Test the connection: To ensure successful pairing, test the connection between your device and the garage door opener. Open the companion app or use the designated controls on your device to send a signal to the garage door opener and observe if it opens or closes as expected.
  10. Finalize setup and troubleshoot: Follow any additional instructions provided by the garage door opener manufacturer to finalize the setup. If you encounter any issues, consult the troubleshooting section in the manual or visit the manufacturer’s website for support.

Remember to keep the Garage Door Repair opener’s manual in a safe place, as it contains specific instructions and troubleshooting tips that may be helpful in the future.

Ohio Garage Door Repair

199 S Chillicothe Rd Ste 212, Aurora, OH 44202

1-440-773-2246

How to Reprogram a Garage Door Opener-First Call Garage Doors

Reprogramming a Garage Door Repair opener is a straightforward process that allows you to update the settings and security codes associated with your garage door.

Whether you’re moving into a new home, need to change the access code, or simply want to refresh your garage door opener’s programming, this guide will provide you with step-by-step instructions to reprogram your garage door opener. Please note that specific instructions may vary depending on the manufacturer and model of your garage door opener, so it’s recommended to consult your opener’s user manual for additional guidance if needed.

Step 1: Gather the Necessary Tools and Information Before you begin reprogramming your garage door opener, make sure you have the following tools and information at hand:

  1. A ladder (if needed)
  2. The manufacturer’s user manual for your garage door opener
  3. A new access code (if you’re changing it)
  4. A pen and paper to note down important information

Step 2: Locate the Programming Button or Panel Most garage door openers have a programming button or panel located on the motor unit, which is typically installed on the ceiling of your garage. Use a ladder if necessary to reach the motor unit safely. The programming button or panel may be labeled as “Learn,” “Set,” or “Program.”

Step 3: Clear Existing Programming (if necessary) If you’re reprogramming an existing garage door opener, it’s essential to clear its existing programming before proceeding. Locate the “Clear” or “Erase” button on your garage door opener and press it. This step may require holding down the button for a few seconds, so consult your user manual for specific instructions.

Step 4: Choose a New Access Code (if applicable) If you’re changing the access code for your garage door opener, decide on a new code that is easy for you to remember but difficult for others to guess. Avoid using easily guessable combinations such as sequential numbers or repetitive patterns.

Step 5: Enter Programming Mode To enter programming mode, you typically need to press and hold the programming button on your garage door opener. Refer to your user manual for the exact steps as they may vary between different models. After pressing the programming button, an indicator light or LED on the motor unit may start blinking, indicating that the garage door opener is in programming mode.

Step 6: Program the New Access Code Once in programming mode, enter the new access code by pressing the corresponding buttons on the garage door opener’s keypad or remote control. Some models may require you to press the programming button again to confirm the new access code. Again, refer to your user manual for precise instructions.

Step 7: Test the New Access Code After programming the new access code, test it by entering the code on the keypad or using the remote control. The garage door opener should respond accordingly, indicating that the reprogramming was successful.

Step 8: Program Additional Features (if desired) Many garage door openers offer additional features, such as controlling multiple garage doors or connecting to smart home systems. If you wish to program any of these features, consult your user manual for specific instructions on how to do so.

Step 9: Record the New Access Code To ensure you don’t forget the new access code, write it down on a piece of paper and keep it in a safe place. It’s important to have a backup in case you need to reference it in the future.

Conclusion: Reprogramming a Garage Door Repair opener is a relatively simple task that allows you to update the access code and settings associated with your garage door. By following the step-by-step instructions outlined in this guide, you should be able to reprogram your garage door opener with ease. Remember to consult your garage door opener’s user manual for model-specific instructions and troubleshooting tips. With your newly programmed garage door opener, you can enjoy enhanced security and convenience for your home.

First Call Garage Doors

20527 FM1093 Unit B205, Richmond, TX 77407

713-248-2684

How to Balance a Garage Door With Side Springs-Atlas Door Company

Balancing a Garage Door Repair with side springs is essential to ensure smooth and safe operation. When a garage door is properly balanced, it will open and close easily, minimizing wear and tear on the components and preventing potential accidents.

Here are the steps to balance a garage door with side springs:

  1. Safety precautions:
    • Before starting any work on the garage door, ensure that the power to the garage door opener is disconnected to prevent accidental activation.
    • Wear protective gloves and safety goggles to protect yourself from any potential injuries.
  2. Inspect the door and springs:
    • Examine the garage door for any visible damage, such as bent tracks, broken hinges, or frayed cables. Address any issues before attempting to balance the door.
    • Check the side springs for signs of wear or damage. If the springs are worn out or damaged, they should be replaced before balancing the door.
  3. Release tension from the springs:
    • To balance the door, you need to relieve the tension from the side springs.
    • Locate the winding cones at the end of each side spring. These cones hold the tension on the springs.
    • Insert a winding bar into one of the holes on the cone and slowly rotate it downward to release the tension. Repeat the process for the other side spring.
  4. Test the balance of the door:
    • Once the tension is released, manually open the garage door halfway and then let go.
    • If the door stays in place or moves slightly up or down, it is properly balanced. However, if it falls or rises quickly, it is unbalanced and requires adjustment.
  5. Adjusting the tension:
    • To balance the door, you need to adjust the tension on the side springs.
    • Increase tension: If the door falls quickly when released, you need to increase the tension. Insert the winding bar into the lower hole of the winding cone and rotate it upward, adding tension to the spring. Repeat this process for both side springs, adding an equal amount of tension to each side.
    • Decrease tension: If the door rises quickly when released, you need to decrease the tension. Insert the winding bar into the upper hole of the winding cone and rotate it downward, reducing tension. Again, repeat the process for both side springs, adjusting the tension equally.
  6. Test the balance again:
    • After making adjustments, manually open the door halfway and release it.
    • Repeat the test multiple times to ensure the door stays in place or moves slightly up or down without falling or rising quickly.
    • Continue adjusting the tension as necessary until the door remains balanced.
  7. Final adjustments and lubrication:
    • Once the door is properly balanced, ensure that all other components, such as rollers, tracks, and hinges, are in good condition.
    • Lubricate all moving parts with a recommended garage door lubricant to ensure smooth operation.
  8. Regular maintenance:
    • To maintain the balance of the garage door, periodically inspect all components for wear or damage.
    • Lubricate the moving parts every few months or as recommended by the manufacturer.
    • If you notice any issues with the balance or operation of the door, address them promptly to prevent further damage.

Remember, balancing a Garage Door Repair can be challenging and potentially dangerous if not done correctly. If you are unsure about any step or encounter significant difficulties, it is recommended to consult a professional garage door technician for assistance.

Atlas Door Company

6817 Sundance Cir W, Joshua, TX 76058, United States

1-817-295-3660

Powered by WordPress & Theme by Anders Norén