Local Businesses Blog in Texas

Tag: garage door repair miami fl

How To Open Electric Garage Door Manually – All American Doors


Garage Door Repair Miami FL, is a necessary skill in situations like power outages or when the automatic opener malfunctions.

Below is a detailed guide on how to open an electric garage door manually:

1. Locate the Emergency Release Mechanism:

The emergency release mechanism is typically a red cord or handle hanging from the center rail or trolley of the garage door opener. It’s designed to disengage the door from the opener so it can be operated manually.

2. Access the Release Mechanism:

If necessary, use a stepladder or stool to reach the release mechanism. Once you’ve located it, grasp the handle or cord firmly with your hand.

3. Pull Down the Release Mechanism:

Apply steady downward pressure to the release mechanism to disengage the garage door from the automatic opener. You may need to pull at a slight angle depending on the mechanism’s design.

4. Manually Lift the Garage Door:

With the release mechanism activated, stand facing the garage door. Position yourself near the bottom edge of the door, where it’s safest to lift.

5. Lift the Door:

Using both hands, grip the bottom edge of the garage door firmly. Lift the door upward with a smooth and steady motion. Be cautious of the door’s weight, especially for larger doors.

6. Fully Open the Door:

Continue lifting the door until it’s fully open. You may need to step back slightly to allow the door to clear the opening. Ensure the door is securely supported in the open position.

7. Secure the Door:

Once the door is fully open, prop it up securely using a sturdy object such as a block of wood or a ladder. This prevents the door from accidentally closing while you’re working.

8. Re-engage the Electric Garage Door Opener (Optional):

After addressing the issue that required manual operation, you may need to re-engage the garage door with the automatic opener. To do this, locate the release mechanism and push it back into its original position.

9. Test the Garage Door:

Once the opener is re-engaged, test the garage door to ensure it’s functioning properly. Use the wall-mounted control panel or remote transmitter to open and close the door.

Safety Precautions:

  • Always exercise caution when operating a garage door manually, as they can be heavy and potentially dangerous if mishandled.
  • Avoid placing your hands or fingers near the moving parts of the door, such as the hinges and rollers, to prevent injury.
  • Ensure the area around the garage door is clear of obstructions before operating it manually.

By following these steps and safety precautions, you should be able to safely and effectively  Garage Door Repair Miami FL, If you encounter any difficulties or issues, consult your garage door opener’s user manual or contact a professional technician for assistance.

All American Doors

8155 NW 93rd St, Medley, FL 33166, United States

1-305-885-8088

Replacing a Damaged Garage Door Panel – Denzel Garage Door of Miami

As a homeowner, I’ve experienced my fair share of household repairs, but few issues can be as daunting as dealing with a damaged garage door panel. A damaged panel not only affects the functionality and security of your garage but can also impact your home’s curb appeal.

I’ll share my experiences and insights into the process of replacing a damaged garage door panel, offering a comprehensive guide for homeowners facing this common issue according to Garage Door Repair.

The Impact of a Damaged Garage Door Panel

A garage door is more than just a functional entry point for your vehicles and belongings; it’s also a prominent feature of your home’s exterior. When a garage door panel becomes damaged, whether due to an accident, weather, or other factors, it can affect both the appearance and operation of your garage door. Here are some common reasons garage door panels may get damaged:

  • Accidental Impact: From backing into the garage door to a basketball hitting it, accidents can lead to dents or more severe damage.
  • Weather and Wear: Over time, weather conditions, like hail or extreme temperatures, can cause panels to warp, crack, or deteriorate.
  • General Wear and Tear: The constant opening and closing of the garage door can lead to wear on the panels, potentially causing them to weaken or become damaged.
  • Incorrect Installation: In some cases, poor installation or a lack of reinforcement can lead to panel damage.

The Benefits of Replacing a Damaged Panel

Replacing a damaged garage door panel offers a range of benefits for homeowners:

1. Improved Appearance

A damaged panel can significantly impact the overall appearance of your home. Replacing it will restore the curb appeal and ensure your home looks its best.

2. Enhanced Security

A damaged panel can compromise the security of your garage, making it easier for unauthorized access. Replacing the panel ensures your garage remains secure.

3. Functionality

A damaged panel can lead to operational issues, such as difficulty in opening or closing the garage door. Replacing it ensures smooth and reliable functionality.

4. Prevent Further Damage

A damaged panel can worsen over time, affecting adjacent panels and other components. Replacing it early can prevent further damage and costly repairs.

The DIY vs. Professional Consideration

Before embarking on the process of replacing a damaged garage door panel, it’s essential to decide whether this is a DIY project or one that requires professional assistance. Several factors can influence your decision:

  • Skill Level: Assess your own skill level and comfort with tools and DIY projects. Replacing a garage door panel can be a complex task that requires precision and knowledge of the system.
  • Tools and Equipment: You’ll need specific tools and equipment to replace a garage door panel, and you should be comfortable using them.
  • Safety: Safety is paramount. Working on a garage door can be hazardous, especially if you’re not experienced. Professional technicians are trained to handle these situations safely.
  • Time and Convenience: Replacing a garage door panel can be time-consuming. Consider whether you have the time to complete the project efficiently.
  • Warranty Considerations: If your garage door is under warranty, attempting a DIY repair may void the warranty. It’s essential to check the terms and conditions of your warranty before proceeding.

Steps for Replacing a Damaged Garage Door Panel

If you decide to replace a damaged garage door panel yourself, here’s a step-by-step guide to help you through the process:

Step 1: Gather Materials and Tools

Before you begin, make sure you have the necessary materials and tools:

  • Replacement panel
  • Wrenches or pliers
  • Screwdrivers
  • Pry bar or plunger (for panel removal)
  • Sawhorses
  • Helper (for larger panels)
  • Safety gear, including gloves and safety glasses

Step 2: Disconnect the Opener

To ensure safety, disconnect the garage door opener from the power source. This prevents any accidental activation during the panel replacement.

Step 3: Remove the Damaged Panel

  • Carefully remove any trim or weatherstripping surrounding the damaged panel.
  • If there are any bolts or screws securing the damaged panel to the frame, use the appropriate tools to remove them.
  • Depending on the type of garage door, you may need to use a pry bar or a plunger to detach the damaged panel from the track. Exercise caution to avoid further damage.

Step 4: Prepare the New Panel

  • Before attaching the new panel, ensure it matches the size and style of the existing panels.
  • If necessary, trim or adjust the new panel to fit properly.
  • Apply any insulation or seals according to the manufacturer’s instructions.

Step 5: Install the New Panel

  • Carefully slide the new panel into place, ensuring it fits securely in the tracks.
  • Reattach any bolts or screws to secure the panel to the frame.
  • If you have a helper, their assistance can make this step more manageable, especially with larger panels.

Step 6: Reattach Trim and Weatherstripping

  • Reattach any trim or weatherstripping that was removed earlier. This step helps ensure the garage door is properly sealed.

Step 7: Reconnect the Garage Door Opener

Once the new panel is securely in place, you can reconnect the garage door opener to its power source.

Step 8: Test the Door

Operate the garage door to ensure it opens and closes smoothly with the new panel. Be attentive to any unusual noises or difficulties in operation.

Step 9: Paint and Finish

If the new panel does not match the color of the existing panels, you may want to paint it to achieve a consistent appearance. Be sure to follow proper painting procedures.

Professional Assistance

If you’re unsure about your ability to replace a garage door panel or if you have a complex or custom garage door system, it’s wise to seek professional assistance. Garage door technicians have the expertise and experience to handle panel replacements safely and efficiently. They can also ensure that the new panel matches the existing panels in terms of style and color, maintaining the overall aesthetic of your garage door.

Conclusion

A damaged garage door panel is a common issue that many homeowners encounter, and it’s a problem that can impact the security, appearance, and functionality of your garage. Whether you choose to tackle the replacement as a DIY project or seek professional assistance, the benefits of replacing a damaged panel are significant.

Overall, based from Garage Door Repair, as a homeowner who has faced this issue, I can attest to the difference it can make in restoring the curb appeal of your home, enhancing security, and ensuring your garage door operates smoothly. Whether you’re a seasoned DIY enthusiast or prefer to leave it to the experts, addressing a damaged garage door panel is a crucial step in maintaining your home’s value and comfort.

Denzel Garage Door of Miami

310 NW 25th St, Miami, FL 33127, United States

786-882-8745

How To Reconnect Garage Door After Power Outage – Denzel Garage Door of Miami

Power outages are a common occurrence, and while they may disrupt your daily routine, reconnecting your Garage Door Repair such an event doesn’t have to be a daunting task.

In this comprehensive guide, we’ll walk you through the step-by-step process of restoring your garage door’s functionality post a power outage.

Types of Garage Door Systems

Before we delve into the reconnection process, it’s essential to understand the type of garage door system you have. Whether it’s a chain-driven, belt-driven, or screw-driven system, knowing the basics is the first step toward a successful reconnection.

Importance of Proper Reconnection

A power outage can cause your garage door system to lose its settings, requiring a reconnection to ensure seamless operation. We’ll explore why proper reconnection is crucial for the longevity and efficiency of your garage door.

Signs Your Garage Door Needs Reconnection

Recognizing the signs that your garage door needs reconnection is vital. From unresponsiveness to unusual noises, we’ll guide you through the indicators that it’s time to address the aftermath of a power outage.

Emergency Release Kit

An emergency release kit is a key component in reconnecting your garage door. Ensure you have this kit accessible before starting the reconnection process.

Power Source Verification

Check the power source to ensure stability before attempting to reconnect your garage door. A consistent power supply is essential for a successful reconnection.

Manual Release Activation

Locate and activate the manual release mechanism using the emergency release kit. This step is crucial for disengaging the garage door opener and allowing manual operation.

Manual Operation Test

Once the manual release is activated, manually lift and lower the garage door to test its smooth operation. This step ensures that the door is not binding or catching on any obstructions.

Re-engaging the Garage Door Opener

With the door in the closed position, re-engage the garage door opener. This step is essential for restoring the connection between the door and the opener system.

Power Restoration

If the power outage caused a temporary disruption, wait for the power to be restored, and the garage door opener to reconnect automatically. Modern garage door openers often have this feature for added convenience.

Unresponsive Garage Door Opener

If your garage door opener remains unresponsive after the power is restored, we’ll troubleshoot common issues and provide solutions to get your system back on track.

Inconsistent Operation

Inconsistencies in the garage door’s operation can occur post a power outage. We’ll explore potential causes and troubleshooting steps to ensure smooth functionality.

Emergency Release Re-engagement

If you encounter difficulties re-engaging the emergency release, we’ll guide you through the process and provide tips for a successful reconnection.

Maintenance Tips for Long-lasting Operation

To prevent future issues after power outages, we’ll share maintenance tips to keep your garage door system in optimal condition. Regular checks and lubrication are key to ensuring longevity and reliability.

Benefits of Proper Reconnection

Understanding the benefits of proper reconnection goes beyond immediate problem-solving. From preventing damage to the door and opener system to ensuring the safety of your property, a well-reconnected garage door is a reliable one.

DIY vs. Professional Reconnection

While the reconnection process is often straightforward, we’ll discuss scenarios where professional assistance may be necessary. Knowing when to seek help ensures the longevity of your garage door system.

Safety Precautions

Safety is paramount when dealing with garage door systems. We’ll outline essential precautions to follow during the reconnection process to prevent accidents and injuries.

Conclusion:

In conclusion, reconnecting your Garage Door Repair is a manageable task with the right knowledge and tools. By following this step-by-step guide, you can ensure the seamless operation of your garage door system, providing peace of mind in the face of unexpected power interruptions.

Denzel Garage Door of Miami

310 NW 25th St, Miami, FL 33127, United States

1-786-882-8745

Top Garage Door Painting Tips and Techniques – All American Doors

As a homeowner, I’ve always believed in the transformative power of a fresh coat of paint. When it came time to tackle my garage door, I realized that this often-overlooked feature could significantly impact my home’s curb appeal.

With some research and a bit of trial and error, I’ve gathered a collection of garage door painting tips and techniques that I’m excited to share with you in this article by following Garage Door Repair.

1. Prepare and Plan: The Key to Success

Before you dive into painting your garage door, careful preparation and planning are crucial. Here’s how I approached it:

  • Clean Thoroughly: Start by cleaning the garage door surface. Remove dirt, grime, and any loose paint with a pressure washer or a scrub brush and soapy water. Ensure that the door is completely dry before moving forward.
  • Inspect for Damage: Examine the door for any signs of damage, such as cracks, dents, or rust. Address these issues before starting the painting process to ensure a smooth finish.
  • Gather Supplies: Invest in quality painting supplies, including paint, brushes, rollers, painter’s tape, drop cloths, sandpaper, and a paint tray. The right tools can make a significant difference in the final result.
  • Choose the Right Paint: Select a high-quality exterior paint designed for metal or wood surfaces, depending on your garage door material. Consult with a paint specialist for recommendations on the best type and finish for your climate and preferences.
  • Color Selection: Take your time choosing the color for your garage door. Consider your home’s exterior color palette and architectural style. Remember that a fresh color can enhance your home’s overall curb appeal.

2. Remove Hardware and Protect Surroundings

Proper preparation includes removing any hardware or accessories from the garage door, such as handles, locks, and weatherstripping. This step ensures that you can paint the entire surface without obstruction. Additionally, take the time to protect the surrounding areas, including:

  • Masking: Use painter’s tape to mask off any areas you don’t want to paint, such as windows, trim, or adjacent walls. This helps achieve clean, sharp lines and prevents accidental paint splatter.
  • Drop Cloths: Lay drop cloths or plastic sheeting on the ground to catch any paint drips or spills. This will also protect your driveway or garage floor.

3. Sand and Prime for a Smooth Surface

To achieve a professional-looking finish, it’s essential to prepare the garage door’s surface properly. Here’s how I approached this step:

  • Sand: Sand the entire surface of the garage door to create a smooth, even texture. Start with coarse-grit sandpaper to remove imperfections, and then switch to finer grits for a smoother finish. This step is especially crucial if your door has existing peeling or chipping paint.
  • Remove Dust: After sanding, wipe down the door with a clean, damp cloth to remove any dust or debris. Allow the surface to dry completely.
  • Prime: Apply a quality primer designed for exterior surfaces. Primer helps the paint adhere better, ensures uniform coverage, and provides an extra layer of protection. Be sure to follow the manufacturer’s instructions for drying times and application techniques.

4. Paint Like a Pro: Techniques for Success

Painting your garage door can be a rewarding DIY project, but it requires some skill and technique to achieve a flawless finish. Here are some tips to help you paint like a pro:

  • Start at the Top: Begin painting at the top of the door and work your way down. This helps prevent drips and ensures an even application.
  • Use the Right Brush: For detailed areas, such as panels or trim, use a high-quality brush designed for the type of paint you’re using. A 2-inch angled brush works well for most garage door painting tasks.
  • Roll for Speed: A paint roller can cover larger areas quickly and efficiently. Use a roller with a medium nap for a smooth finish on most garage doors.
  • Paint in Sections: Divide the door into manageable sections and work on one section at a time. This approach helps maintain a wet edge, preventing visible seams or lap marks.
  • Feather the Edges: When painting adjacent sections, feather the edges of the paint with a dry brush or roller to blend the colors seamlessly.
  • Apply Thin Coats: It’s better to apply multiple thin coats of paint rather than one thick coat. Thin coats dry more evenly and are less likely to drip or sag.
  • Mind the Weather: Pay attention to the weather conditions. Ideally, paint on a dry, mild day with moderate humidity. Avoid painting in direct sunlight or extreme heat, as it can cause the paint to dry too quickly.
  • Allow Proper Drying Time: Follow the recommended drying times on the paint and primer labels. Rushing the drying process can lead to uneven results.

5. Final Touches and Reassembly

Once you’ve completed the painting process and the door has dried thoroughly, it’s time for the final touches:

  • Remove Masking Tape: Carefully remove the painter’s tape and any protective coverings from windows or other areas.
  • Reattach Hardware: Reinstall any hardware or accessories that you removed before painting. Ensure that they are securely fastened.
  • Inspect and Touch-Up: Inspect the entire surface of the garage door for any missed spots, drips, or imperfections. Touch up these areas as needed for a flawless finish.

6. Clean Up and Dispose of Materials

Properly cleaning up after your painting project is essential for both environmental responsibility and the longevity of your painting supplies:

  • Clean Brushes and Rollers: Thoroughly clean your brushes, rollers, and paint trays with the appropriate cleaning solution as recommended by the paint manufacturer.
  • Dispose of Paint and Solvents: Dispose of any leftover paint and solvent according to your local regulations. Many communities have specific guidelines for the disposal of hazardous materials.
  • Store Supplies Properly: Store any leftover paint in a cool, dry place for future touch-ups. Seal the paint can tightly to prevent air from entering and spoiling the paint.

7. Regular Maintenance

Once your garage door has been beautifully painted, don’t forget about regular maintenance to keep it looking its best:

  • Cleaning: Periodically clean the door to remove dust, dirt, and grime. A simple solution of water and mild soap, applied with a soft brush or sponge, works well for cleaning.
  • Inspect for Damage: Regularly inspect the garage door for any signs of damage, such as chips or peeling paint. Address these issues promptly to prevent further damage.
  • Touch-Ups: Keep some of the leftover paint for touch-ups as needed. Touching up small areas can help maintain the door’s appearance and protect it from the elements.

Conclusion

Overall, according to Garage Door Repair, painting your garage door is a rewarding DIY project that can significantly enhance your home’s curb appeal. With careful preparation, quality materials, and attention to technique, you can achieve a professional-looking finish that lasts for years. Remember to choose the right paint, prepare the surface properly, use the appropriate tools, and follow best practices for a successful garage door painting project.

All American Doors

8155 NW 93rd St, Medley, FL 33166, United States

305-885-8088

Where To Lubricate Garage Door – Denzel Garage Door of Miami

Proper lubrication is essential for maintaining the smooth and efficient operation of your Garage Door Repair Miami FL. Lubricating various components helps reduce friction, prevent rust and corrosion, and extend the lifespan of the door system.

Here’s a comprehensive guide on where to lubricate your garage door for optimal performance:

1. Rollers:
Rollers are critical components that allow the garage door to move smoothly along the tracks. Apply lubricant to the rollers’ bearings, avoiding the roller’s nylon or plastic parts. Lubricating the rollers reduces friction and ensures quiet operation.

2. Hinges:
Hinges connect the individual panels of the garage door and allow it to bend as it moves. Apply lubricant to the pivot points of each hinge. Lubricated hinges enable the door sections to move seamlessly without causing undue strain on the system.

3. Bearings and Bushings:
If your garage door has bearings or bushings, such as in a torsion spring system, apply lubricant to these components. Proper lubrication prevents them from seizing and ensures smooth movement.

4. Springs:
Springs play a crucial role in counterbalancing the weight of the garage door. While torsion springs are typically enclosed and may not require lubrication, extension springs can benefit from a light application of lubricant to their coils. Focus on the coils without overapplying, as excessive lubrication can attract dust.

5. Tracks:
Lubricate the tracks where the rollers move. Apply lubricant to the inside edges of the tracks to reduce friction and facilitate smoother movement. Be cautious not to over-lubricate, as excess lubricant can collect debris.

6. Lock Mechanisms:
If your garage door has a lock mechanism, apply lubricant to the moving parts to ensure it functions smoothly. This is especially important for manual locking mechanisms.

7. Pulleys and Cables:
If your garage door has extension springs, it likely has pulleys and cables. Apply a small amount of lubricant to the pulleys’ moving parts and to the cables where they make contact with other components.

8. Opener Chain or Belt:
If you have a chain or belt drive garage door opener, lubricate the chain or belt with a lubricant specifically designed for these components. Proper lubrication reduces friction and noise generated by the opener mechanism.

9. Arm of the Opener:
The arm that connects the garage door opener to the door itself should also be lubricated. Apply lubricant to the pivot points and moving parts of the arm to ensure smooth operation.

10. Weatherstripping:
While not a moving part, lubricating the weatherstripping on the bottom of the garage door can prevent it from sticking to the ground during extreme temperatures. Use a silicone-based lubricant for this purpose.

11. Bearings and Rollers in the Opener:
If your garage door opener has internal bearings and rollers, lubricate these components according to the manufacturer’s recommendations. Proper lubrication prolongs the life of the opener.

12. Chain Rail and Screw Drive (If Applicable):
For chain rail or screw drive garage door openers, apply lubricant along the rail or screw to ensure smooth movement. Follow the manufacturer’s guidelines for the appropriate lubricant.

13. Limit Switches:
If your garage door opener has limit switches, which determine the open and close positions, consult your owner’s manual to see if they require lubrication. In some cases, they might need a light application of lubricant.

14. Safety Sensor Brackets:
If your garage door opener uses safety sensors, lubricate the brackets or mounting points to ensure that they remain securely in place.

15. Regular Maintenance:
To maintain proper performance, incorporate regular lubrication into your garage door maintenance routine. Frequency varies based on usage, but generally, lubricate the components every six months to a year.

Choosing the Right Lubricant:
Select a lubricant specifically designed for garage door components. Silicone-based lubricants and lithium grease are commonly used options. Avoid using WD-40 or other general-purpose lubricants, as they might not provide the necessary protection and can attract dirt and debris.

Application Tips:

  • Apply a moderate amount of lubricant; excess lubricant can collect dust.
  • Wipe away any excess lubricant to prevent it from dripping onto the floor or creating a mess.
  • Consider wearing gloves while lubricating to protect your hands from dirt and chemicals.

Conclusion:
Lubricating your Garage Door Repair Miami FL moving parts is a simple but essential maintenance task that ensures smooth, quiet, and efficient operation. By focusing on the rollers, hinges, tracks, springs, and other relevant components, you’ll reduce friction, extend the lifespan of your garage door system, and maintain the safety and functionality of your garage. Regular lubrication should be part of your overall garage door maintenance routine to ensure consistent performance and prevent potential issues.

Denzel Garage Door of Miami

310 NW 25th St, Miami, FL 33127, United States

1-786-882-8745

The Advantages of Custom Steel Garage Doors: Strength and Durability – Denzel Garage Door of Miami

As a homeowner who recently upgraded to custom steel garage doors, I can confidently say that the advantages of these robust and durable doors have exceeded my expectations. When it was time to replace my old garage doors, I knew I wanted a strong and secure solution that would stand the test of time. After extensive research and consultation with professionals, I settled on custom steel garage doors, and I couldn’t be happier with my decision.

Let me share my firsthand experience with the key advantages of custom steel garage doors, focusing on their strength and durability in reference to Denzel Garage Door of Miami.

  1. Superior Strength and Security:

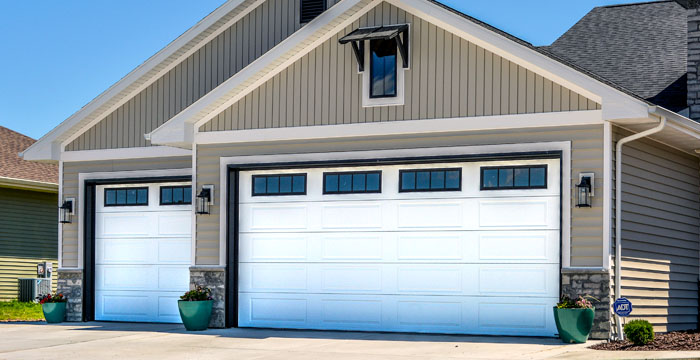
The first thing that impressed me about my custom steel garage doors was their impressive strength and security features. From the moment they were installed, I could feel the difference in their solidity compared to my previous doors. Steel is renowned for its high tensile strength, and that characteristic is evident in these doors. They feel sturdy and substantial, providing a sense of confidence in the security they offer for my home and belongings.

The multiple layers of steel used in the construction of custom steel garage doors create a formidable barrier that is difficult to breach. Along with their reinforced tracks, hinges, and locks, I am confident that my garage is well-protected against potential intruders. As a homeowner who prioritizes the safety of my family and property, the superior strength and security of custom steel garage doors have been a game-changer.

  1. Exceptional Durability and Longevity:

When making any significant investment in my home, I look for durability and longevity. Custom steel garage doors have proven to be an excellent investment in this regard. Steel is naturally resistant to various weather elements, and I no longer worry about rain, snow, or sunlight causing damage to my doors.

Unlike some other materials that may rot, warp, or suffer insect damage over time, steel remains resilient and functional. The doors have handled daily use with ease, and their robust construction ensures that they will continue to do so for many years to come. This exceptional durability has saved me from potential maintenance headaches and expenses down the road.

  1. Low Maintenance Requirements:

As a busy homeowner, I value low maintenance solutions that free up my time for other priorities. Custom steel garage doors have delivered in this aspect, requiring minimal upkeep compared to other materials like wood or certain types of plastics. Cleaning them is a breeze, as a simple wipe with soap and water keeps them looking fresh and attractive.

I no longer have to worry about repainting or restaining my garage doors to maintain their appearance. The factory-applied finish has been fantastic in preventing rust and chipping, further reducing maintenance tasks. The low maintenance requirements of custom steel garage doors have been a significant convenience, leaving me with more time to focus on other aspects of homeownership.

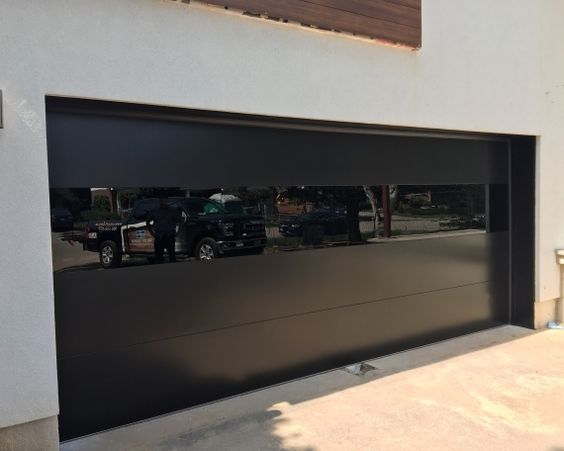
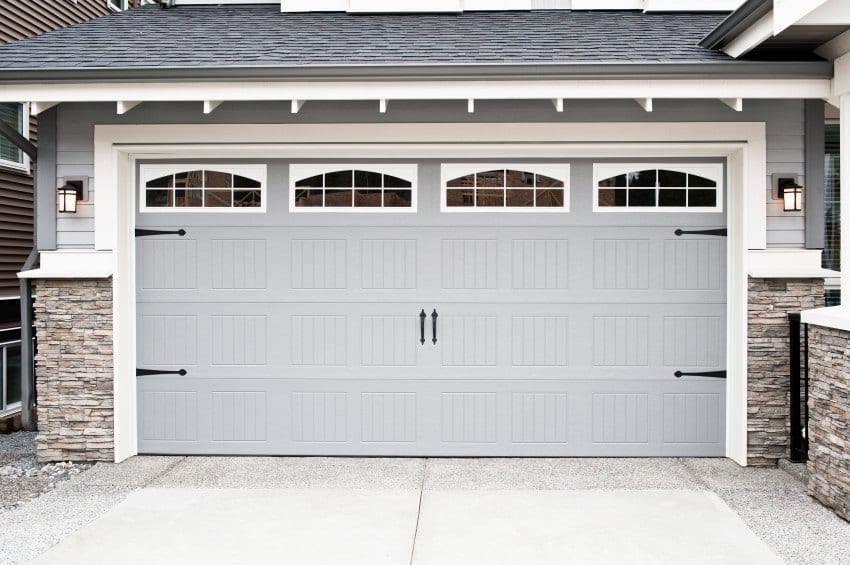
  1. Wide Range of Design Options:

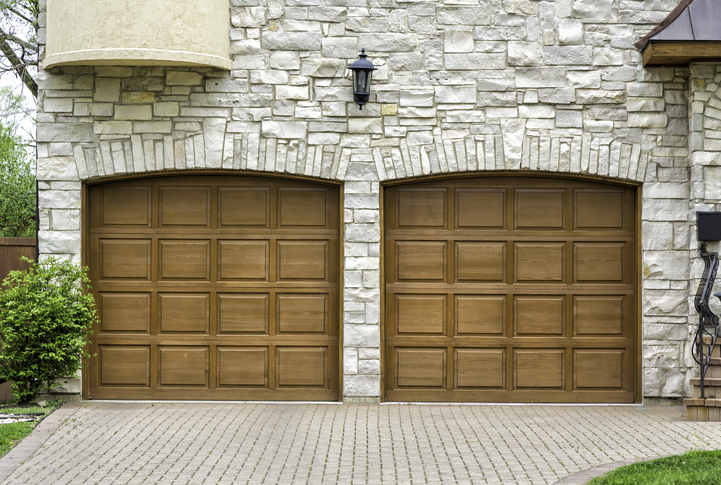
Before upgrading to custom steel garage doors, I was concerned that I would have limited design options with steel. However, I was pleasantly surprised by the wide range of design options available. Steel doors can be embossed, textured, or even painted to resemble natural wood grains, which was a huge plus for me.

The versatility in design allowed me to achieve the elegant and sophisticated look of wooden doors without the drawbacks of wood’s maintenance requirements. I also personalized my doors with decorative hardware, such as handles and window inserts, which perfectly complemented the overall design of my home. The wide range of design options meant that I could tailor my garage doors to seamlessly blend with my home’s architecture, enhancing its curb appeal.

  1. Energy Efficiency:

With rising concerns about energy efficiency, I appreciated the added benefit that custom steel garage doors brought in this aspect. Many steel doors come with insulation options, which have positively impacted the temperature inside my garage and adjacent living spaces.

The insulated steel doors act as a barrier against external temperature fluctuations, making my garage space cooler in hot weather and warmer during colder months. This added insulation has translated into energy savings by reducing the workload on my heating and cooling systems. I am pleased to contribute to a more energy-efficient home while enjoying the comfort it brings.

  1. Resistance to Harsh Weather Conditions:

Living in an area with harsh weather conditions, the resistance of custom steel garage doors to external elements has been a huge relief. I no longer worry about my garage doors deteriorating due to heavy rain, snow, or strong winds.

The corrosion-resistant properties of steel prevent rust and deterioration, ensuring that my doors remain functional and aesthetically pleasing even after years of exposure to the elements. This resistance to harsh weather conditions has provided me with peace of mind, especially during severe weather events, knowing that my custom steel garage doors will hold up and protect my property.

  1. Enhanced Fire Resistance:

The added fire resistance of custom steel garage doors has been an extra layer of protection for my home. In the unfortunate event of a fire, I know that my doors can act as a barrier, preventing the rapid spread of flames to other areas of the house.

This enhanced fire resistance not only protects my property but also provides additional time for occupants to safely exit the premises or for firefighters to arrive and contain the fire. The added safety and peace of mind provided by custom steel garage doors are invaluable.

  1. Eco-Friendly Option:

Lastly, I feel good about the eco-friendly choice I made by opting for custom steel garage doors. Steel is a highly recyclable material, which means that at the end of its long life cycle, it can be recycled and repurposed for other applications. By choosing custom steel garage doors, I have contributed to a sustainable and environmentally responsible choice for my home.

In conclusion, according to Denzel Garage Door of Miami, the advantages of custom steel garage doors, including their strength, durability, and versatility, have made them a worthwhile investment for my home. The superior strength and security they provide offer peace of mind, while the low maintenance requirements and wide range of design options have added convenience and curb appeal. Additionally, the energy efficiency, resistance to harsh weather conditions, and enhanced fire resistance have further enhanced the benefits of custom steel garage doors. For any homeowner seeking a long-lasting and secure garage door solution, I highly recommend considering custom steel garage doors for their strength and durability, along with the numerous other advantages they bring to any property.

Denzel Garage Door of Miami

310 NW 25th St, Miami, FL 33127, United States

786-882-8745

Step to Remove Weather-stripping from your Garage Door – Denzel Garage Door of Miami

If you need to remove weather stripping from your garage door, it’s a fairly straightforward process that you can easily do yourself.

Here’s how I went about removing the weather stripping from my garage door by following Miami Garage Door:

  1. Gather Materials

Before I started, I made sure I had all the necessary tools and materials. I grabbed a utility knife, pliers, a hammer, and a pry bar. I also put on safety gloves and eye protection to prevent any injuries.

  1. Identify the Type of Weather Stripping

The first thing I did was identify the type of weather stripping on my garage door. I had adhesive-backed foam tape weather stripping, which I knew would be easy to remove.

  1. Prepare the Area

I cleared any debris or obstructions around the garage door to make it easier to work. I also put on my safety gear to protect myself while I worked.

  1. Remove the Adhesive-backed Foam Tape

I started by peeling off the adhesive-backed foam tape weather stripping with my fingers. It came off fairly easily, but I did have to use a utility knife to cut through some parts that were sticking.

  1. Clean the Area

Once I had removed all the weather stripping, I used a damp cloth to wipe the area clean. This removed any dirt or debris that had accumulated under the weather stripping.

Overall, according to Miami Garage Door, removing weather stripping from a garage door is a simple task that doesn’t require any special skills or tools. With the right materials and a little bit of patience, you can easily remove the weather stripping from your garage door and prepare it for new weather stripping installation.

Denzel Garage Door of Miami

310 NW 25th St, Miami, FL 33127, United States

786-882-8745

Powered by WordPress & Theme by Anders Norén