Local Businesses Blog in Texas

Category: garage floor

How Do I Clean Oil Stains From My Garage Floor? – The Garage Floor Company Omaha

Garage Floor Omaha NE can be a challenging task, but with the right approach, tools, and a bit of elbow grease, you can effectively remove them.

Here’s a detailed guide to help you tackle those stubborn oil stains and restore the cleanliness of your garage floor.

1. Act Quickly: The key to successfully removing oil stains from a garage floor is to act quickly. The longer the oil sits on the surface, the more difficult it becomes to remove. As soon as you notice a spill, begin the cleaning process.

2. Gather Your Supplies: Before you start cleaning, gather all the necessary supplies. You’ll need:

  • Absorbent materials such as cat litter, sawdust, or baking soda
  • Liquid dish soap or a specialized concrete cleaner
  • Stiff-bristled brush or scrubbing pad
  • Protective gear including gloves and goggles
  • Pressure washer (optional)

3. Absorb Excess Oil: Start by covering the oil stain with a generous amount of absorbent material like cat litter, sawdust, or baking soda. These materials will help soak up the excess oil and prevent it from spreading further.

4. Allow Time to Absorb: Let the absorbent material sit on the stain for at least 30 minutes, allowing it to absorb as much oil as possible. For older stains, you may need to leave it on for several hours or overnight.

5. Sweep or Vacuum: After the absorbent material has had time to work, sweep or vacuum it up. Dispose of it properly according to local regulations for hazardous waste.

6. Apply Cleaner: Once the excess oil has been absorbed, it’s time to apply a cleaner. You can use liquid dish soap diluted in water or a specialized concrete cleaner according to the manufacturer’s instructions. Apply the cleaner directly to the stained area.

7. Scrub the Stain: Using a stiff-bristled brush or scrubbing pad, scrub the stained area vigorously in a circular motion. Focus on breaking up the oil and lifting it from the surface of the concrete. You may need to apply additional cleaner as you scrub.

8. Rinse Thoroughly: After scrubbing the stain, rinse the area thoroughly with clean water. You can use a hose or a pressure washer for this step if available. Make sure to remove all traces of the cleaning solution.

9. Repeat if Necessary: Stubborn oil stains may require multiple rounds of cleaning. If the stain persists after the first attempt, repeat the process until you achieve satisfactory results.

10. Allow to Dry: Once the stain is removed, allow the garage floor to air dry completely before using the area again. This may take several hours depending on the weather conditions.

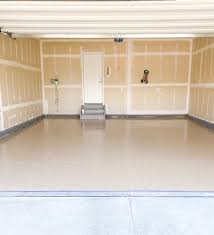
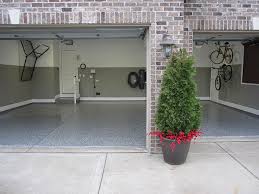
11. Prevent Future Stains: To prevent future oil stains, consider using a garage floor sealer or epoxy coating. These products create a protective barrier that makes it easier to clean up spills before they become stains.

12. Regular Maintenance: Make it a habit to inspect your garage floor regularly for any signs of oil leaks or spills. Address them promptly to prevent them from becoming stubborn stains in the future.

13. Dispose of Waste Properly: Dispose of any leftover cleaning materials, such as used absorbents or contaminated water, according to local regulations. Many municipalities have specific guidelines for disposing of hazardous waste.

14. Safety Precautions: Always wear gloves and goggles when handling cleaning chemicals or working with a pressure washer. Additionally, ensure adequate ventilation in the garage to avoid inhaling fumes from cleaning products.

15. Professional Help: If you’re unable to remove the oil stain on your own or if it’s particularly stubborn, consider hiring a professional cleaning service that specializes in concrete stain removal.

By following these steps and tips, you can effectively clean oil stains from your garage floor and maintain a clean and safe environment in your home. Remember to act quickly, use the right tools and cleaning products, and take preventive measures to minimize future stains.

The Garage Floor Company Omaha

15125 Industrial Rd, Omaha, NE 68144, United States

1-402-576-5599

How To Prepare Garage Floor For Coating – The Garage Floor Company Arizona

Preparing your Garage Floor Chandler AZ is a crucial step to ensure the longevity and effectiveness of the coating.

Whether you’re applying epoxy, paint, or another type of coating, a well-prepared surface is essential. Follow this detailed guide for a comprehensive approach to preparing your garage floor for coating.

: Clear the Space

Start by removing all items from your garage. This includes vehicles, tools, and any other belongings. A clear space allows for easier access to the entire floor and ensures that the coating can be applied uniformly.

: Repair Any Damage

Inspect the garage floor for any cracks, pits, or damage. Repair these issues using an appropriate concrete patch or filler. Addressing these imperfections before coating ensures a smoother and more even finish. Follow the product instructions for the repair material and allow it to cure fully before proceeding.

: Clean the Floor

Thoroughly clean the garage floor to remove dirt, grease, and other contaminants. Use a broom to sweep away loose debris, and then scrub the surface with a degreaser to remove any oil or grease stains. Rinse the floor with water and allow it to dry completely. For stubborn stains, consider using a pressure washer for a more thorough cleaning.

: Etch or Grind the Surface

To enhance the adhesion of the coating, it’s essential to etch or grind the surface of the concrete. Etching can be done using an acid-based solution, following the product instructions carefully. Alternatively, use a floor grinder to mechanically roughen the surface. This step promotes better bonding between the coating and the concrete.

: Test for Moisture

Check the garage floor for moisture issues, as excess moisture can affect the adhesion of coatings. Perform a moisture test by taping a plastic sheet to the floor and observing for condensation after 24 hours. If moisture is present, address the underlying issue before proceeding with the coating.

: Fill Expansion Joints

If your garage floor has expansion joints, consider filling them to create a seamless surface. Use a flexible joint filler designed for use with coatings. This step not only enhances the appearance of the coated floor but also prevents the coating from settling into joints, ensuring a more uniform finish.

: Vacuum and Tack Cloth

After etching or grinding, vacuum the entire floor to remove any dust or debris. Follow this with a tack cloth to ensure a completely clean surface. A dust-free environment is crucial for the success of the coating application.

: Choose the Right Coating

Select a high-quality coating suitable for your garage floor. Whether it’s epoxy, polyurethane, or another type of coating, ensure that it is designed for use on concrete garage floors. Consider factors such as durability, resistance to chemicals, and ease of application.

: Mix and Apply the Coating

Follow the manufacturer’s instructions for mixing the coating material. Use a stir stick or mixer to ensure a consistent blend. Apply the coating evenly using a roller or brush, working in small sections to maintain control. Pay attention to the edges and corners, ensuring complete coverage. Work quickly, as some coatings have a limited working time.

: Allow Sufficient Drying Time

After applying the coating, allow it to dry according to the recommended drying time specified by the manufacturer. Avoid walking or driving on the coated surface until it has fully cured. This step is crucial for the coating to achieve its maximum strength and durability.

: Apply Additional Coats if Necessary

Depending on the type of coating used, you may need to apply multiple coats for optimal results. Follow the manufacturer’s recommendations for additional coats, allowing sufficient drying time between each application. This ensures a robust and resilient finish.

: Final Inspection

Once the coating is fully cured, inspect the garage floor for any imperfections or areas that may require touch-ups. Address any issues promptly to maintain the integrity of the coating. Once satisfied with the result, you can begin reintroducing items into your garage.

In conclusion, preparing your Garage Floor Chandler AZ involves a systematic approach, from cleaning and repairing to applying the chosen coating. By following these detailed steps, you can achieve a professionally coated garage floor that not only enhances the aesthetic appeal but also provides long-lasting protection.

The Garage Floor Company Arizona

2300 W Pecos Rd #126, Chandler, AZ 85224, United States

1-480-405-1661

How to Put Chain Back on Garage Door Opener? – Medina Garage & Overhead Doors

I can provide you with a step-by-step guide on how to put a chain back on a garage door opener. Please note that the process may vary depending on the type and model of your garage door opener.

Here are the steps I followed from Medina Garage Door:

  1. Ensure Safety:
    • First and foremost, I made sure to turn off the power to the garage door opener to prevent any accidents or injuries during the process. I located the power switch or disconnected the opener from the power source.
  2. Identify the Disconnected Chain:
    • I inspected the garage door opener and located the chain that had come off. It was a metal or steel component that connected the motor unit to the trolley mechanism.
  3. Inspect the Chain:
    • I carefully examined the chain to check for any visible damage, such as broken links or excessive wear. If I noticed any significant damage, I knew I might have to replace the chain.
  4. Align the Chain:
    • To reattach the chain, I positioned it around the sprocket on the motor unit, ensuring that it aligned properly with the trolley mechanism.
    • It was important to align the chain correctly to ensure smooth operation and prevent any potential issues.
  5. Reattach the Chain to the Trolley:
    • Holding the chain in place, I carefully slid it onto the trolley mechanism. There was usually a designated slot or attachment point where the chain needed to be placed.
    • I also checked for any pins, clips, or retaining devices that were part of the garage door opener mechanism and made sure to reinsert or fasten them securely.
  6. Adjust Chain Tension:
    • With the chain reattached, I checked its tension. The chain should have a slight amount of slack or sag when the garage door is closed, but not be too loose.
    • Some garage door openers have an adjustment mechanism, such as an adjusting bolt or tensioner, which allows for fine-tuning the tension of the chain. I referred to the manufacturer’s instructions for my specific model and made any necessary adjustments.
  7. Test the Garage Door Opener:
    • Once the chain was properly reattached and tensioned, I restored power to the garage door opener.
    • Using the control panel or remote, I tested the opener by opening and closing the garage door.
    • I paid close attention to the movement of the door and listened for any unusual sounds or excessive vibrations. If everything operated smoothly, I knew the chain had been successfully put back on the garage door opener.

It’s important to note that these steps are based on my personal experience, and your garage door opener may have slight variations in design or attachment methods. Always consult the user manual or follow the specific instructions provided by the manufacturer for your particular garage door opener model.

Overall, according to Medina Garage Door, if you encounter any difficulties or are unsure about the process, it’s best to reach out to the manufacturer’s customer support or consult a professional technician who can assist you in safely reattaching the chain to your garage door opener.

Medina Garage & Overhead Doors

3745 Medina Rd Suite H, Medina, OH 44256, United States

330-785-7630

The Garage Floor Leveling-Garage Floor Coatings Omaha

A garage is not just a space to park vehicles; it often serves as a multipurpose area for storage, workshops, or even a recreational zone. One crucial aspect of maintaining a functional and safe garage is ensuring proper floor leveling. In this article, we will explore the significance of Garage Floor Coatings Omaha NE leveling, its benefits, and the various methods used to achieve a level surface.

Section 1: Understanding Garage Floor Leveling 1.1 Defining Floor Leveling: Garage floor leveling refers to the process of correcting uneven or sloping surfaces to create a flat and stable base. Uneven garage floors can lead to numerous issues, such as water pooling, compromised structural integrity, difficulties with vehicle navigation, and limited usability of the space.

1.2 Causes of Uneven Garage Floors: Several factors contribute to an uneven garage floor, including settling of the foundation, soil erosion, poor construction, or damage due to heavy loads. Over time, these issues can worsen, emphasizing the importance of timely floor leveling.

Section 2: The Benefits of Garage Floor Leveling 2.1 Enhanced Safety: A level garage floor reduces the risk of accidents, especially when moving heavy equipment or vehicles. Eliminating tripping hazards and providing a stable surface improves overall safety in the garage.

2.2 Smooth Vehicle Navigation: For vehicles, a level garage floor ensures seamless navigation, preventing unnecessary strain on tires, suspension systems, and other vehicle components. Proper leveling also helps maintain alignment, reducing wear and tear on tires.

2.3 Efficient Drainage: Uneven floors can cause water to accumulate, leading to potential water damage, mold growth, and compromised structural integrity. Leveling the floor facilitates efficient drainage, preventing these issues and extending the lifespan of the garage.

2.4 Improved Aesthetics and Usability: A level garage floor enhances the visual appeal of the space and allows for better organization. Whether you use the garage for storage or as a workspace, a level surface provides more versatility and easier utilization of the available space.

Section 3: Methods of Garage Floor Leveling 3.1 Self-Leveling Compounds: Self-leveling compounds are often used to correct minor irregularities in the garage floor. These compounds are liquid-based and spread across the surface, automatically filling low spots and creating a level finish. They provide a cost-effective and time-efficient solution for leveling small imperfections.

3.2 Concrete Resurfacing: For more significant floor leveling requirements, concrete resurfacing is an effective method. It involves applying a new layer of concrete over the existing floor, creating a smooth and level surface. Concrete resurfacing can address deeper cracks, potholes, and extensive unevenness.

3.3 Floor Grinding: In cases where the garage floor has high spots or uneven sections, floor grinding is a viable option. This method uses specialized machinery to remove or grind down the raised areas, resulting in a level floor. Floor grinding is often combined with other leveling techniques for optimal results.

3.4 Professional Intervention: In complex cases or when dealing with severe floor unevenness, seeking professional assistance is recommended. Experienced contractors can assess the garage floor condition, identify underlying issues, and provide tailored solutions for effective leveling.

Conclusion: Garage Floor Coatings Omaha NE leveling is a crucial aspect of maintaining a functional, safe, and visually appealing space. By addressing unevenness, homeowners can enjoy the benefits of enhanced safety, improved vehicle navigation, efficient drainage, and increased usability. Whether through self-leveling compounds, concrete resurfacing, floor grinding, or professional assistance, ensuring a level garage floor is an investment that pays off in the long run. Prioritizing garage floor leveling will not only enhance the value of the property but also provide a seamless and enjoyable experience within the garage environment.

Garage Floor Coatings Omaha

14685 California St, Omaha, NE 68154, United States

1-402-538-8225

How to Coatings the Garage Floor-Omaha’s Best Epoxy Garage Floor

Coating the Epoxy Garage Floor Omaha NE is a great way to enhance its appearance and protect it from stains, spills, and wear and tear. By following the right steps and using the appropriate materials, you can achieve a professional-looking finish.

In this guide, I will provide you with a step-by-step process on how to coat your garage floor. Let’s get started!

Step 1: Prepare the Garage Before you begin coating the floor, it’s crucial to prepare the garage properly. Clear out all items, tools, and vehicles from the area. Sweep or vacuum the floor to remove any loose debris. If you notice any oil stains or grease spots, use a degreaser to clean them thoroughly. Rinse the floor with water and allow it to dry completely.

Step 2: Repair Any Cracks or Imperfections Inspect the floor for cracks, holes, or other imperfections. Use a concrete patching compound to repair any damaged areas. Follow the manufacturer’s instructions to mix and apply the compound. Smooth out the patch and allow it to dry according to the recommended drying time.

Step 3: Etch the Surface Etching the surface is essential to create a proper bond between the coating and the concrete. You can use an etching solution, which is usually available at hardware stores. Dilute the solution with water as per the instructions provided. Apply the solution evenly to the floor using a mop or a sprayer. Allow it to sit for the recommended amount of time, usually around 20-30 minutes. Rinse the floor thoroughly with clean water and let it dry completely.

Step 4: Apply the Primer A primer helps in better adhesion of the coating to the concrete surface. Choose a primer specifically designed for garage floors. Mix the primer according to the manufacturer’s instructions. Start applying the primer along the edges of the floor using a brush or roller. Then, work your way towards the center, covering the entire floor. Make sure the primer is spread evenly. Allow it to dry as per the recommended drying time.

Step 5: Apply the Coating Now it’s time to apply the coating to the garage floor. There are different types of coatings available, such as epoxy, polyurethane, or acrylic. Choose the one that suits your preferences and needs. Mix the coating material according to the manufacturer’s instructions. Start applying the coating along the edges of the floor using a brush. Then, use a roller to cover the rest of the floor, working in small sections. Apply the coating evenly and avoid leaving any puddles or streaks. Allow the first coat to dry according to the recommended drying time.

Step 6: Optional: Add a Second Coat Depending on the type of coating and the desired level of protection, you may choose to apply a second coat. Follow the same process as in step 5, allowing the second coat to dry completely.

Step 7: Allow Proper Curing Time After applying the final coat, allow the floor to cure properly. Curing time can vary depending on the type of coating used, so refer to the manufacturer’s instructions for specific guidelines. Avoid walking or placing heavy objects on the floor until it is fully cured.

Congratulations! You have successfully coated your Epoxy Garage Floor Omaha NE. The coating will provide an attractive, durable, and easy-to-clean surface that will last for years to come. Enjoy your newly transformed garage!

Omaha’s Best Epoxy Garage Floor

5060 Dodge St, Omaha, NE 68132, Estados Unidos

1-402-814-8957

Powered by WordPress & Theme by Anders Norén