Local Businesses Blog in Texas

Tag: garage door repair fort worth tx

How Much To Break Garage Door Rust – Arnold’s Garage Door

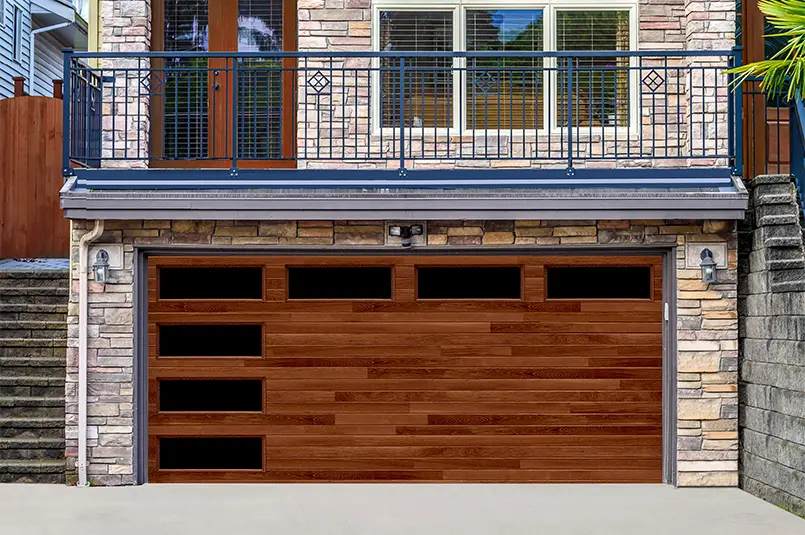
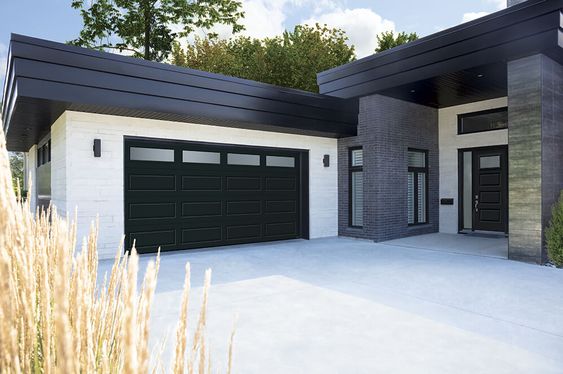
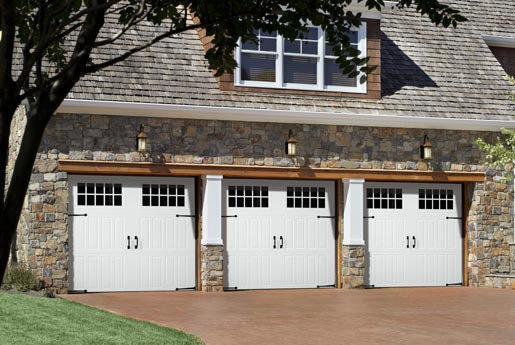
Garage Door Repair Fort Worth TX are a vital part of a home’s exterior, providing security, functionality, and aesthetic appeal. However, over time, garage doors may develop rust, compromising their appearance and structural integrity.

Dealing with rust on garage doors requires understanding the causes, assessing the extent of damage, and implementing appropriate solutions. In this comprehensive guide, we’ll explore the factors influencing the cost of addressing rust on garage doors, provide insights into different treatment options, and offer valuable tips for homeowners looking to restore their garage doors to their former glory.

Understanding Rust on Garage Doors

Rust on garage doors is typically caused by exposure to moisture and oxygen, which triggers a chemical reaction known as oxidation. Common causes of rust include:

  1. Exposure to Weather Elements: Garage doors are constantly exposed to the elements, including rain, snow, and humidity. Over time, moisture can penetrate the surface of the door, leading to rust formation.
  2. Lack of Maintenance: Neglecting regular cleaning and maintenance of garage doors can accelerate rust formation. Dirt, debris, and other contaminants can accumulate on the surface, creating an ideal environment for rust to develop.
  3. Poor Quality Materials: Garage doors made from low-quality materials or lacking proper protective coatings are more susceptible to rust. Investing in high-quality, rust-resistant materials can help prevent rust formation.

Factors Influencing Rust Treatment Costs

Several factors influence the cost of addressing rust on garage doors, including:

  1. Extent of Rust Damage: The severity of rust damage determines the complexity and cost of treatment. Surface-level rust may be easier and less expensive to address, while extensive corrosion requiring replacement of door panels or components can be more costly.
  2. Type of Garage Door: Different types of garage doors, such as steel, aluminum, or wood, require specific treatment methods. The material composition of the door influences the selection of rust treatment products and techniques, which can affect overall costs.
  3. Professional Services: Hiring a professional garage door technician for rust treatment incurs labor costs, which can vary depending on factors such as location, expertise, and scope of work. DIY rust treatment may be more cost-effective but requires time, effort, and specialized tools.

Treatment Options for Rusty Garage Doors

Several treatment options are available for addressing rust on garage doors, including:

  1. Surface Cleaning and Sanding: Surface-level rust can often be removed using sandpaper or a wire brush, followed by thorough cleaning to remove debris and oxidation. This method is relatively inexpensive but may not be effective for extensive rust damage.
  2. Chemical Rust Converters: Rust converters are chemical solutions that react with rust to convert it into a stable compound, preventing further corrosion. These products are applied directly to the rusted areas and can be effective for mild to moderate rust damage.
  3. Primer and Paint: Applying a rust-inhibiting primer followed by a coat of paint can provide long-term protection against rust formation. Choose a high-quality, weather-resistant paint formulated for use on metal surfaces for optimal results.
  4. Professional Rust Removal Services: Professional garage door companies offer rust removal and restoration services using specialized tools and techniques. This option is suitable for severe rust damage or when DIY methods are ineffective.

Average Costs of Rust Treatment for Garage Doors

The cost of addressing rust on garage doors varies depending on factors such as the extent of damage, type of treatment, and professional services. Here’s a breakdown of average costs associated with different treatment options:

  • Surface Cleaning and Sanding: DIY surface cleaning and sanding typically cost between $50 and $100, including the purchase of sandpaper and cleaning supplies.
  • Chemical Rust Converters: Rust converter products range in price from $10 to $30 per bottle, depending on the brand and quantity needed. DIY application requires minimal additional costs.
  • Primer and Paint: Rust-inhibiting primer and paint products cost between $20 and $50 per gallon, depending on the brand and quality. Professional painting services may incur additional labor costs.
  • Professional Rust Removal Services: Hiring a professional garage door company for rust removal and restoration can cost between $200 and $500 or more, depending on the extent of damage and scope of work.

Tips for Rust Prevention and Maintenance

To prevent rust formation and maintain the appearance and functionality of your garage door, consider the following tips:

  1. Regular Cleaning: Clean your garage door regularly using mild detergent and water to remove dirt, debris, and contaminants that can contribute to rust formation.
  2. Apply Protective Coatings: Apply a rust-inhibiting primer and paint to your garage door every few years to provide an additional layer of protection against corrosion.
  3. Inspect for Damage: Conduct regular inspections of your garage door for signs of rust or corrosion. Address any rust spots promptly to prevent further damage.
  4. Keep Gutters and Downspouts Clear: Ensure that gutters and downspouts are clear of debris to prevent water from pooling near the garage door and causing rust formation.
  5. Schedule Professional Maintenance: Consider scheduling annual maintenance with a professional garage door technician to inspect and lubricate moving parts, assess for rust damage, and address any issues promptly.

Conclusion:

In conclusion, addressing rust on Garage Door Repair Fort Worth TX requires understanding the causes, assessing the extent of damage, and implementing appropriate treatment methods. Factors such as the type of rust, severity of damage, and treatment options influence the overall cost of rust treatment. By taking proactive steps to prevent rust formation and addressing rust damage promptly, homeowners can prolong the lifespan of their garage doors and maintain their appearance and functionality for years to come.

Dallas Fort Worth International Airport

2400 Aviation Dr, Dallas, TX 75261

1-972-973-3112

How To Program A Chamberlain Whisper Drive Garage Door Opener – Dallas-Fort Worth Metropolitan Area

Programming a Chamberlain Whisper Drive Garage Door Repair Fort Worth TX involves a series of steps to ensure seamless operation and security.

This detailed guide will walk you through the process, providing clear instructions for programming your Whisper Drive opener.

1. Identify Your Whisper Drive Model: Begin by locating the model number of your Chamberlain Whisper Drive garage door opener. The model number is usually found on the motor unit or in the owner’s manual.

2. Read the Manual: Refer to the owner’s manual that came with your Whisper Drive opener. The manual contains specific instructions and information tailored to your model.

3. Power On the Opener: Ensure that the Whisper Drive garage door opener is powered on. If there’s a power outage, wait until power is restored before proceeding.

4. Locate the Program/Smart/Learn Button: Find the “Program,” “Smart,” or “Learn” button on the motor unit of the garage door opener. The location of this button may vary based on the model, so consult your manual for guidance.

5. Press the Program Button: Press and release the Program/Smart/Learn button. The indicator light on the opener should illuminate, indicating that it’s ready to accept programming.

6. Program Remote Control: Within 30 seconds of pressing the Program button, press and hold the button on your Chamberlain remote control that you want to program. Hold the button until the opener’s lights flash, signaling successful programming.

7. Test the Remote: Press the programmed button on the remote to test if it opens or closes the garage door. If successful, the programming is complete.

8. Keypad Programming (if applicable): If your Whisper Drive opener has a wireless keypad, follow the instructions in the manual to program PIN codes. Typically, this involves entering a default PIN, pressing the Learn button on the opener, and then entering a new PIN.

9. Homelink Compatibility (if applicable): If you have a vehicle with Homelink technology, consult your vehicle’s manual and the Whisper Drive manual for instructions on programming it to work with your garage door opener.

10. Program Additional Features (if applicable): Some Whisper Drive models offer additional features such as timer-to-close or MyQ technology. Follow the instructions in the manual to program and customize these features.

11. Set Limits and Force Settings: Adjust the travel limits and force settings on your garage door opener according to the manual. This ensures smooth and safe operation of the door.

12. Safety Sensor Alignment: Verify that the safety sensors on either side of the garage door are properly aligned. Adjust them if necessary to ensure they are facing each other and the indicator lights are on.

13. Troubleshooting: If you encounter issues during programming, refer to the troubleshooting section of your Whisper Drive manual. Common issues may include interference or incomplete programming steps.

14. Regular Maintenance: Perform regular maintenance tasks recommended in the manual, such as lubricating moving parts, to keep your Whisper Drive opener in optimal condition.

15. Documentation: Keep a record of programmed remotes, keypads, and any additional features for future reference.

By following these comprehensive steps, you should be able to successfully program your Chamberlain Whisper Drive Garage Door Repair Fort Worth TX. Always refer to the specific manual for your model for the most accurate and detailed instructions. If issues persist, contact Chamberlain customer support for assistance.

Fort Worth, Texas

1-817-646-3237

2129 Tippy Ter, Fort Worth, TX 76134

Choosing the Best Insulated Garage Door for Energy Efficiency – Arnold’s Garage Door

Embarking on the journey of homeownership ushered me into a realm where every decision felt like a brushstroke on the canvas of my living space. One particular aspect that demanded my attention was the garage door – not just as an entry point but as a significant player in the battle for energy efficiency. As I delved into the world of insulated garage doors, the quest for comfort and efficiency became a captivating exploration.

In reference to Garage Door Repair, join me in unraveling the key considerations and insights that guided my journey toward choosing the best-insulated garage door for optimal energy efficiency.

1. Understanding the Importance of Insulation: The Foundation of Efficiency

Before delving into the nuances of choosing an insulated garage door, understanding the role of insulation in energy efficiency is paramount. An insulated garage door acts as a barrier against temperature extremes, preventing the transfer of heat or cold between the garage and the exterior. This not only regulates the temperature within the garage space but also extends its impact to the connected areas of the home, contributing significantly to overall energy efficiency.

2. R-Value: The Metric of Insulation Effectiveness

In the realm of insulated garage doors, the R-value emerges as a critical metric. The R-value measures the effectiveness of insulation in resisting heat flow, with higher values indicating better insulation. Understanding the climate of your region and the desired level of insulation helps determine the appropriate R-value for your garage door. For colder climates, a higher R-value is recommended to enhance thermal resistance and retain indoor warmth.

3. Material Matters: Balancing Insulation and Aesthetics

The material of the garage door plays a pivotal role in both its aesthetic appeal and insulation capabilities. Common materials include steel, aluminum, wood, and composite. Each material has its unique characteristics, and choosing the best one involves balancing insulation needs with aesthetic preferences. Steel and aluminum doors are often chosen for their durability and insulation options, while wood and composite doors may appeal to those seeking a natural and classic aesthetic.

4. Polyurethane vs. Polystyrene Insulation: The Battle of Efficiency

Insulated garage doors typically feature either polyurethane or polystyrene insulation. Polyurethane, often injected as a foam, provides a higher R-value per inch, offering superior insulation in a thinner profile. Polystyrene, on the other hand, is inserted in panels and may require a thicker door to achieve comparable insulation levels. Understanding the insulation method and material used in the door aids in making an informed decision about energy efficiency.

5. Design and Panel Options: Aesthetic Appeal with Insulation in Mind

As I navigated the realm of insulated garage doors, I realized that energy efficiency need not compromise aesthetic appeal. Many manufacturers offer a variety of design and panel options for insulated doors. Whether you prefer a traditional raised-panel design or a more contemporary flush style, there are insulated options that cater to diverse tastes. Choosing a design that aligns with your home’s architecture ensures a seamless integration of style and efficiency.

6. Weatherstripping and Seals: The Guardians of Thermal Integrity

The battle for energy efficiency extends beyond the insulation material to include the effectiveness of weatherstripping and seals. High-quality weatherstripping along the edges of the garage door and seals at the bottom contribute to the overall thermal integrity. These components prevent drafts, moisture infiltration, and heat loss, ensuring that the insulated garage door functions as a robust barrier against external elements.

7. Windows and Insulation: Striking a Balance

For homeowners who desire natural light in their garage space, the incorporation of windows is a consideration. While windows add aesthetic appeal and contribute to the overall ambience, they can impact insulation. Opting for insulated glass or windows with multiple panes helps strike a balance between energy efficiency and the desire for natural light. Consider the placement and size of windows to minimize their impact on the door’s insulation properties.

8. Energy-Efficient Garage Door Opener: Completing the Ensemble

The quest for energy efficiency doesn’t stop with the garage door itself. The garage door opener also plays a role in overall efficiency. Choosing an energy-efficient garage door opener, equipped with features like standby mode and variable-speed motors, ensures that the entire garage system operates with a focus on minimizing energy consumption.

9. Professional Installation: Ensuring Optimal Performance

While I initially considered installing the garage door myself, I soon realized the importance of professional installation. A well-installed garage door ensures that the insulation is maximized, weatherstripping is effective, and seals are properly aligned. Professional installers possess the expertise to address nuances in the installation process, contributing to the optimal performance of the insulated garage door.

10. Life Cycle Costs: Considering the Long-Term Investment

As with any home improvement decision, considering the life cycle costs of an insulated garage door is crucial. While the upfront investment may be higher compared to non-insulated options, the long-term energy savings and increased comfort can outweigh the initial cost. Factoring in the potential energy savings over the life of the door provides a comprehensive perspective on the value of choosing an insulated garage door.

Conclusion: A Haven of Efficiency and Comfort

Overall, based from Garage Door Repair and in the tapestry of homeownership, the garage door emerged as a key player in the pursuit of energy efficiency and comfort. Choosing the best-insulated garage door became a journey of understanding R-values, balancing materials and designs, and appreciating the role of weatherstripping and seals. As I stand in the haven of efficiency and comfort that my insulated garage door has created, I am reminded that every decision in homeownership contributes to the overall well-being of the space we call home. Here’s to a year of thermal integrity, where the garage door not only guards against the elements but also stands as a testament to the seamless blend of efficiency and aesthetics. Cheers to the transformative power of choosing the best-insulated garage door for a haven that resonates with comfort and energy efficiency.

Arnold’s Garage Door

2129 Tippy Ter, Fort Worth, TX 76134

682-261-6268

How To Reset Your Genie Garage Door Opener – Dallas-Fort Worth Metropolitan Area

Resetting your Genie Garage Door Repair Fort Worth TX is a practical and common solution to address various issues, from remote control malfunctions to programming errors.

In this comprehensive guide, I’ll take you through the step-by-step process of resetting your Genie garage door opener to ensure optimal performance.

Understanding the Genie Garage Door Opener:

Genie garage door openers come in different models, each equipped with unique features and technology. Before attempting a reset, familiarize yourself with the specific model of your Genie opener and locate key components such as the motor unit, remote controls, and wall-mounted control panel.

Identifying the Issue:

Before proceeding with a reset, identify the specific issue you are experiencing with your Genie garage door opener. Common problems include remote controls not working, the door not responding to commands, or other operational issues.

Checking Power and Connections:

Ensure that the garage door opener is receiving power. Check for any loose or disconnected wires and verify that the electrical outlet is functional. If the opener is hardwired, inspect the wiring for any visible damage.

Locating the “Learn” Button:

The reset process often involves the “Learn” button on the garage door opener motor unit. Locate this button, which is typically found on the back or side of the motor unit. The button may be labeled as “Learn” or “Program.”

Resetting Remote Controls:

If your issue is with remote controls not working, resetting them may solve the problem. Press and release the “Learn” button on the motor unit. Within 30 seconds, press and hold the button on the remote control that you want to program. Release the button when the opener lights flash, confirming successful programming.

Erasing Memory:

To clear the entire memory of the opener, press and hold the “Learn” button for about 10 seconds until the indicator light blinks. This erases all programmed remote controls and keyless entry codes. You will need to reprogram all remotes and devices after this step.

Reprogramming Remote Controls:

After erasing the memory, reprogram your remote controls by pressing and releasing the “Learn” button on the motor unit. Within 30 seconds, press the button on the remote control that you want to program. Repeat this process for each remote control.

Reprogramming Keyless Entry:

If you have a keyless entry system, follow a similar process. Enter a new PIN on the keypad, press and release the “Learn” button on the motor unit, and then enter the PIN again. The opener lights should flash, indicating successful programming.

Testing the Opener:

Test the garage door opener by using the remote controls and keyless entry system. Ensure that the door responds to commands and moves smoothly. If you encounter any issues, repeat the programming steps and double-check the batteries in the remote controls.

Resetting Limits and Force Settings:

If your garage door is not closing or opening properly, you may need to reset the limits and force settings. Adjust the settings using the controls on the motor unit or the wall-mounted control panel according to the manufacturer’s instructions.

Checking Safety Sensors:

Ensure that the safety sensors are aligned and free from obstructions. Clean the sensors with a soft cloth and make any necessary adjustments to ensure proper alignment.

Updating Firmware (Optional):

Check if there are firmware updates available for your Genie garage door opener. Some models allow you to update the firmware for improved performance and compatibility.

Consulting the User Manual:

If you encounter difficulties during the reset process or if your specific model has unique features, refer to your Genie garage door opener’s user manual. The manual provides specific instructions tailored to your opener model and can offer troubleshooting tips for common issues.

Professional Assistance:

If you have followed the steps above and are still experiencing issues with your Genie garage door opener, it’s advisable to seek professional assistance. Genie technicians have the expertise to diagnose and resolve complex problems with garage door openers.

Conclusion:

Resetting your Genie Garage Door Repair Fort Worth TX is a practical solution to address common issues and ensure the proper functioning of your garage door system. By following these step-by-step instructions and troubleshooting tips, you can successfully reset your Genie opener and enjoy reliable access to your garage. Always prioritize safety, refer to your specific opener’s user manual for accurate instructions, and seek professional help if needed.

Dallas-Fort Worth Metropolitan Area

1-817-646-3237

2129 Tippy Ter, Fort Worth, TX 76134

How to Program Garage Door Opener to Car-Fort Worth Garage Door Experts

Programming a Garage Door Repair Fort Worth TX opener to a car involves a series of steps that must be carefully followed to ensure that the process is successful.

In this guide, we will provide you with a step-by-step process on how to program a garage door opener to a car.

Step 1: Gather the Necessary Materials Before you begin programming your garage door opener to your car, you need to gather the necessary materials. These include the garage door opener remote control, the car’s owner’s manual, and the garage door opener’s manual. You should also make sure that your garage door opener is compatible with your car’s remote control.

Step 2: Locate the Learn Button on Your Garage Door Opener The next step is to locate the learn button on your garage door opener. The learn button is usually located on the back or side of the garage door opener unit. You will need to press this button during the programming process, so make sure you can access it easily.

Step 3: Clear the Memory of Your Garage Door Opener Before you can program your garage door opener to your car, you need to clear the memory of your garage door opener. This ensures that any previous programming is erased, and you can start fresh. To clear the memory, locate the learn button on your garage door opener and press it for about 10 seconds until the LED light on the garage door opener unit goes off.

Step 4: Prepare Your Car for Programming The next step is to prepare your car for programming. This involves turning on the car’s ignition and making sure that the car is in park or neutral. You should also make sure that all of the car’s windows are closed.

Step 5: Press and Hold the Garage Door Opener Remote Control To program your garage door opener to your car, you need to press and hold the garage door opener remote control. Press and hold the button on the remote control that you want to use to open and close your garage door. Hold the button until the LED light on the garage door opener remote control starts flashing.

Step 6: Press the Learn Button on Your Garage Door Opener While still holding down the button on the garage door opener remote control, press the learn button on your garage door opener. The learn button should be pressed for about a second before releasing it.

Step 7: Wait for the LED Light on Your Garage Door Opener to Blink After pressing the learn button on your garage door opener, wait for the LED light on your garage door opener to blink. This indicates that the garage door opener has successfully learned the code from the remote control.

Step 8: Test the Programming To test the programming, press the button on your garage door opener remote control that you just programmed. If the garage door opens and closes, then the programming was successful.

Step 9: Repeat the Process for Additional Buttons on Your Garage Door Opener Remote Control If you have more than one button on your garage door opener remote control that you want to program to your car, repeat the process above for each additional button.

Step 10: Finalize the Programming Once you have programmed all the buttons on your garage door opener remote control to your car, finalize the programming. To do this, press the learn button on your garage door opener once again, then release it. This finalizes the programming process and saves the codes to the garage door opener’s memory.

In conclusion, programming a Garage Door Repair Fort Worth TX opener to a car can seem like a daunting task, but if you follow the steps outlined above, the process should be relatively straightforward. Just remember to gather all the necessary materials, locate the learn button on your garage door opener, clear the memory of your garage door opener, prepare your car for programming, press and hold the garage door opener remote control,

Fort Worth Garage Door Experts TX

817 Currie St, Fort Worth, TX 76107

817- 242-5868

How to Program Genie Garage Door Opener – Arnold’s Garage Door Service

When I first purchased my Genie garage door opener, I needed to program it to work with my remote control.

Here’s a step-by-step account of how I accomplished it according to Garage Door Repair Services:

  1. I made sure that the remote control had fresh batteries. This ensured a strong signal during the programming process.
  2. To begin programming, I located the “Learn” button on the Genie garage door opener. In my case, it was located on the side of the motor unit.
  3. I pressed and held the “Learn” button until the LED light on the opener turned off or started blinking. Releasing the button cleared the memory of the opener, preparing it for programming.
  4. After clearing the memory, I pressed the “Learn” button once. This caused the LED light on the opener to start blinking or remain steady, indicating that it was ready for programming.
  5. Within 30 seconds of pressing the “Learn” button, I pressed the button on the remote control that I wanted to program. As I did this, I noticed that the LED light on the opener flashed or briefly turned off, indicating that the programming was successful.
  6. To ensure that the programming was successful, I tested the remote control by pressing the programmed button. I observed the garage door responding by either opening or closing.
  7. If I had additional remote controls to program, I repeated the previous step within the 30-second time frame. Each time, I pressed the “Learn” button on the opener and then the button on the remote control I wanted to program. The LED light on the opener confirmed each successful programming.
  8. I also had the option to program a wireless keypad if my Genie garage door opener had one. To do this, I followed the instructions provided by Genie, which involved locating the “Program” or “Learn” button on the opener, entering a desired PIN code on the wireless keypad, and confirming the programming.
  9. Once I had finished programming all the remotes and optional accessories, I pressed the “Learn” button on the opener one more time. This action turned off the LED light or stopped it from blinking, indicating that the programming mode was completed.

It’s important to note that these steps are based on my personal experience, and they may vary depending on the specific model of your Genie garage door opener. I would recommend referring to the user manual provided with your opener or visiting Genie’s official website for accurate and detailed programming instructions tailored to your particular model.

By following the programming steps from Garage Door Repair Services and using the appropriate resources, you should be able to successfully program your Genie garage door opener, allowing you to conveniently operate your garage door using the remote control and any optional accessories.

Arnold’s Garage Door Service

2129 Tippy Ter, Fort Worth, TX 76134

682-261-6268

Powered by WordPress & Theme by Anders Norén