Local Businesses Blog in Texas

Tag: Garage Door Repair North Richland Hills TX

How Much To Install A Garage Side Door – Tarrant County Door & Gate

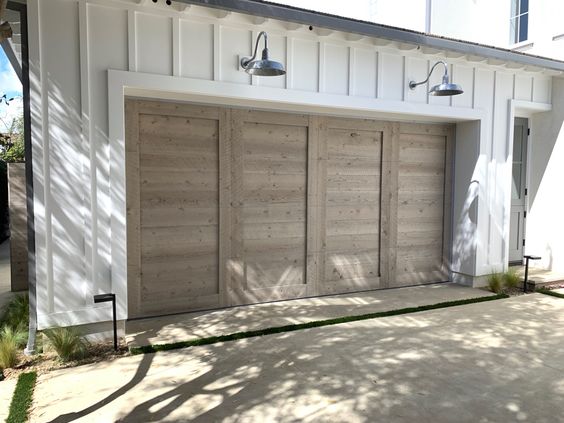
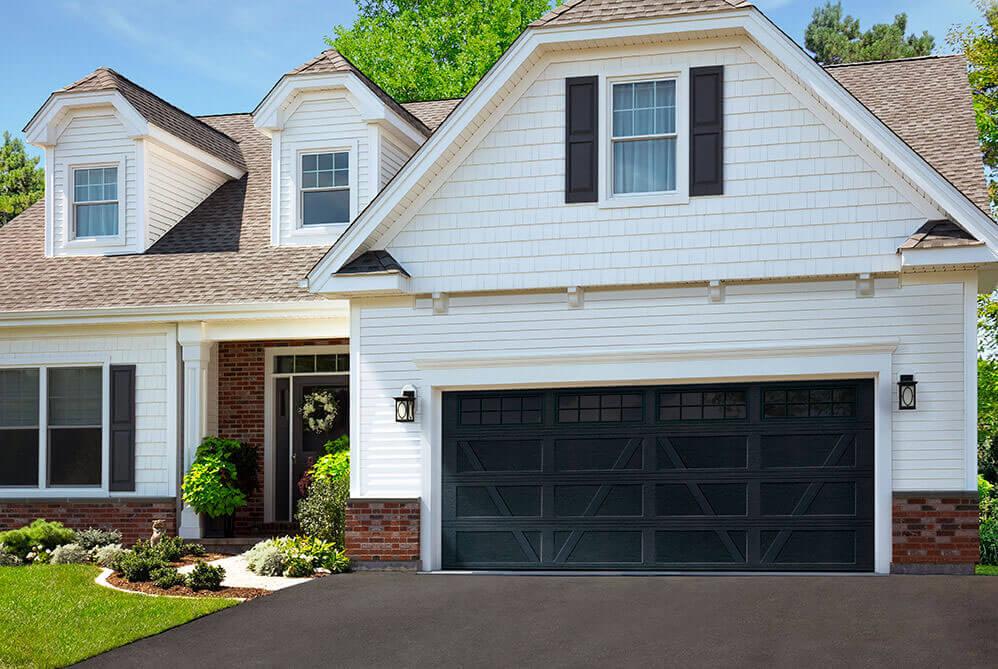
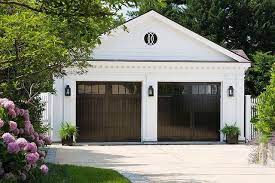
Adding a Garage Door Repair North Richland Hills TX can provide convenient access to your outdoor space while enhancing the functionality and aesthetics of your property.

However, you may be wondering about the costs associated with this home improvement project. In this comprehensive guide, we’ll explore various factors that influence the cost of installing a garage side door and provide valuable insights to help you budget effectively.

Understanding Garage Side Door Installation

Before delving into costs, let’s briefly review what’s involved in installing a garage side door:

  1. Assessment: A professional installer will assess the location and size of the desired side door, as well as any existing structural considerations.
  2. Selection: Based on the assessment, you’ll choose a door style, material, color, and security features that suit your needs and complement your home’s design.
  3. Preparation: The installer will prepare the opening for the side door, which may involve framing, cutting, and reinforcing the existing structure.
  4. Installation: The door frame, hinges, door slab, handle, lockset, and weatherstripping will be installed according to the manufacturer’s instructions, ensuring proper alignment, security, and weatherproofing.
  5. Testing: The installer will test the door to ensure smooth operation, proper sealing, and security.
  6. Cleanup: Once installation is complete, the installer will clean up the work area and provide instructions for operating and maintaining the new side door.

Factors Affecting Installation Costs

Several factors influence the cost of installing a garage side door:

  • Door Material: Side doors are available in various materials, including steel, fiberglass, wood, and aluminum, each with its price range.
  • Door Style: Different door styles, such as flush, paneled, or decorative, may come at different price points.
  • Security Features: Additional security features such as deadbolts, reinforced frames, and impact-resistant glass can add to the overall cost.
  • Size and Complexity: The size of the door opening and any structural modifications required can affect the installation cost.
  • Labor Rates: Installation costs vary depending on the contractor’s rates, location, and level of expertise.

Average Cost of Garage Side Door Installation

The cost of installing a garage side door can vary widely depending on the factors mentioned above. On average, homeowners can expect to pay:

  • Basic Installation: For a standard single garage side door with no additional features, the cost typically ranges from $500 to $1,500.
  • Custom Installation: For a custom or high-end side door with premium materials, security features, and decorative elements, the cost can range from $1,500 to $3,000 or more.

DIY vs. Professional Installation

While some homeowners may consider a DIY installation to save money, it’s essential to weigh the pros and cons:

  • DIY Installation: DIY installation can save on labor costs, but it requires technical skills, specialized tools, and knowledge of local building codes. Improper installation can compromise security, insulation, and weatherproofing.
  • Professional Installation: Hiring a professional ensures proper installation, warranty coverage, and peace of mind. While it adds to the overall cost, professional installation reduces the risk of issues down the line.

Tips for Cost-Saving

To minimize the cost of garage side door installation, consider the following tips:

  • Choose a Standard Model: Opt for a standard side door style and material without unnecessary features to keep costs down.
  • Reuse Existing Hardware: If your existing garage door hardware is in good condition, you may be able to save on installation costs by reusing it with the new side door.
  • Shop Around: Obtain quotes from multiple contractors to compare prices and services offered, ensuring you get the best value for your money.

Conclusion:

Garage Door Repair North Richland Hills TX can improve accessibility, convenience, and security while enhancing the overall appearance of your home. By understanding the factors influencing installation costs and following the tips outlined in this guide, you can ensure a smooth and cost-effective installation process.

Tarrant County Door & Gate

6408 Marlette Ct, Fort Worth, TX 76182, United States

1-817-456-2958

Fixing a Garage Door That Reverses Unexpectedly: Expert Insights – NRH’s Gates & Garage Doors

As a homeowner, there are few things as frustrating as a garage door that seems to have a mind of its own. I recently faced this issue when my garage door started reversing unexpectedly. At first, I thought it was a minor glitch, but as the problem persisted, I realized that it was time to seek expert insights to fix this perplexing issue.

In reference to Garage Door Repair North Richland Hills TX, I’ll share my journey and the valuable lessons I learned from garage door experts on dealing with a door that reverses unexpectedly.

The Frustration of a Reversing Garage Door

It all began with the daily routine of opening and closing my garage door. Each morning, I’d press the remote control button, and the door would begin to lower as usual. However, before it fully closed, it would suddenly reverse and go back up. It was perplexing, to say the least, and an inconvenience that I couldn’t ignore.

My initial reaction was to check for obvious obstructions in the door’s path. I meticulously examined the garage floor and the space above the door, but there was nothing that should have caused this behavior. It was time to consult the experts.

Expert Insights on Garage Door Reversal Issues

I reached out to a local garage door repair company, and they promptly dispatched a technician to diagnose the problem. What I learned during this process was not only fascinating but also essential for maintaining a safe and functional garage door.

The technician explained that there are several common reasons why a garage door might reverse unexpectedly. Here are the key insights I gained:

1. Sensor Misalignment: One of the most common causes of garage door reversal is misaligned safety sensors. Garage doors are equipped with sensors near the base on both sides of the door’s track. These sensors send an infrared beam across the door’s path, and if anything interrupts the beam, the door reverses to prevent damage or injury. Misaligned sensors can trigger this safety feature, causing the door to reverse even if there’s no obstruction.

2. Dirty Sensors: Dust, dirt, or debris on the sensor lenses can also interfere with the infrared beam, causing the door to reverse. Cleaning the sensor lenses regularly can prevent this issue.

3. Obstruction Detection: Modern garage doors are designed to be highly sensitive to obstructions. Even small objects like leaves or debris on the garage floor can trigger the door’s reversal. Regularly clearing the area around the door’s threshold can help prevent this.

4. Spring Tension Problems: Garage doors are counterbalanced by springs. If one of the springs is damaged or has the wrong tension, it can cause the door to behave erratically. Garage door professionals have the tools and expertise to adjust or replace the springs safely.

5. Limit Switch Adjustments: Every garage door has limit switches that determine how far it should open and close. If these switches are set incorrectly, the door may reverse before reaching its intended position.

6. Safety Edge Testing: Some garage doors are equipped with safety edges, which are sensors on the bottom edge of the door. These sensors detect pressure, and if they sense an obstruction, they trigger the reversal. If the safety edge is damaged or malfunctioning, it can cause unintended reversals.

My Personal Experience

In my case, the technician found that the garage door’s safety sensors were misaligned. Over time, vibrations and minor bumps had shifted them slightly, causing the door to reverse unexpectedly. The solution was straightforward; the technician adjusted the sensor brackets and ensured they were perfectly aligned. After this adjustment, the door operated flawlessly, without any further unexpected reversals.

The technician also recommended regular maintenance to prevent similar issues in the future. This maintenance includes cleaning the sensor lenses, ensuring the area around the door is free from obstructions, and testing the limit switches to confirm that they are correctly set.

Preventing Future Reversal Problems

Learning about the various reasons for unexpected garage door reversals made me realize the importance of preventive measures. Here are some expert tips to avoid future issues:

  1. Regular Sensor Maintenance: Make it a habit to clean the sensor lenses and ensure they remain aligned. This simple step can prevent many reversal problems.
  2. Keep the Threshold Clear: Regularly clear debris, leaves, or other objects from the garage door’s threshold area to prevent obstructions from triggering reversals.
  3. Scheduled Garage Door Maintenance: Consider scheduling regular maintenance with a garage door professional. They can inspect and adjust the door’s components to ensure smooth and safe operation.
  4. Safety Edge Testing: If your garage door has a safety edge, test it periodically to ensure it’s functioning correctly. If you notice any issues, contact a professional for repairs.

Conclusion

Dealing with a garage door that reverses unexpectedly can be frustrating and inconvenient. However, my journey to understand and fix this issue taught me valuable insights from garage door experts. Misaligned sensors, dirty lenses, obstruction detection, spring tension problems, limit switch adjustments, and safety edge malfunctions are all potential causes of this problem.

In summary, based from Garage Door Repair North Richland Hills TX, regular maintenance and vigilance can go a long way in preventing unexpected garage door reversals. If you encounter this issue and are unsure of the cause, it’s wise to seek the expertise of a professional garage door technician. Their knowledge and experience can swiftly identify the problem and provide a safe and effective solution, ensuring that your garage door operates smoothly and without surprises.

NRH’s Gates & Garage Doors

7048 Ridge Crest Dr, North Richland Hills, TX 76182, United States

817-533-4913

How To Install Garage Door Stop Molding – NRH’s Gates & Garage Doors

Installing Garage Door Repair North Richland Hills TX is a relatively straightforward DIY project that can help seal gaps around your garage door, keeping out drafts, water, and pests.

Here’s a step-by-step guide with detailed instructions on how to install garage door stop molding:

Tools and Materials You’ll Need:

  1. Garage door stop molding kit (typically available at hardware stores)
  2. Measuring tape
  3. Miter saw or utility knife
  4. Caulk gun and exterior-grade caulk
  5. Screws or nails
  6. Screwdriver or hammer
  7. Safety glasses
  8. Safety gloves
  9. Level
  10. Pencil

: Measure and Prepare

Before you start, measure the perimeter of your garage door frame to determine how much molding you’ll need. Make sure to account for any corners or angles. Purchase enough molding to cover this distance, plus a little extra for mistakes.

: Cut the Molding

Use a miter saw or a utility knife to cut the molding to the appropriate lengths. If you have angled corners, make miter cuts (45-degree angles) to ensure a snug fit. Remember to wear safety glasses and gloves while cutting.

: Clean the Surface

Clean the surface around the garage door frame to ensure good adhesion for the molding and caulk. Remove any dirt, debris, or old caulk.

: Apply Caulk

Load your caulk gun with exterior-grade caulk. Run a continuous bead of caulk along the backside of the molding. This caulk will create a watertight seal between the molding and the garage frame. Be generous with the caulk, especially in corners and at the ends of each piece of molding.

: Attach the Molding

Starting at one corner of the garage door frame, press the molding firmly against the frame, aligning it with the edge. If you have angled corners, carefully position the mitered ends together. Use a level to ensure the molding is straight and plumb. If needed, make adjustments before the caulk sets.

: Secure with Screws or Nails

Once the molding is in place, secure it to the garage frame using screws or nails. Place fasteners about every 12 inches along the length of the molding. Make sure to drive them flush with the surface but not so tight that they squeeze out all the caulk.

: Repeat for Remaining Pieces

Continue installing the molding piece by piece, repeating the caulking, aligning, and securing process for each section. Make sure to cut pieces to the appropriate length as needed.

: Seal the Joints

After all the molding is installed, go back and fill any gaps or joints with additional caulk. This will provide extra protection against drafts and moisture.

: Allow Time to Dry

Let the caulk dry and cure according to the manufacturer’s instructions. This may take a few hours or longer, depending on the product.

: Test the Garage Door

After the caulk has fully cured, test your garage door to ensure it opens and closes smoothly without any interference from the new molding.

: Paint or Finish (Optional)

If your molding is not pre-finished, you can paint or stain it to match your garage door or the surrounding trim.

Congratulations, you’ve successfully installed Garage Door Repair North Richland Hills TX This project should help improve the insulation and weatherproofing of your garage while also giving it a more finished look.

NRH’s Gates & Garage Doors

7048 Ridge Crest Dr, North Richland Hills, TX 76182, United States

1-817-533-4913

How To Connect Remote Garage Door Opener – Tarrant County Door & Gate

Connecting a remote Garage Door Repair North Richland Hills TX opener is a convenient and essential process for modern homeowners. With a remote opener, you can effortlessly open and close your garage door from a distance, providing added security and ease of access.

In this comprehensive guide, we will walk you through the steps to successfully connect a remote garage door opener to your garage door system. Ensure that you carefully read and follow the instructions provided by the manufacturer to ensure a safe and effective setup.

Step 1: Gather the Necessary Equipment

Before you begin, make sure you have all the required equipment readily available. Most remote garage door opener kits typically include the following components:

  1. Garage door opener unit
  2. Remote control(s)
  3. Wall-mounted control panel
  4. Safety sensors
  5. Mounting hardware and brackets
  6. Power supply (battery or AC adapter)

Step 2: Identify the Type of Garage Door Opener

Different types of garage door openers may have varying installation procedures. The most common types are chain drive, belt drive, and screw drive openers. Check the manufacturer’s documentation to determine which type you have and which steps are applicable to your specific model.

Step 3: Read the Manufacturer’s Instructions

Thoroughly read the user manual and instructions provided by the manufacturer. Each model may have unique installation steps and safety precautions that you need to follow. Following the manufacturer’s guidelines is crucial for a successful setup and to maintain your warranty.

Step 4: Install the Garage Door Opener Unit

  1. Power off the garage door system: Disconnect the power supply to the garage door opener to prevent any accidents during installation.
  2. Position the motor unit: Install the garage door opener unit at the center of the garage ceiling, ensuring it is securely mounted with the supplied brackets and hardware.
  3. Attach the drive mechanism: Depending on the type of opener, connect the chain, belt, or screw mechanism to the garage door trolley or carriage.
  4. Install the rail or track: For chain and belt drive openers, attach the rail or track to the motor unit and secure it to the ceiling.
  5. Install the safety sensors: These sensors help prevent the door from closing if an object is detected in its path. Mount them on each side of the garage door, near the floor, and ensure they are aligned properly.

Step 5: Wiring and Electrical Connections

  1. Connect the control panel: Wire the wall-mounted control panel to the opener unit according to the manufacturer’s instructions.
  2. Connect the safety sensors: Follow the instructions to connect the safety sensors to the opener unit using the provided wiring.
  3. Power supply: Depending on your model, power the garage door opener unit with either a battery or an AC adapter. Make sure the power source is compatible and properly connected.

Step 6: Program the Remote Control

  1. Locate the programming button: On the garage door opener unit or in the user manual, find the “Learn” or “Program” button.
  2. Press the programming button: Press and hold the programming button until the indicator light on the opener unit blinks or illuminates.
  3. Program the remote control: While the indicator light is blinking, press the button on the remote control that you wish to use to operate the garage door. The light should flash to indicate successful programming.
  4. Test the remote control: Stand at a safe distance and test the remote control to ensure it opens and closes the garage door smoothly.

Step 7: Test the Safety Features

Before finalizing the installation, it is vital to test the safety features of the garage door opener:

  1. Place an object in the path of the garage door, and try closing it using the remote control. The safety sensors should detect the obstacle and prevent the door from closing.
  2. Check the auto-reverse feature by placing a small block of wood or a similar object under the garage door. The door should reverse its direction when it comes into contact with the obstruction.

Conclusion:

Connecting a remote Garage Door Repair North Richland Hills TX opener might seem like a daunting task, but by carefully following the manufacturer’s instructions and taking the necessary safety precautions, you can easily accomplish the installation. Once successfully set up, you’ll enjoy the convenience and security of effortlessly controlling your garage door from a distance. Remember, safety should always be a top priority during the entire installation process.

Tarrant County Door & Gate

6408 Marlette Ct, North Richland Hills, TX 76182, Estados Unidos

817-456-2958

How Much Does it Cost to install Garage Door Opener-North Richland hills Best Garage & Overhead Doors

A Garage Door Repair North Richland Hills TX is a convenient and practical device that provides easy access to your garage, eliminating the need for manual operation. If you’re considering installing a garage door opener, it’s essential to understand the associated costs involved.

In this article, we will discuss various factors that can impact the cost of installing a garage door opener, providing you with a comprehensive guide to help you make an informed decision.

Factors Affecting Installation Costs:

  1. Type of Garage Door Opener:
    • Chain Drive: These are the most common and affordable options, with prices ranging from $150 to $300. However, they tend to be noisy during operation.
    • Belt Drive: Known for their quieter performance, belt drive openers typically cost between $200 and $400.
    • Screw Drive: These openers are low-maintenance and suitable for larger and heavier garage doors. They usually range from $250 to $500 in price.
  2. Power and Horsepower:
    • Garage door openers come in different power ratings and horsepower levels. Higher-powered models are generally more expensive than lower-powered ones. Prices can vary between $200 and $700, depending on the horsepower and power rating required for your specific garage door.
  3. Additional Features:
    • Some openers offer additional features such as battery backup, Wi-Fi connectivity, smartphone control, motion sensors, and security systems. These features can significantly impact the cost of the opener, with prices ranging from $50 to $300 or more, depending on the complexity and technology involved.
  4. Professional Installation:
    • While it is possible to install a garage door opener yourself, many homeowners prefer hiring a professional for a seamless and hassle-free installation. Professional installation costs can range from $150 to $500, depending on factors like the complexity of the installation, the location, and the contractor’s rates.
  5. Removal of Old Opener (if applicable):
    • If you’re replacing an existing garage door opener, you may need to factor in the cost of removing the old unit. Disposal fees and labor costs for removal can range from $50 to $150, depending on the complexity and weight of the old opener.
  6. Additional Hardware and Accessories:
    • You may need to purchase additional hardware and accessories for the installation, such as mounting brackets, extension kits, safety sensors, and remote controls. These items can cost anywhere from $50 to $200, depending on your specific requirements.

Conclusion: When considering the installation of a Garage Door Repair North Richland Hills TX opener, it is crucial to account for various factors that can impact the overall cost. The type of opener, its power and features, professional installation, removal of old units, and additional hardware all play a role in determining the final price. By understanding these factors and conducting thorough research, you can make an informed decision that meets both your budget and garage door requirements. Remember to compare prices, read customer reviews, and consult with professionals to ensure a smooth and successful installation process.

North Richland hills Best Garage & Overhead Doors

North Richland Hills, TX 76182

817-533-4913

How to Avoid Hitting Garage Door Frame – Tarrant County Door & Gate

Avoiding hitting the garage door frame has been a top priority for me to prevent any damage to both my vehicle and the door.

Here’s how I go about it according to Garage Door Repair Services:

First, I measured the width and height of my vehicle, taking into account any side mirrors or protruding features. This gave me a clear understanding of the space I needed to maneuver within the garage.

Knowing the dimensions of the garage door opening was equally important. I measured the width and height of the opening, including the frame, and compared these measurements with those of my vehicle. This helped ensure that I had sufficient clearance on all sides.

Keeping the interior of the garage clear and free of obstacles was crucial. I made it a habit to regularly remove any objects or clutter that could potentially obstruct my path or reduce the available space for maneuvering.

To assist with parking, I installed parking aids such as laser guides or hanging tennis balls. These aids acted as visual indicators, helping me position my vehicle correctly within the garage and stop before hitting the garage door frame.

Using the mirrors and rearview camera of my vehicle became second nature. Before entering or exiting the garage, I relied on these tools to monitor my position relative to the garage door frame. Regularly checking these mirrors and the camera display while maneuvering helped me stay aware of my surroundings.

Opening the garage door fully was a non-negotiable step. I made sure the door was completely open before entering or exiting the garage. Opening it to its fullest extent provided maximum clearance and minimized the risk of hitting the door frame.

Approaching the garage door slowly was another essential practice. Whether I was driving into or out of the garage, I reduced my speed and proceeded with caution. This allowed me to have more time to react and make any necessary adjustments.

Understanding the turning radius of my vehicle was crucial. I paid close attention to the space required for turning to avoid hitting the garage door frame. Being mindful of this allowed me to plan my movements accordingly.

Proper positioning within the garage was a key strategy. I aimed to have an equal distance between my vehicle and the garage door frame on both sides. Achieving this balanced position ensured that I had ample clearance and minimized the risk of any contact.

Familiarizing myself with the controls of the garage door opener was essential. I made sure to learn the buttons for opening and closing the door. This way, I could stop the door’s movement if I noticed that I was getting too close to the frame.

During windy conditions, I exercised extra caution. Strong winds can affect the movement of the garage door, making it more challenging to control. I adjusted my approach accordingly, giving the door more time to open or close safely.

Regularly inspecting the garage door for loose or misaligned parts became part of my maintenance routine. By checking for any issues, I could address them promptly and ensure the door operated smoothly, reducing the risk of hitting the frame.

Practicing parking and maneuvering within the garage was a valuable exercise. I set aside time to become more familiar with the dimensions of the space and improve my ability to navigate without hitting the garage door frame.

If I ever found it challenging to avoid the garage door frame or felt uncertain about the dimensions of my vehicle and the garage opening, I sought professional guidance. Consulting a garage door installer or a driving instructor allowed me to receive expert advice tailored to my specific situation.

By following these practices from Garage Door Repair Services and staying vigilant, I have successfully avoided hitting the garage door frame. Being attentive, taking my time, and making any necessary adjustments have been crucial in keeping both my vehicle and the garage door safe from any collisions.

Tarrant County Door & Gate

6408 Marlette Court,North Richland Hills, TX

817-456-2958

Powered by WordPress & Theme by Anders Norén