Local Businesses Blog in Texas

Tag: Garage Door Repair Lantana TX

How Do I Fix My Garage Door – Lantana Gates & Garage Doors

Garage Door Repair Lantana TX, the unsung heroes of our homes, provide security and convenience.

However, when they start acting up, it can be frustrating. In this guide, we’ll delve into the common issues plaguing garage doors and equip you with the knowledge to troubleshoot and fix them effectively.

Understanding the Basics

Garage doors may seem complex, but understanding their basic components is crucial. From panels to springs, each part plays a vital role in the door’s functionality.

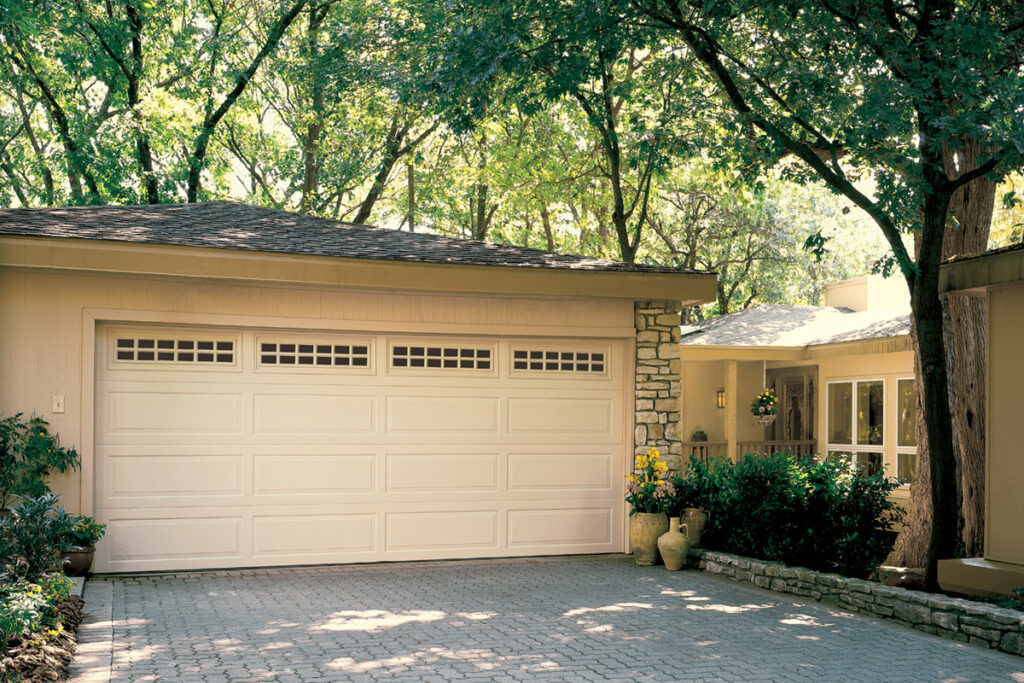
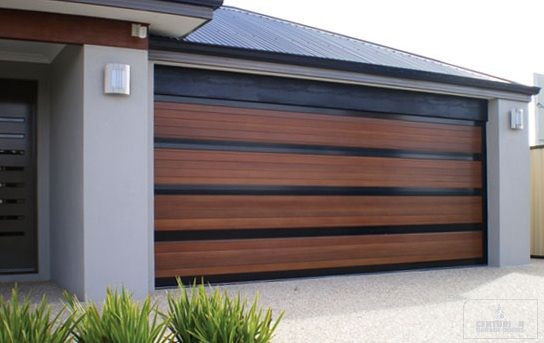
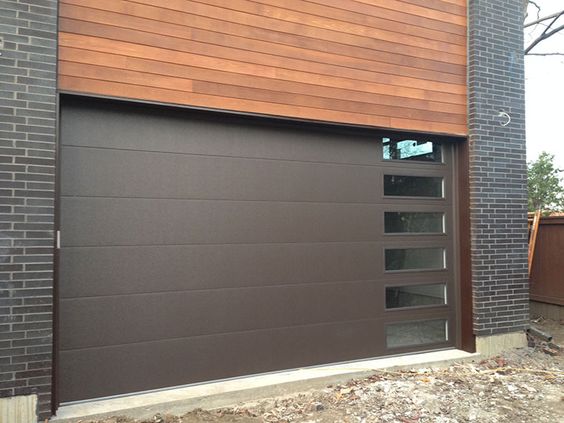
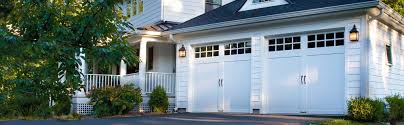
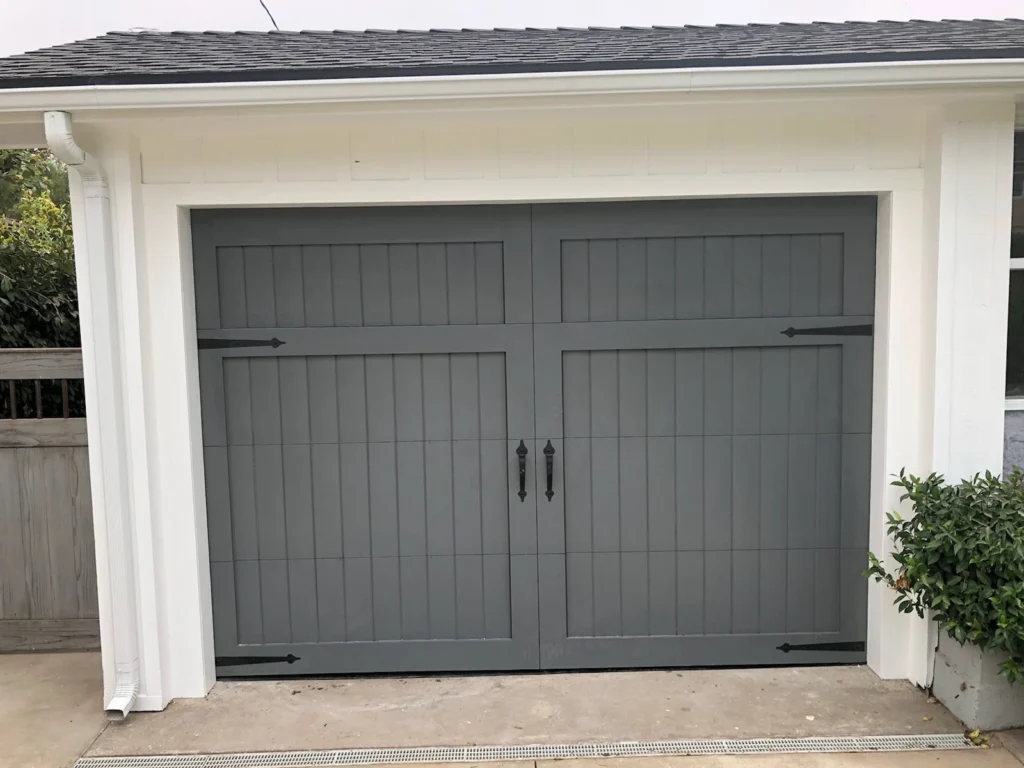
Recognizing Different Types of Garage Doors

Knowing your garage door type is the first step in troubleshooting. Whether it’s a traditional sectional door or a modern roll-up variant, each has its unique characteristics.

Identifying Common Parts and Their Functions

From torsion springs to sensors, get acquainted with the parts that make your garage door tick. Knowing their functions will aid in pinpointing potential issues.

Troubleshooting Common Issues

One of the most common issues is a malfunctioning remote. Ensure the batteries are fresh and that there are no obstructions blocking the signal.

Examining the Sensors

Garage doors have safety sensors that can impede operation if misaligned. Check for any obstacles in their path and ensure proper alignment.

Inspecting the Track and Rollers

A misaligned track or damaged rollers can cause operational issues. Regularly inspect and clean the track, and replace worn-out rollers promptly.

Strange Noises from the Garage Door

Over time, vibrations can loosen nuts and bolts. Grab your tools and tighten any loose hardware to eliminate those annoying rattles.

Lubricating Moving Parts

Lack of lubrication is a common culprit for strange noises. Invest in a high-quality garage door lubricant and apply it to hinges, springs, and rollers.

Replacing Worn-Out Rollers

If the noise persists, worn-out rollers might be the culprit. Replace them with new, high-quality ones for a smoother, quieter operation.

The Garage Door Is Uneven

Uneven doors are often a result of imbalanced extension springs. Follow the manufacturer’s guidelines to adjust them properly.

Balancing the Torsion Springs

Torsion springs play a crucial role in balancing the door’s weight. If the door is uneven, consult a professional to adjust or replace these springs.

Ensuring Proper Cable Alignment

Inspect the cables on both sides of the door. If they’re misaligned or damaged, it can lead to uneven operation. Adjust or replace them as needed.

DIY Repairs and Maintenance

Not all lubricants are created equal. Opt for a silicone-based or lithium-based lubricant specifically designed for garage doors.

Where and How to Apply Lubricant

Apply the lubricant to all moving parts, including hinges, springs, and rollers. Wipe off any excess to prevent attracting dirt and debris.

Frequency of Lubrication

Regular lubrication should be part of your garage door maintenance routine. Aim to lubricate the moving parts every six months to ensure smooth operation.

Tightening Loose Hardware

Gather basic tools such as a wrench and screwdriver for tightening loose nuts and bolts.

Identifying and Tightening Loose Nuts and Bolts

Inspect the entire door for loose hardware. Tighten any nuts, bolts, and screws you find, paying extra attention to the tracks and support brackets.

Regular Maintenance Schedule

Create a maintenance schedule to keep your garage door in top condition. Regular checks for loose hardware, lubrication, and visual inspections can prevent major issues.

When to Call a Professional

While many issues can be tackled with DIY solutions, certain signs indicate the need for professional intervention. These include major structural damage, motor issues, or complex spring problems.

Choosing the Right Garage Door Repair Service

When seeking professional help, research and choose a reputable repair service. Look for customer reviews, ask for recommendations, and ensure they offer transparent pricing.

Cost Considerations

Understanding the potential costs involved in professional repairs is essential. Get multiple quotes, and be wary of services that provide estimates without a thorough inspection.

Conclusion:

Fixing your Garage Door Repair Lantana TX doesn’t have to be a headache. By understanding its components and following this guide, you can troubleshoot common issues and perform basic maintenance. Remember, regular care goes a long way in ensuring your garage door operates smoothly.

Lantana Gates & Garage Doors

1180 Central Way, Lantana, TX 76226, United States

1-940-400-3038

How To Get A Garage Door Opener To Work – Lantana Gates & Garage Doors

Getting a Garage Door Repair Lantana TX involves a series of systematic steps to troubleshoot and resolve common issues.

Follow this comprehensive guide to ensure your garage door opener functions smoothly.

1. Initial Assessment: Begin by inspecting the overall condition of your garage door opener system. Identify the main components: the opener unit, remote control, and safety sensors.

2. Power Source Check: Ensure that the opener unit is properly connected to a power source. A loose or disconnected power cord can be a simple yet overlooked cause of malfunction.

3. Remote Control Examination: Examine the remote control for visible issues. Check for damaged buttons, a depleted battery, or loose battery connections. Replace the battery and guarantee a clear line of sight between the remote and the opener unit.

4. Safety Sensor Inspection: Most modern garage door openers are equipped with safety sensors. Make sure these sensors are clean and properly aligned. Dirt or misalignment can disrupt their function, preventing the door from closing.

5. Opener Settings Review: Access the settings on the garage door opener unit. Confirm that travel limits and force settings are configured correctly. Consult the user manual for your specific model to understand and adjust these settings.

6. Lubrication of Moving Parts: Lack of lubrication can cause friction and hinder smooth door operation. Apply a silicone-based lubricant to rollers, tracks, and hinges to ensure everything moves freely.

7. Door Balance Check: An imbalanced garage door can strain the opener. Manually open and close the door to check for any resistance or imbalance. Address any issues that may impede the door’s movement.

8. Testing Safety Features: Conduct tests on the safety features of the garage door opener. Place an object in the door’s closing path to ensure the safety sensors detect it and prevent the door from closing.

9. Consult the User Manual: When uncertain, refer to the user manual provided by the manufacturer. Manuals often contain troubleshooting tips and specific instructions tailored to your garage door opener model.

10. Professional Assistance: If the issue persists or if you’re uncomfortable with certain tasks, seek professional help. Garage door technicians have the expertise to diagnose and fix complex problems beyond the scope of DIY troubleshooting.

11. Remote Reprogramming: If the remote control is not working, reprogram it according to the instructions in the user manual. This may involve pressing specific buttons on the opener unit or following a sequence to sync the remote with the opener.

12. Resetting the Opener: Some garage door openers have a reset button on the unit. Pressing this button may reset the opener to its default settings. Refer to the user manual for the location and instructions on using the reset button.

13. Inspect Wiring Connections: Examine the wiring connections between the opener unit and other components. Loose or damaged wires can disrupt communication and functionality. If any issues are found, carefully reattach or replace the wiring.

14. Consider Environmental Factors: Extreme temperatures or humidity can affect the performance of garage door openers. Ensure that the unit is rated for the environmental conditions in your area. In extreme cases, consider installing insulation or a climate control system in the garage.

15. Upgrade or Replace Outdated Systems: If your garage door opener is old and consistently problematic, it might be more cost-effective to upgrade to a newer model. Newer openers often come with enhanced features, improved security, and better technology.

16. Regular Maintenance: Establish a routine maintenance schedule for your garage door opener. Regularly clean sensors, lubricate moving parts, and tighten loose bolts and screws. This proactive approach can prevent issues before they arise.

Conclusion:

Troubleshooting and getting a Garage Door Repair Lantana TX involves a systematic approach, from basic checks to more advanced diagnostics. Following these steps will help you identify and address common issues, ensuring the reliable and efficient operation of your garage door opener.

Lantana Gates & Garage Doors

1180 Central Way, Lantana, TX 76226, United States

1-940-400-3038

How To Install Safety Sensors On Garage Door – Coppell Gates & Garage Doors


Installing safety sensors on a Garage Door Repair LAntana TX is a crucial safety measure to prevent accidents and injuries.

These sensors, also known as photoelectric sensors or photo eyes, are designed to detect obstructions in the path of a closing garage door and automatically reverse it to prevent crushing or trapping objects or people. In this guide, we’ll provide step-by-step instructions on how to install safety sensors on a garage door.

Before you start the installation process, ensure you have the following tools and materials:

  1. Safety sensors kit (usually includes two sensors and mounting brackets)
  2. Screwdriver
  3. Wire strippers
  4. Screws and anchors
  5. Drill with a 1/8-inch bit
  6. Electrical tape
  7. Extension cords (if needed)
  8. Wire nuts
  9. Wire connectors
  10. Pencil or marker
  11. A ladder or step stool
  12. A level

: Read the Manual

Before starting any installation, carefully read the manufacturer’s instructions provided with your safety sensors. The instructions may vary slightly depending on the brand and model of sensors you are using, so it’s essential to understand their specific requirements.

: Turn off Power

For safety reasons, disconnect power to the garage door opener. Locate the power source, which is usually a plug near the motor unit, and unplug it. This prevents any accidental activation of the door during installation.

: Identify Sensor Locations

Position the sensors on each side of the garage door, approximately 6 inches above the ground. Ensure they are aligned vertically and directly facing each other. Use a level to make sure they are perfectly even. Mark the positions for the sensors on the wall using a pencil or marker.

: Mount the Sensors

Attach the mounting brackets provided with the sensor kit to the marked positions on the wall. Use the screws and anchors to secure the brackets firmly. Ensure they are level and at the correct height.

: Install the Sensors

Attach each sensor to its corresponding mounting bracket. Typically, sensors have a threaded base that screws into the bracket. Secure them firmly but don’t overtighten, as this may damage the sensor. Make sure the sensors are facing each other with a clear line of sight.

: Wiring

Connect the wires from the sensors to the garage door opener unit. Usually, there are two wires for each sensor: one for power (usually white or black) and one for ground (usually white with a stripe). Follow the color-coding in the instructions to connect the wires correctly.

Use wire nuts and electrical tape to secure the connections and protect them from moisture or other elements. Route the wires neatly along the wall and ceiling, keeping them away from moving parts of the garage door.

: Test the Sensors

Before finalizing the installation, test the sensors to ensure they are functioning correctly. Plug the garage door opener back in and operate the door. Wave your hand or an object in front of one of the sensors while the door is closing. The door should immediately reverse its direction. If it doesn’t, there may be an issue with the sensor alignment or wiring.

: Adjust Sensor Alignment

If the sensors do not trigger the door to reverse or if they are not aligned correctly, you may need to adjust their position. Make small adjustments and retest until the door reverses reliably when an object is in the sensor’s path.

: Secure the Wiring

Once the sensors are working correctly, use cable clips or staples to secure the wiring along the wall and ceiling. This helps prevent accidental damage to the wires and keeps them tidy.

: Final Check

Perform a final check to ensure everything is secure and functioning as expected. Confirm that the door reverses when an obstruction is detected by the sensors. If everything is in order, your safety sensors are successfully installed.

: Reconnect Power

Plug the garage door opener back in and restore power to the system. Test the door again to ensure it operates correctly with the sensors in place.

Congratulations! You’ve successfully installed safety sensors on your Garage Door Repair LAntana TX. Regularly inspect and maintain these sensors to ensure they continue to provide reliable safety protection for your garage and family. If you encounter any issues during installation or have doubts about the process, consult a professional garage door technician for assistance. Safety should always be a top priority when working with garage door systems.

Coppell Gates & Garage Doors

440 Shadowcrest Ln, Coppell, TX 75019, United States

1-972-449-7776

The Ins and Outs of Garage Door Track Systems – Lantana Gates & Garage Doors

As a homeowner who has always been fascinated by the mechanics of household systems, I recently found myself delving into the world of garage door track systems. While the garage door itself often takes center stage, it’s the track system that plays a behind-the-scenes role in making everything work smoothly.

By following Lantana Gates & Garage Doors, I’ll share my journey of exploring the ins and outs of garage door track systems, shedding light on their importance, components, and maintenance.

The Role of Garage Door Tracks

Before we dive into the details of garage door track systems, let’s understand their fundamental role in the operation of your garage door:

1. Guidance: Garage door tracks serve as guides, keeping the door aligned as it moves up and down. This ensures that the door opens and closes smoothly and evenly.

2. Support: Tracks provide support for the weight of the garage door. They bear the load and prevent the door from sagging or falling out of alignment.

3. Balance: Properly installed and maintained tracks help maintain the balance of the garage door, reducing wear and tear on other components like springs and cables.

4. Safety: Tracks also contribute to the safety of the garage door system. They help prevent the door from veering off its intended path, which can pose a hazard.

Components of Garage Door Track Systems

A garage door track system consists of several key components that work together to facilitate the smooth operation of the door:

1. Vertical Tracks: Vertical tracks run from the floor to the ceiling on each side of the garage door opening. They guide the door as it moves upward and downward. Vertical tracks are typically anchored to the wall and ceiling.

2. Horizontal Tracks: Horizontal tracks are installed parallel to the garage ceiling and run from the vertical tracks to the back of the garage. They help transition the door from its vertical path to the horizontal plane.

3. Rollers: Rollers are attached to the sides of the garage door and roll within the tracks as the door opens and closes. They come in various materials, including steel, nylon, and plastic, and can affect the smoothness and noise level of the door’s operation.

4. Hinges: Hinges connect the various sections or panels of the garage door. They allow the door to bend as it moves along the tracks. Hinges are essential for the flexibility of sectional garage doors.

5. Track Brackets: Track brackets are used to attach the tracks to the wall and ceiling. They provide stability and support to the entire track system.

6. Track Jams: Track jams, also known as track brackets or track hangers, are used to secure the horizontal tracks to the ceiling. They come in different styles, including adjustable and fixed brackets.

7. Bottom Fixtures: Bottom fixtures are located at the bottom of the vertical tracks and connect to the garage door cables. They help anchor the door and ensure smooth movement.

8. Cable Drums: Cable drums are attached to the torsion spring shaft and are responsible for winding and unwinding the cables. They play a crucial role in lifting and lowering the garage door.

Common Types of Garage Door Tracks

There are two common types of garage door tracks: Standard Lift and High Lift. The type of track you need depends on the design of your garage and the space available above the door.

1. Standard Lift: Standard lift tracks are the most common type and are suitable for most residential garages. They are designed to fit within the garage’s height, with the horizontal tracks parallel to the ceiling.

2. High Lift: High lift tracks are used when there is additional space above the garage door. They allow the door to travel higher into the garage before leveling off horizontally. High lift tracks are often used in garages with tall ceilings or when homeowners want to maximize the space in their garage.

Garage Door Track Maintenance

Maintaining your garage door tracks is essential to ensure smooth and safe operation. Here are some maintenance tips to keep in mind:

1. Regular Inspection: Periodically inspect the tracks for signs of wear, damage, or misalignment. Look for dents, bends, or loose hardware.

2. Cleanliness: Keep the tracks clean and free of debris, dust, and cobwebs. Dirty tracks can impede the smooth movement of the rollers.

3. Lubrication: Apply a silicone-based lubricant to the rollers, hinges, and tracks. Lubrication helps reduce friction and noise.

4. Tighten Hardware: Check and tighten any loose bolts, nuts, or screws in the track system. Loose hardware can lead to misalignment.

5. Clear Obstructions: Ensure that there are no obstructions in the tracks that could prevent the rollers from moving freely. Remove any foreign objects or debris.

6. Track Alignment: Check the alignment of the tracks to ensure they are parallel and level. Misaligned tracks can cause the door to bind or come off track.

7. Professional Inspection: Consider scheduling a professional inspection of your garage door and track system annually or as needed. A trained technician can identify and address potential issues.

Troubleshooting Garage Door Track Problems

Despite regular maintenance, garage door track problems can occasionally occur. Here are some common issues and their solutions:

1. Misalignment: If you notice that the door is not moving smoothly or is off track, carefully attempt to realign the tracks using a rubber mallet. If you’re unsure or the problem persists, consult a professional.

2. Dents or Bends: Small dents or bends in the tracks can sometimes be repaired by carefully tapping them out with a block of wood and a hammer. However, severe damage may require track replacement.

3. Loose Hardware: If you hear rattling or notice loose bolts or nuts, tighten them using the appropriate tools. Be cautious not to over-tighten, as this can cause damage.

4. Lubrication: If the door starts making squeaking or grinding noises, it may be time to reapply lubricant to the rollers, hinges, and tracks.

5. Track Cleaning: If debris or dirt accumulates in the tracks, use a soft brush or a vacuum to remove it. Avoid using abrasive materials that could scratch the tracks.

6. Professional Help: For more complex issues, such as significant track damage or a door that continually comes off track, it’s best to consult a professional garage door technician.

Upgrading Your Garage Door Tracks

If you’re considering upgrading your garage door or renovating your garage, you may also want to explore the possibility of upgrading your garage door tracks. High lift or vertical lift track systems, for example, can provide more space in your garage and accommodate larger vehicles or storage needs.

Before making any upgrades, consult with a garage door specialist to ensure that the new track system is compatible with your garage door and that it meets local building codes and safety standards.

Conclusion: The Unsung Heroes of Garage Doors

Overall, based from Lantana Gates & Garage Doors, while garage door tracks may not be the most visible part of your garage door system, they play a crucial role in its operation and longevity. Understanding the components and maintenance needs of your garage door tracks can help you ensure that your garage door operates smoothly and safely. Whether you’re troubleshooting minor issues, performing routine maintenance, or considering an upgrade, a well-maintained track system ensures that your garage door continues to function as it should, quietly and reliably, day after day.

Lantana Gates & Garage Doors

1180 Central Way, Lantana, TX 76226, United States

940-400-3038

How To Open Garage Door With MYQ App – Lantana Gates & Garage Doors

The MyQ app is a convenient and secure way to control your Garage Door Repair Lantana TX from your smartphone. Whether you’re coming home and need to open the garage door remotely or just want to check if it’s closed, the MyQ app has you covered.

In this comprehensive guide, we’ll walk you through the step-by-step process of opening your garage door using the MyQ app. By the end of this guide, you’ll be able to effortlessly manage your garage door with the tap of a button.

  1. What You’ll Need:
    • A compatible garage door opener.
    • A Wi-Fi connection at home.
    • The MyQ app installed on your smartphone.
    • A MyQ account, which you can create within the app.
  2. Connecting Your Garage Door Opener:
    • Launch the MyQ app on your smartphone.
    • Log in to your MyQ account or create a new one.
    • Follow the app’s on-screen instructions to add a new device.
    • Choose your garage door opener model from the list of compatible devices.
    • Enter the necessary information, such as the device’s serial number and Wi-Fi details.
  3. Testing the Connection:
    • Once your garage door opener is successfully connected, test the connection by tapping the “Open” button in the app.
    • Your garage door should start to open. If it doesn’t, follow the troubleshooting steps provided in the app.
  4. Additional Features:
    • Explore other features of the MyQ app, such as scheduling your garage door to open or close at specific times.
    • Set up notifications to receive alerts when your garage door is opened or closed.
    • Share access with family members or trusted individuals by inviting them to your MyQ account.
    • Integrate MyQ with other smart home devices, like smart lights or thermostats, to create automated routines.
  5. Security and Privacy:
    • MyQ takes security seriously, employing encryption and secure authentication methods to protect your data.
    • Be cautious when sharing access with others and only invite trusted individuals to your MyQ account.
  6. Troubleshooting:
    • If you encounter issues with your MyQ app or garage door opener, consult the MyQ app’s help section or contact customer support for assistance.

Conclusion:

With the MyQ app, you can enjoy the convenience and peace of mind that comes with being able to open and close your Garage Door Repair Lantana TX remotely. By following the steps outlined in this guide, you’ll have your garage door connected to the MyQ app in no time. Say goodbye to the hassle of physical remotes and hello to the future of garage door control!

Lantana Gates & Garage Doors

1180 Central Way, Lantana, TX 76226, United States

1-940-400-3038

How To Repair Sagging Garage Door Lintel – Lantana Gates & Garage Doors

Repairing a sagging Garage Door Repair Lantana TX lintel is essential for maintaining the structural integrity of your garage door and preventing further damage. The lintel is the horizontal beam that supports the weight of the brickwork or masonry above the garage door. If it’s sagging, it can cause the door to operate improperly and lead to more serious issues over time.

Here’s a detailed guide on how to repair a sagging garage door lintel:

Step 1: Safety Precautions
Before you start, ensure your safety by wearing appropriate personal protective equipment, such as gloves and safety glasses. Additionally, work with a partner if the repair requires heavy lifting.

Step 2: Assess the Damage
Inspect the lintel carefully to determine the extent of the sagging. Look for visible cracks, signs of bowing, or separation between the lintel and the surrounding masonry. Understanding the damage will help you plan the repair process.

Step 3: Support the Garage Door
Use a ladder to access the lintel area. To prevent the garage door from shifting or moving unexpectedly, secure it in place using c-clamps or locking pliers on the tracks.

Step 4: Relieve Pressure
If the sagging lintel has caused the bricks or masonry above it to shift or crack, gently remove any loose or unstable pieces to relieve pressure on the lintel. Use a chisel or masonry hammer to carefully remove these materials.

Step 5: Reinforce with Temporary Supports
To prevent further sagging and distribute the weight, use temporary supports to lift the sagging lintel. Place adjustable temporary supports, such as strong metal or wooden beams, underneath the lintel at both ends. Adjust the supports until they provide even lifting pressure.

Step 6: Remove and Replace Damaged Lintel
If the lintel is severely damaged or cracked, it might need to be replaced. Consult a professional if you’re unsure about this step, as it requires specialized knowledge and equipment. If you’re confident in your abilities, follow these steps:

  1. Carefully remove any bricks or masonry above the lintel that might obstruct its removal.
  2. Using appropriate tools, such as a masonry chisel or saw, carefully remove the damaged lintel.
  3. Clean the area around the lintel to ensure a proper fit for the new lintel.
  4. Install the new lintel, making sure it’s level and properly aligned with the garage door opening.
  5. Use masonry adhesive or mortar to secure the lintel in place. Follow manufacturer instructions for proper curing time.

Step 7: Replace Bricks or Masonry
If you removed bricks or masonry to access the lintel, replace them using fresh mortar. Make sure the replacement materials are level and properly aligned.

Step 8: Remove Temporary Supports
Once the new lintel is in place and the masonry is secure, carefully remove the temporary supports. Ensure that the lintel is adequately supporting the weight of the masonry.

Step 9: Check Alignment
Use a level to verify that the lintel is level and properly aligned with the garage door opening. Adjust as needed.

Step 10: Caulk and Finish
Seal any gaps between the lintel, masonry, and garage door frame using exterior-grade caulk. This helps prevent moisture infiltration and further damage.

Step 11: Test the Garage Door
Carefully remove any clamps or locking pliers from the garage door tracks and test the door’s operation. Ensure that the door opens and closes smoothly and without any obstructions.

Step 12: Monitor for Further Issues
Regularly inspect the repaired lintel for any signs of cracking, bowing, or sagging. Address any issues promptly to prevent more serious damage.

Repairing a sagging Garage Door Repair Lantana TX lintel requires careful attention to detail and the use of proper techniques and materials. If you’re uncertain about any aspect of this repair, it’s recommended to seek the assistance of a professional contractor or masonry expert who has experience with structural repairs.

Lantana Gates & Garage Doors

1180 Central Way, Lantana, TX 76226, United States

1-940-400-3038

Garage Door Budgeting: How to Estimate Costs for Repairs and Upgrades – Lantana Gates & Garage Doors

As a homeowner who takes pride in maintaining and improving my property, I’ve learned that the garage door is a crucial element that requires attention. Whether it’s addressing repairs to keep it running smoothly or considering upgrades to enhance its functionality, having a clear grasp of the associated costs is essential for effective budgeting.

In reference to Lantana Gates & Garage Doors, I’m excited to share my insights on how I estimate costs for both garage door repairs and upgrades. Armed with this knowledge, I’m better equipped to make informed financial decisions that keep my garage door in optimal condition.

Estimating Repair Costs

  1. Professional Diagnosis: My first step when estimating repair costs is to have a professional assess the issue. Their expertise helps pinpoint the problem and provides a breakdown of the necessary repairs. Depending on the components involved—such as springs, cables, rollers, or openers—the repair costs can vary.
  2. Labor Charges: Labor charges play a significant role in repair costs. Factors like the complexity of the repair, the time required for completion, and the technician’s skill level all contribute to the final labor cost.
  3. Replacement Parts: Depending on the problem, I may need to replace certain parts. It’s essential to ask for an itemized list of the replacement parts along with their costs. I prioritize quality over cheap parts, as durability is critical for long-lasting repairs.
  4. Emergency Repairs: I’m aware that emergency repairs might incur additional charges due to the urgency and time constraints. To avoid such situations, regular maintenance can help identify potential issues early on.
  5. Service Call Fee: Some repair companies charge a service call fee for simply coming to your location. I always inquire about this fee when contacting repair services to ensure there are no surprises.
  6. Bundling Repairs: If my garage door requires multiple repairs, bundling them together often results in a more cost-effective solution compared to addressing each issue separately.
  7. Warranty Check: It’s wise to check whether my garage door is still under warranty. Some repairs might be covered, reducing the out-of-pocket expenses. I always review the warranty terms before proceeding with any repairs.

Estimating Upgrade Costs

  1. Thorough Research: I begin by researching various garage door upgrades and identifying the ones that align with my needs and preferences. Security enhancements, energy efficiency improvements, and curb appeal upgrades are usually high on my list.
  2. New Garage Door: If I’m considering a major upgrade, like replacing the entire garage door, I take into account factors such as material, design, insulation, and any added features like windows. These influence the overall cost.
  3. Insulation Upgrade: Improving the insulation of my garage door can lead to better energy efficiency and temperature control. The cost varies based on the insulation type and the size of my garage door.
  4. Opener Enhancement: When upgrading my garage door opener, I consider opting for a modern model with advanced features like Wi-Fi connectivity, battery backup, and smart controls. These enhancements come at varying costs.
  5. Security Features: I prioritize security by adding features like keypad entry, rolling code technology, and motion sensors. The costs differ depending on the complexity of the features.
  6. Aesthetic Touches: To enhance curb appeal, I invest in aesthetic upgrades like decorative hardware, paint, or windows. These upgrades require budgeting for materials and, if necessary, professional painting services.
  7. Professional Installation: Some upgrades, such as insulation or new garage doors, require professional installation. I ensure I account for installation fees on top of the upgrade’s cost.
  8. Long-Term Savings: While upgrades may involve upfront costs, I always factor in the potential long-term savings. Energy-efficient upgrades, for instance, can lead to significant reductions in utility bills over time.

In summary, based from Lantana Gates & Garage Doors, estimating garage door repair and upgrade costs is a process that requires careful consideration and research. By involving professionals for accurate assessments, understanding the various factors that contribute to the costs, and exploring different options, I can confidently estimate the expenses linked to repairs and upgrades. I remember to factor in labor charges, replacement parts, service call fees, and any available warranties for repairs. When it comes to upgrades, I prioritize features that cater to my needs and consider the long-term advantages they provide. Armed with a comprehensive understanding of costs, I’m well-equipped to plan and budget for garage door upkeep and enhancements that ultimately contribute to the value and functionality of my home.

Lantana Gates & Garage Doors

1180 Central Way, Lantana, TX 76226, United States

940-400-3038

How to Adjust Liftmaster p3 Garage Door Opener-Lantana Garage & Overhead Doors

The LiftMaster P3 Garage Door Repair Lantana TX opener is a reliable and efficient device designed to make your daily life more convenient. However, over time, adjustments may be required to ensure optimal performance.

In this guide, we will provide you with a detailed step-by-step process to adjust your LiftMaster P3 garage door opener. By following these instructions carefully, you will be able to fine-tune the settings and address common issues such as door misalignment, speed, and force.

Before You Begin:

  1. Ensure you have read and understood the manufacturer’s manual for your LiftMaster P3 garage door opener. It contains important safety information and specific instructions for your model.
  2. Familiarize yourself with the various adjustment options available on your garage door opener, such as travel limits, force settings, and speed controls. These may vary slightly depending on the model and year of manufacture.

Step 1: Identify the Adjustment Controls The LiftMaster P3 garage door opener typically has adjustment controls located on the main unit or the wall-mounted control panel. Familiarize yourself with the location and functionality of these controls.

Step 2: Adjusting the Travel Limits The travel limits determine how far your garage door opens and closes. To adjust the travel limits, follow these steps:

  1. Locate the limit adjustment screws on the main unit or control panel. They are usually labeled “up” and “down” or “open” and “close.”
  2. Using a screwdriver, turn the appropriate limit adjustment screw in small increments. If your door doesn’t close completely, turn the “down” or “close” screw clockwise. If your door doesn’t open fully, turn the “up” or “open” screw clockwise.
  3. Test the door’s operation after each adjustment. Continue making small adjustments until the door opens and closes smoothly and reaches the desired position.

Step 3: Adjusting the Force Settings The force settings control the amount of power exerted by the garage door opener when opening or closing the door. To adjust the force settings, follow these steps:

  1. Locate the force adjustment controls on the main unit or control panel. They are typically labeled “up force” and “down force” or “open force” and “close force.”
  2. Using a screwdriver, turn the appropriate force adjustment screw in small increments. If your door doesn’t close smoothly, increase the down or close force. If your door doesn’t open smoothly, increase the up or open force.
  3. Test the door’s operation after each adjustment. Make sure the door opens and closes without excessive force or resistance. Continue making small adjustments until the door operates smoothly.

Step 4: Adjusting the Speed Controls The speed controls regulate how fast your garage door opens and closes. To adjust the speed controls, follow these steps:

  1. Locate the speed adjustment controls on the main unit or control panel. They are usually labeled “open speed” and “close speed.”
  2. Using a screwdriver, turn the appropriate speed adjustment screw to increase or decrease the speed. Clockwise rotation typically increases the speed, while counterclockwise rotation decreases it.
  3. Test the door’s operation after each adjustment. Make sure the door moves at a comfortable speed without excessive noise or vibrations. Continue making small adjustments until the desired speed is achieved.

Conclusion: By following the steps outlined in this guide, you can successfully adjust your LiftMaster P3 garage door opener to ensure optimal performance. Remember to always consult the manufacturer’s manual for specific instructions related to your model. Regular maintenance and periodic adjustments will help keep your Garage Door Repair Lantana TX opener operating smoothly and extend its lifespan. Enjoy the convenience and reliability of your properly adjusted LiftMaster P3 garage door opener!

Lantana Garage & Overhead Doors

3501 FM 407 #15, Lantana, TX 76226

940-400-3038

Powered by WordPress & Theme by Anders Norén