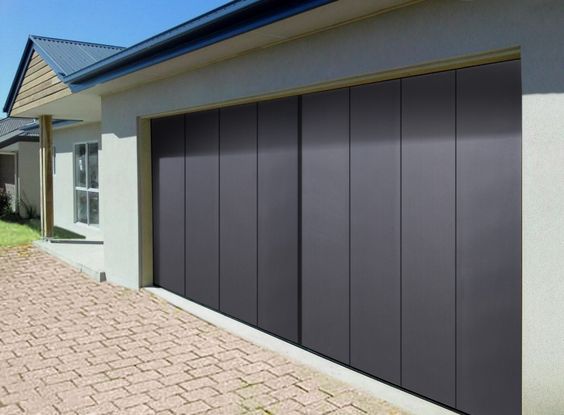
As a conscientious homeowner who recently faced the predicament of a damaged garage door, I embarked on a journey to explore the feasibility and intricacies of replacing just one panel.

By following Garage Door Repair, I share my insights, experiences, and a step-by-step guide for those grappling with the question: Can I replace just one panel of my damaged garage door?
Chapter 1: Assessing the Damage
The first step in considering a single-panel replacement is a thorough assessment of the damage. Whether it’s a dent, a scratch, or more severe damage, evaluating the extent and location of the impairment is crucial. If the damage is limited to a single panel and doesn’t compromise the overall structural integrity of the door, the prospect of a targeted replacement becomes a viable option.
Chapter 2: Identifying the Garage Door Model
Successfully replacing a single panel hinges on identifying the specific make and model of the garage door. Manufacturers often produce doors with unique panel designs and dimensions. I delved into the garage door’s documentation, which typically includes information on the model and specifications. In instances where the documentation is unavailable, I sought identifying marks or labels on the door itself.
Chapter 3: Contacting the Manufacturer or Supplier
Armed with the knowledge of the garage door model, I reached out to the manufacturer or the supplier from whom the door was purchased. Manufacturers usually produce replacement panels for their doors, ensuring a seamless match in terms of design and specifications. I provided them with details about the damaged panel, and they guided me through the process of ordering a compatible replacement.
Chapter 4: Exploring Aftermarket Panels
In cases where contacting the original manufacturer is challenging or cost-prohibitive, exploring aftermarket panels becomes an alternative. Numerous companies specialize in producing replacement panels that cater to a wide range of garage door models. I researched reputable aftermarket suppliers, ensuring that the replacement panels they offered were compatible with my specific garage door model.
Chapter 5: Measuring and Documenting
Precision is paramount when replacing a single panel, and accurate measurements are the linchpin of success. I meticulously measured the dimensions of the damaged panel, paying attention to its width, height, and thickness. These measurements served as the basis for selecting or customizing a replacement panel that would seamlessly integrate with the existing door.
Chapter 6: Considering Aesthetic Harmony
Beyond technical compatibility, maintaining aesthetic harmony is a crucial consideration. Garage doors often feature distinctive panel designs and patterns. I scrutinized the replacement options, ensuring that the chosen panel not only matched the dimensions but also preserved the overall aesthetic appeal of the door. This attention to detail was instrumental in achieving a cohesive and visually pleasing result.
Chapter 7: Removing the Damaged Panel
Before undertaking the replacement process, I disengaged the garage door opener and carefully removed the damaged panel. This step involved loosening the fasteners securing the panel to the frame and cautiously detaching it. If the door is composed of multiple sections, I ensured that adjacent panels were adequately supported to prevent any unintended movement or damage.
Chapter 8: Installing the Replacement Panel
With the damaged panel removed, I proceeded to install the replacement panel. Aligning the new panel with the existing ones, I secured it in place using the appropriate fasteners. Ensuring a snug fit and uniform alignment was crucial to maintaining the structural integrity and aesthetic cohesion of the garage door.
Chapter 9: Finishing Touches and Paint Matching
To achieve a seamless integration, I paid attention to finishing touches. This involved checking for any gaps or misalignments and making necessary adjustments. If the replacement panel required painting, I meticulously matched the color to the existing panels, ensuring a cohesive and polished appearance. Proper paint matching played a pivotal role in disguising the replacement and preserving the uniformity of the door.
Chapter 10: Testing the Door Operation
Before declaring the replacement a success, I conducted thorough tests to ensure the door operated smoothly and without any issues. I engaged the garage door opener and manually operated the door, observing its movement and functionality. Any unusual sounds, misalignments, or resistance prompted further adjustments until the door operated seamlessly.
Chapter 11: Seeking Professional Assistance
While the process of replacing a single panel is achievable through careful planning and execution, there are instances where professional assistance may be prudent. Structural damage, intricate designs, or specific garage door mechanisms may require the expertise of a qualified technician. Seeking professional guidance ensures a comprehensive assessment and appropriate solutions tailored to the unique characteristics of the door.
Conclusion: Breathing New Life into an Old Door
In conclusion, based from Garage Door Repair, replacing just one panel of a damaged garage door is a viable solution under certain conditions. A systematic approach, including assessing the damage, identifying the model, contacting the manufacturer or exploring aftermarket options, measuring accurately, considering aesthetic harmony, and executing a meticulous installation process, can breathe new life into an otherwise compromised door. My experience in replacing a single panel not only salvaged the functionality of the garage door but also highlighted the importance of precision, compatibility, and attention to detail in achieving a successful outcome. As I look at my rejuvenated garage door, I’m confident that this targeted replacement has prolonged the life of the door and maintained the overall appeal of my home.
Dedham Garage & Overhead Doors
3 Allied Dr #303, Dedham, MA 02026, United States
781-650-7642
