
After successfully repairing the cracked window in my living room, I was filled with a sense of satisfaction and pride. The once-disturbing fissure had disappeared, and my window was looking as good as new. However, I soon realized that the journey wasn’t over. To ensure the longevity of my repaired window and maintain its pristine appearance, I needed to learn how to clean and care for it properly.
In reference to North Richland Hills Window Cleaning, I will share my personal insights on how to maintain and clean repaired windows.
The Importance of Maintenance
Maintenance is the key to preserving the quality and longevity of any home improvement project, including window repairs. Neglecting regular maintenance can lead to a host of problems, such as the deterioration of repairs, the buildup of dirt and grime, and the reoccurrence of issues. Here are some reasons why maintaining your repaired windows is essential:
- Protecting Your Investment: Window repairs, whether DIY or professionally done, represent an investment in your home’s value and aesthetics. Regular maintenance ensures that your investment continues to pay off.
- Preventing Further Damage: Small issues that arise over time, such as chipped paint or loose seals, can lead to more extensive damage if left unattended. Maintenance helps identify and address these issues promptly.
- Energy Efficiency: Well-maintained windows are more energy-efficient. Proper seals and clean glass contribute to better insulation, reducing heating and cooling costs.
- Aesthetic Appeal: Clean and well-maintained windows enhance the overall appearance of your home, both from the inside and outside.
- Indoor Air Quality: Regular cleaning removes dust, allergens, and pollutants from window surfaces, contributing to better indoor air quality.
Cleaning Your Repaired Windows
Cleaning your repaired windows is a straightforward yet essential part of maintenance. Here’s how to do it effectively:
Step 1: Gather Your Supplies
Before you begin, gather the necessary cleaning supplies:
- Mild detergent (dish soap or a window-specific cleaner)
- A bucket
- A squeegee
- A scrubbing brush or sponge
- Lint-free cloths or paper towels
- A spray bottle filled with clean water
- Safety gear (gloves and safety goggles)
Step 2: Dusting and Preparing the Surface
Start by gently dusting the window frame and sash with a dry cloth or a duster. This step removes loose dirt and debris, preventing it from smudging the glass during cleaning. Pay attention to corners and crevices where dust tends to accumulate.
Step 3: Pre-Cleaning Inspection
Before applying any cleaning solution, inspect the window for any visible dirt, grime, or residue. If you notice any stubborn stains or spots, you may need to address them separately before proceeding with the general cleaning.
Step 4: Prepare the Cleaning Solution
In your bucket, mix a solution of warm water and a small amount of mild detergent. Alternatively, you can use a commercial window cleaner. Avoid using harsh chemicals, as they may damage the glass or the window frame.
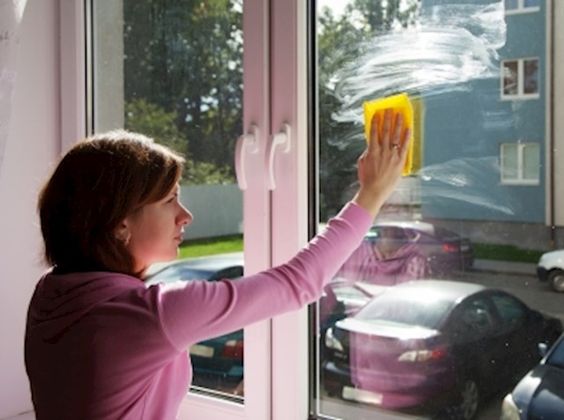
Step 5: Wet and Scrub
Dip your scrubbing brush or sponge into the cleaning solution and thoroughly wet the window. Start from the top and work your way down, scrubbing gently but firmly. Pay attention to any spots or stains and give them extra attention.
Step 6: Squeegee Technique
Using a squeegee, starting from the top, pull it down in a straight line, wiping the blade clean with a cloth or paper towel after each pass. This technique ensures a streak-free finish. Work your way across the entire window, overlapping each pass slightly to avoid leaving streaks.
Step 7: Wipe the Frame and Sill
Don’t forget to clean the window frame and sill. Use a damp cloth or sponge to wipe away any dirt or residue. Pay special attention to any corners or crevices where mold or mildew might develop.
Step 8: Rinse and Repeat (If Necessary)
Rinse the window with clean water using a spray bottle or a damp cloth. This step helps remove any remaining cleaning solution. If your window still appears streaky or soapy, repeat the squeegee and rinse process until the glass is crystal clear.
Step 9: Dry Thoroughly
Using a lint-free cloth or paper towels, dry the window completely. This step is essential to prevent water spots and streaks from forming as the window dries naturally.
Maintaining Repaired Windows
Cleaning is only one part of maintaining your repaired windows. Here are some additional steps to ensure their longevity:
1. Inspect Regularly: Make it a habit to inspect your repaired windows regularly. Look for signs of wear and tear, loose seals, or damaged frames. Early detection allows you to address issues promptly.
2. Lubricate Moving Parts: If your windows have moving parts like hinges or sliding tracks, lubricate them as needed to prevent friction and ensure smooth operation. Use a silicone-based lubricant for best results.
3. Check Seals: The seals around your windows play a crucial role in insulation. Check them for cracks or gaps and replace them if necessary. Properly sealed windows are more energy-efficient.
4. Keep the Area Dry: Prevent moisture from accumulating around your windows. Ensure that your windowsills are sloped away from the window, and repair any leaks or gaps promptly.
5. Remove Mold and Mildew: If you notice any mold or mildew reoccurring, address it promptly using the techniques mentioned earlier in this guide.
6. Protect Against Harsh Weather: During severe weather, such as storms or heavy snowfall, consider protecting your windows with storm windows or shutters. This extra layer of protection can prevent damage.
7. Professional Inspections: Periodically, it’s a good idea to have a professional inspect your repaired windows. They can identify issues that may not be immediately apparent and offer recommendations for maintenance or repairs.
Conclusion
According to North Richland Hills Window Cleaning, maintaining and cleaning repaired windows doesn’t have to be a daunting task. With the right tools, techniques, and a bit of diligence, you can ensure that your repaired windows continue to enhance your home’s beauty and functionality for years to come.
As I looked out of my spotless, repaired window, I couldn’t help but feel a sense of satisfaction and accomplishment. Knowing that I was actively contributing to the longevity of my window and the comfort of my home made the effort well worth it. Remember, proper maintenance is the key to preserving the value and beauty of your repaired windows, and it’s a responsibility that pays off in the long run.
NRH Window Cleaning & Glass Repair
7510 Davis Blvd # B, North Richland Hills, TX 76182, United States
817-601-6082