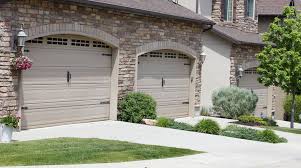
Painting a Garage Door Repair Alpharetta GA is an effective way to enhance the curb appeal of your home and protect the door from weather elements. Whether you want to refresh the existing color or completely change the look, painting a garage door is a relatively simple task that can be accomplished with the right tools and techniques.

In this guide, we will walk you through the step-by-step process of painting a garage door.
Materials and Tools Needed: Before you begin, gather the following materials and tools:
- Paint: Choose a high-quality exterior paint suitable for garage doors. Opt for a color that complements your home’s exterior.
- Primer: If your garage door has never been painted or if you’re changing to a significantly lighter color, use a primer before applying the paint.
- Paint brushes and rollers: Use a brush with synthetic bristles for the edges and corners, and a roller with a medium nap for the larger areas.
- Paint tray: A tray to hold the paint for easy access while using a roller.
- Drop cloths or plastic sheets: Protect the surrounding area from paint splatters.
- Painter’s tape: Use tape to protect windows, handles, and other areas you don’t want to paint.
- Sandpaper: For sanding the garage door and creating a smooth surface.
- Soap or detergent: Use mild soap or detergent and water to clean the garage door before painting.
Step-by-Step Guide:
Step 1: Prepare the Garage Door Start by cleaning the garage door thoroughly. Remove any dirt, grime, or loose paint using a mild detergent and water. Rinse off the soap residue and allow the door to dry completely. If there are any rough areas or peeling paint, sand them down until the surface is smooth.
Step 2: Remove Hardware and Protect Surroundings Remove any hardware such as handles or locks from the garage door. Use painter’s tape to cover windows, weatherstripping, and any other areas you don’t want to paint. Lay drop cloths or plastic sheets on the ground to protect the surrounding area from paint splatters.
Step 3: Apply Primer (if necessary) If you’re painting a bare garage door or switching to a lighter color, apply a coat of primer using a brush or roller. Allow the primer to dry according to the manufacturer’s instructions.
Step 4: Start Painting Stir the paint thoroughly before starting. Begin painting the garage door from the top, working your way down. Use a brush to paint the edges, corners, and other areas that are difficult to reach with a roller. Use smooth, even strokes, and try to maintain a consistent thickness.
Step 5: Use a Roller for Large Areas Once the edges are painted, use a roller to cover the larger areas of the garage door. Roll the paint onto the door using long, vertical strokes for a uniform finish. Be careful not to overload the roller with too much paint to avoid drips and uneven coverage.
Step 6: Apply Additional Coats (if necessary) Allow the first coat to dry completely before applying additional coats. Check the manufacturer’s instructions for the recommended drying time. Apply subsequent coats following the same technique as before, ensuring even coverage and smooth strokes.
Step 7: Clean Up and Reassemble After the final coat has dried, remove the painter’s tape and reinstall any hardware you removed earlier. Dispose of the drop cloths or plastic sheets and clean your brushes and rollers according to the paint manufacturer’s instructions.
Conclusion: Painting a Garage Door Repair Alpharetta GA can significantly improve the overall appearance of your home. By following these step-by-step instructions and using the right materials and tools, you can achieve a professional-looking finish. Remember to take your time, allow for proper drying between coats, and pay attention to detail. With a fresh coat of paint, your garage door will enhance the aesthetic appeal of your home while providing protection for years to come.
Alpharetta Garage Door Repair
5200 Avalon Blvd building 5000, Alpharetta, GA 30009
1-678-379-5834
