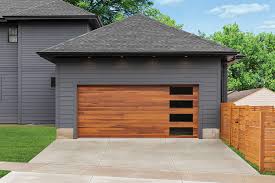
Garage Door Repair Arlington TX are an essential part of our homes, providing security and convenience. However, they rely on several components, including garage door springs, which can sometimes break or become faulty. Fixing a garage door spring may seem daunting, but with the right knowledge and tools, it can be a manageable DIY project.

In this guide, we will provide you with step-by-step instructions to repair a garage door spring safely and efficiently.
- Understand the Types of Garage Door Springs: Before attempting any repairs, it is crucial to familiarize yourself with the two main types of garage door springs: torsion springs and extension springs. Torsion springs are located above the closed door, while extension springs are mounted on either side of the door tracks. Identifying the type of spring your garage door has will help you proceed with the appropriate repair method.
- Safety Precautions: Working with garage door springs can be dangerous due to the high tension they hold. It is vital to prioritize safety by taking the following precautions:
a) Disconnect the Power: Before starting any repairs, unplug the garage door opener or turn off the power at the breaker box to prevent accidental activation.
b) Use Protective Gear: Wear safety glasses, gloves, and sturdy shoes to protect yourself from potential injuries.
c) Release Tension: If you have a torsion spring, it is critical to release the tension before proceeding with any repairs. This can be done by using winding bars to unwind the spring gradually.
- Gather the Necessary Tools: To successfully fix a garage door spring, gather the following tools:
- Winding bars
- Adjustable wrench
- Socket wrench
- C-clamps
- Vise grips
- Pliers
- Safety ladder
- Tape measure
- Replacement spring (if required)
- Assess the Damage: Examine the broken or faulty garage door spring to determine the extent of the damage. Look for signs of wear, corrosion, or gaps in the spring. If the spring is severely damaged, it may need to be replaced entirely.
- Replace the Garage Door Spring: a) Torsion Spring Replacement:
- Mark the position of the old spring and remove it from the torsion tube.
- Measure the length and diameter of the old spring to ensure you select the correct replacement.
- Install the new spring onto the torsion tube, following the manufacturer’s instructions.
- Wind the new spring using winding bars, gradually adding tension until it is properly adjusted.
b) Extension Spring Replacement:
- Open the garage door fully to relieve tension on the extension springs.
- Disconnect the old springs from the pulleys and brackets.
- Install the new springs, ensuring they are properly aligned and securely attached to the pulleys and brackets.
- Test the tension of the springs by lifting the door manually. Adjust as needed to achieve the appropriate balance.
- Lubrication and Maintenance: Once the spring is repaired or replaced, apply a high-quality lubricant to all moving parts of the garage door, including the springs, rollers, and hinges. Regular maintenance, such as lubrication and periodic inspections, will help prolong the lifespan of your garage door springs and ensure smooth operation.
Conclusion: Fixing a Garage Door Repair Arlington TX spring may appear challenging at first, but with careful preparation, safety precautions, and the right tools, it can be accomplished successfully. Remember to prioritize safety throughout the process and consult professional help if you are unsure or uncomfortable with the repair. By following this comprehensive guide, you can save time and money by repairing your garage door spring yourself and enjoy a smoothly functioning garage door once again.
South Arlington Overhead & Garage Door
3330 Matlock Rd #204, Arlington, TX 76015
817-383-2173
